EXTERNAL SECTION
3-A-6
3 DIS./ASSEMBLY
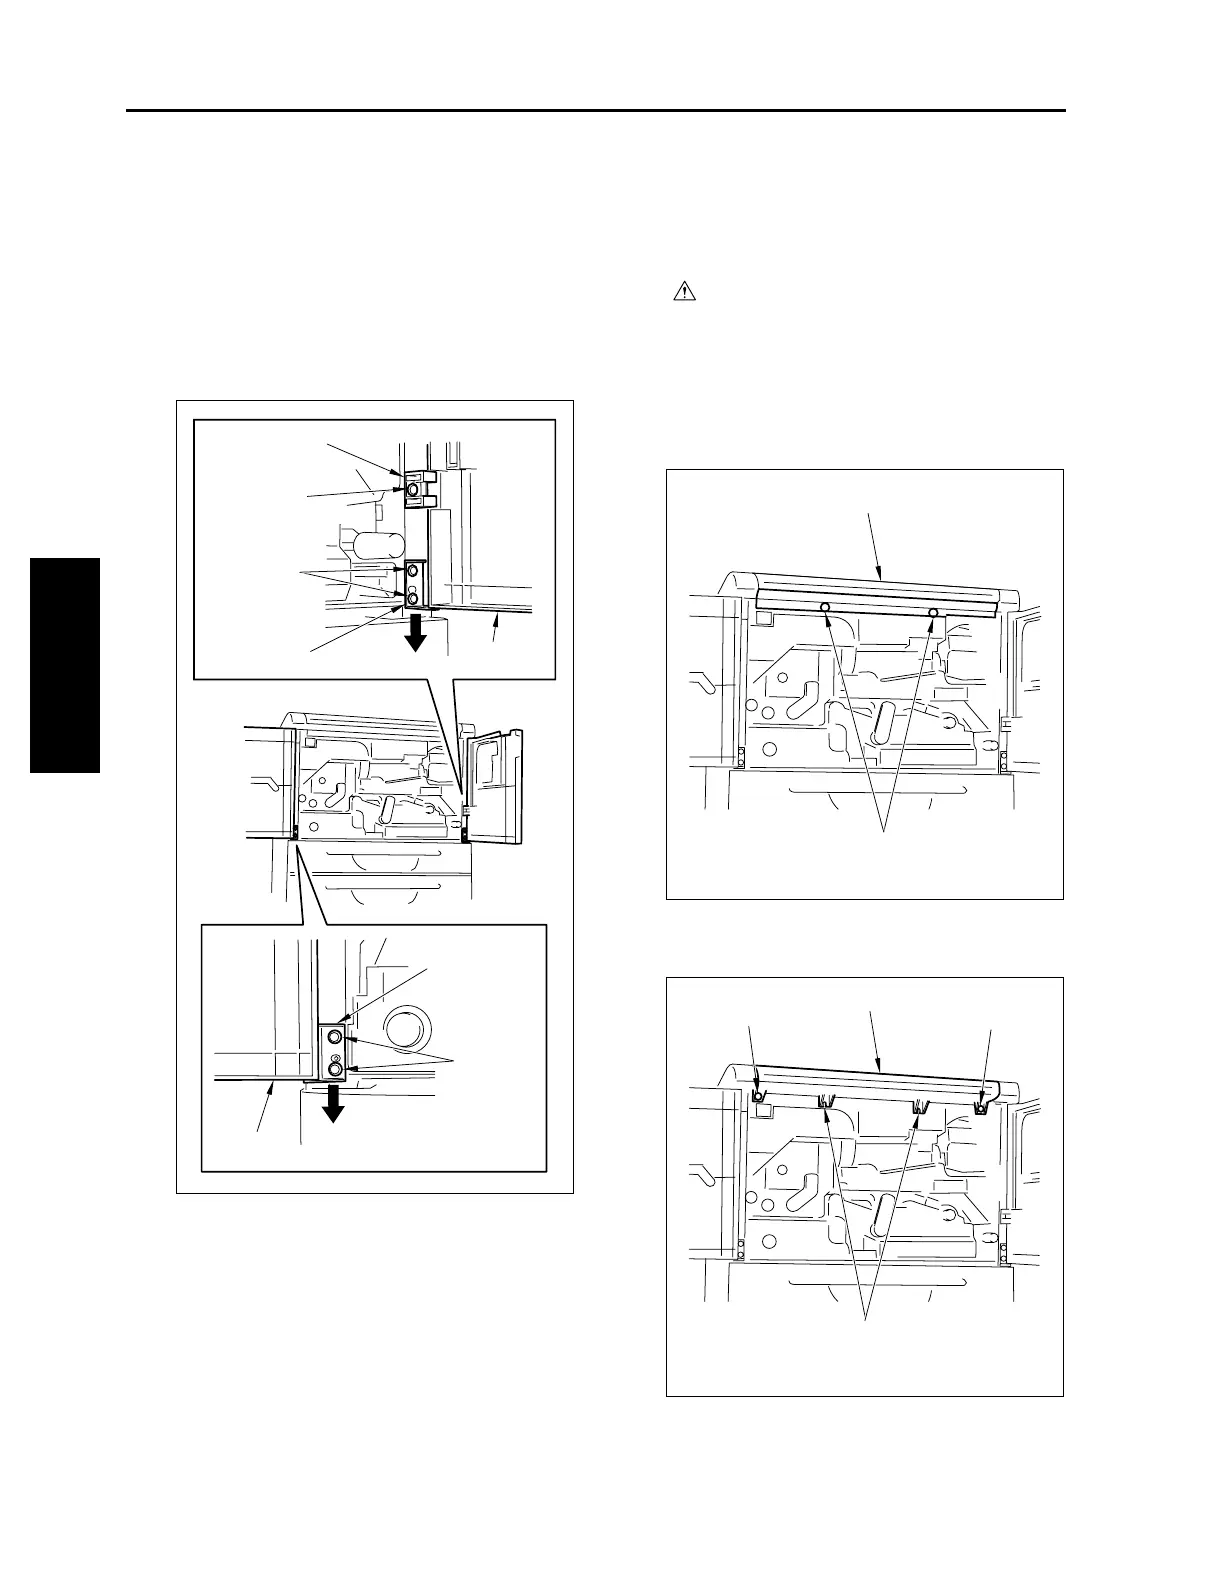
(15) Open the front right door and front left door.
(16) Remove one screw to remove the front open/
close stopper.
(17) Remove two screws to remove the front right
door open/close hinge (lower) and front right
door.
(18) Remove two screws and remove the front left
door hinge (lower) and the front left door.
(19) Reinstall the above parts following the removal
steps in reverse.
[4] Changing the Operation Panel
Attachment Angle and Removing/
Reinstalling
Caution:
Be sure the power cord has been
unplugged from the wall outlet.
a. Procedure
(1) Open the front left door and front right door.
(2) Remove two screws to remove the operation
panel cover (middle).
(3) Remove two screws to unlock the operation
panel.
Front left door
hinge (lower)
Front open/close stopper
Screw
Front right door hinge (lower)
Screws
Front right door
Screws
Front left door
Operation panel cover (middle)
Screws
Operation panel
Attachment holes when changing
the operation panel angle
Screw
Screw
3-A-4

 Loading...


