CLEANING/TONER RECYCLE UNIT
3 DIS./ASSEMBLY
3-I-1
MODEL MANUAL REVISED EDITION DATE PAGE METHOD
SERVICE HANDBOOK May 20027155/7165
CLEANING/TONER RECYCLE UNIT
[1] Removing and Reinstalling the
Cleaning Blade
Caution:
Be sure the power cord has been
unplugged from the wall outlet.
Caution1: Be sure to replace the following parts
at the same time:
• Cleaning blade
• Toner guide roller (TGR)
Caution2: Do not touch the edges of the clean-
ing blade with bare hands.
Caution3: When reinstalling the cleaning blade,
apply setting powder to the entire
surface of the drum and cleaning
blade regardless of whether the
drum and cleaning blade are new or
old.
Caution4: When you have applied setting pow-
der to the drum, perform the follow-
ing before installing the drum unit on
the main body:
1) To ensure accurate toner concentration, wipe
scattered setting powder off the
γ
sensor and
Dmax/JAM sensor on the toner control sen-
sor board with a rag moistened with alcohol.
2) With the charging corona unit and developing
unit removed, turn the drum once (to prevent
setting powder from scattering onto the
charging corona unit, and to prevent image
defects).
a. Procedure
(1) Remove the drum unit. (See "DRUM UNIT.")
(2) Remove the charging corona unit. (See
"CHARGING CORONA UNIT.")
(3) Remove the developing unit. (See "DEVELOP-
ING UNIT.")
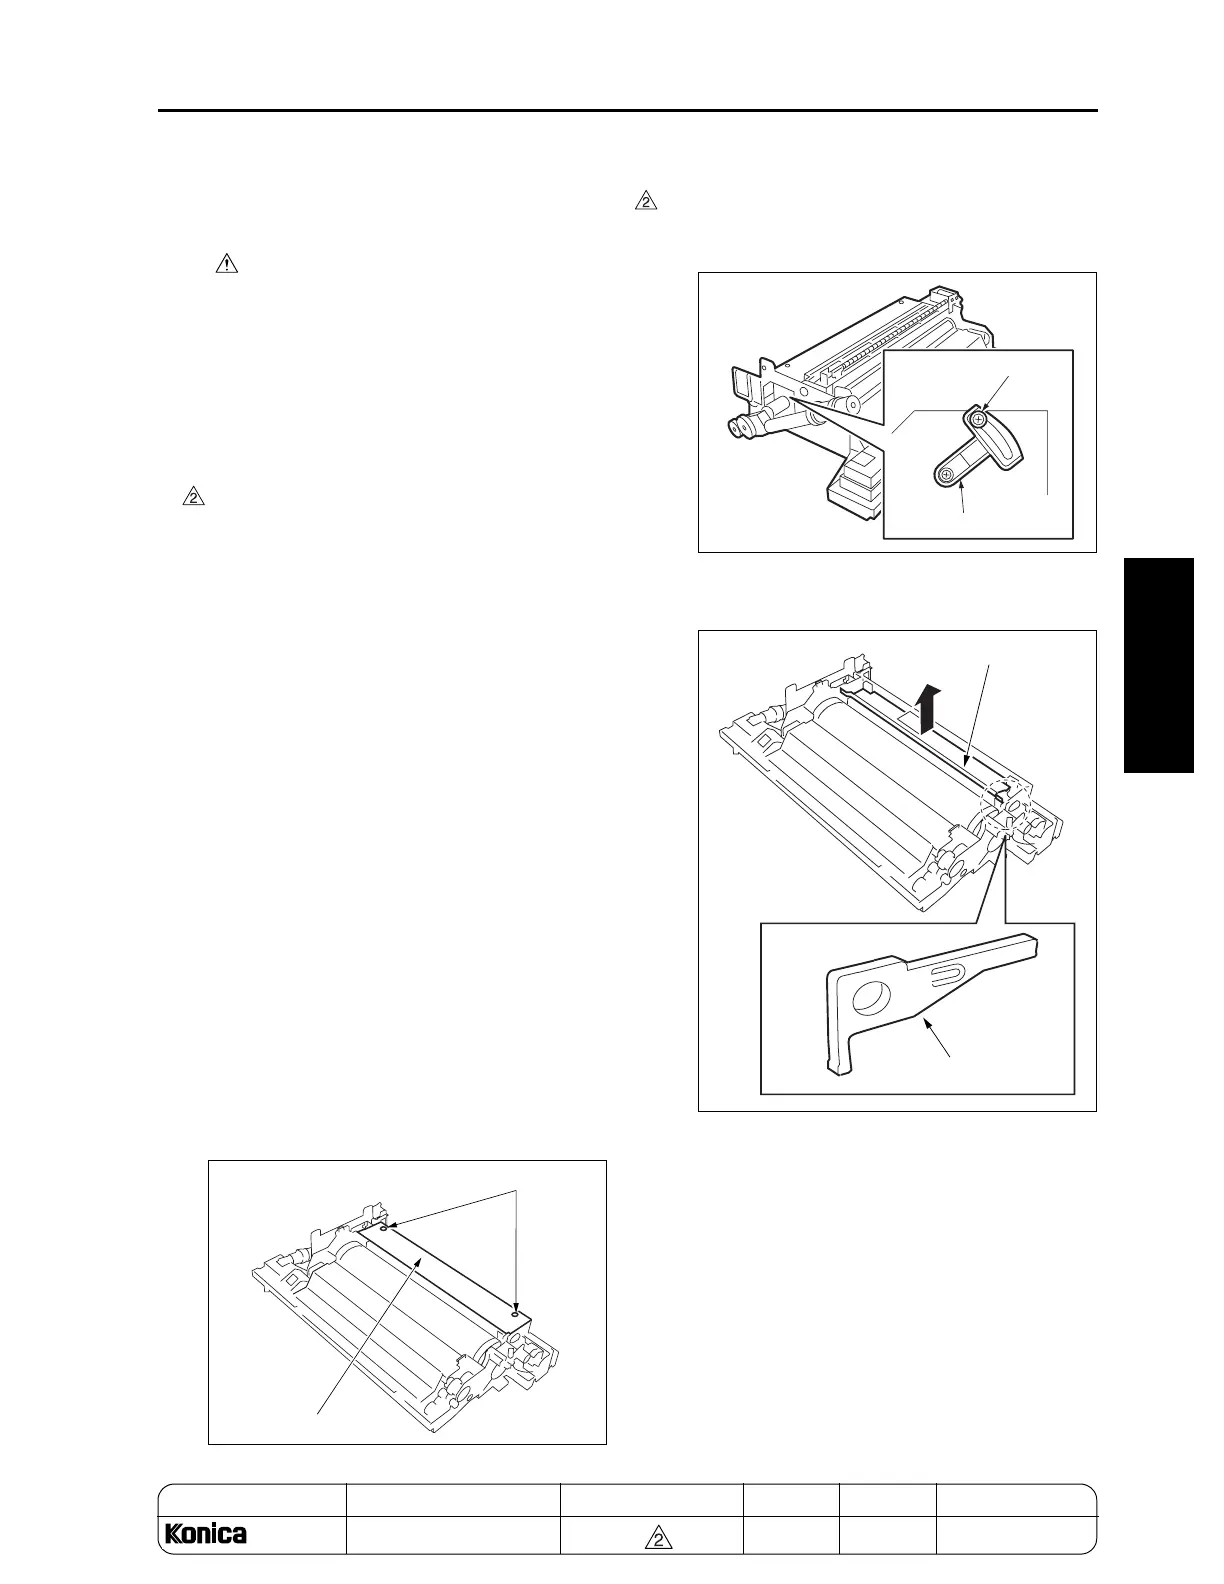
(4) Remove two screws to remove the cleaner cover.
(5) Check that the blade fixing component is
released. If it is not, release it referring to"DRUM
UNIT."
(6) Remove the blade support bearing to remove the
cleaning blade.
(7) Reinstall the above parts following the removal
steps in reverse.
Caution: After replacing the cleaning blade, be
sure to perform Blade Setting Mode
Adjustment in the 36 mode. (To pre-
vent the blade from peeling.)
Screws
Cleaner cover
Screw
Released
position
Blade fixing component
Cleaning blade
Blade support bearing
REPLACEMENT

 Loading...


