OTHER ADJUSTMENT
1 ADJUSTMENT
4
4
b. Adjustment
[37] FNS Adjusting the Paper-Path
Switching Gate (FS-111)
1. Tool
• Screwdriver (Phillips)
•Scale
2. Adjustment method
a. Preparation
Step Operation
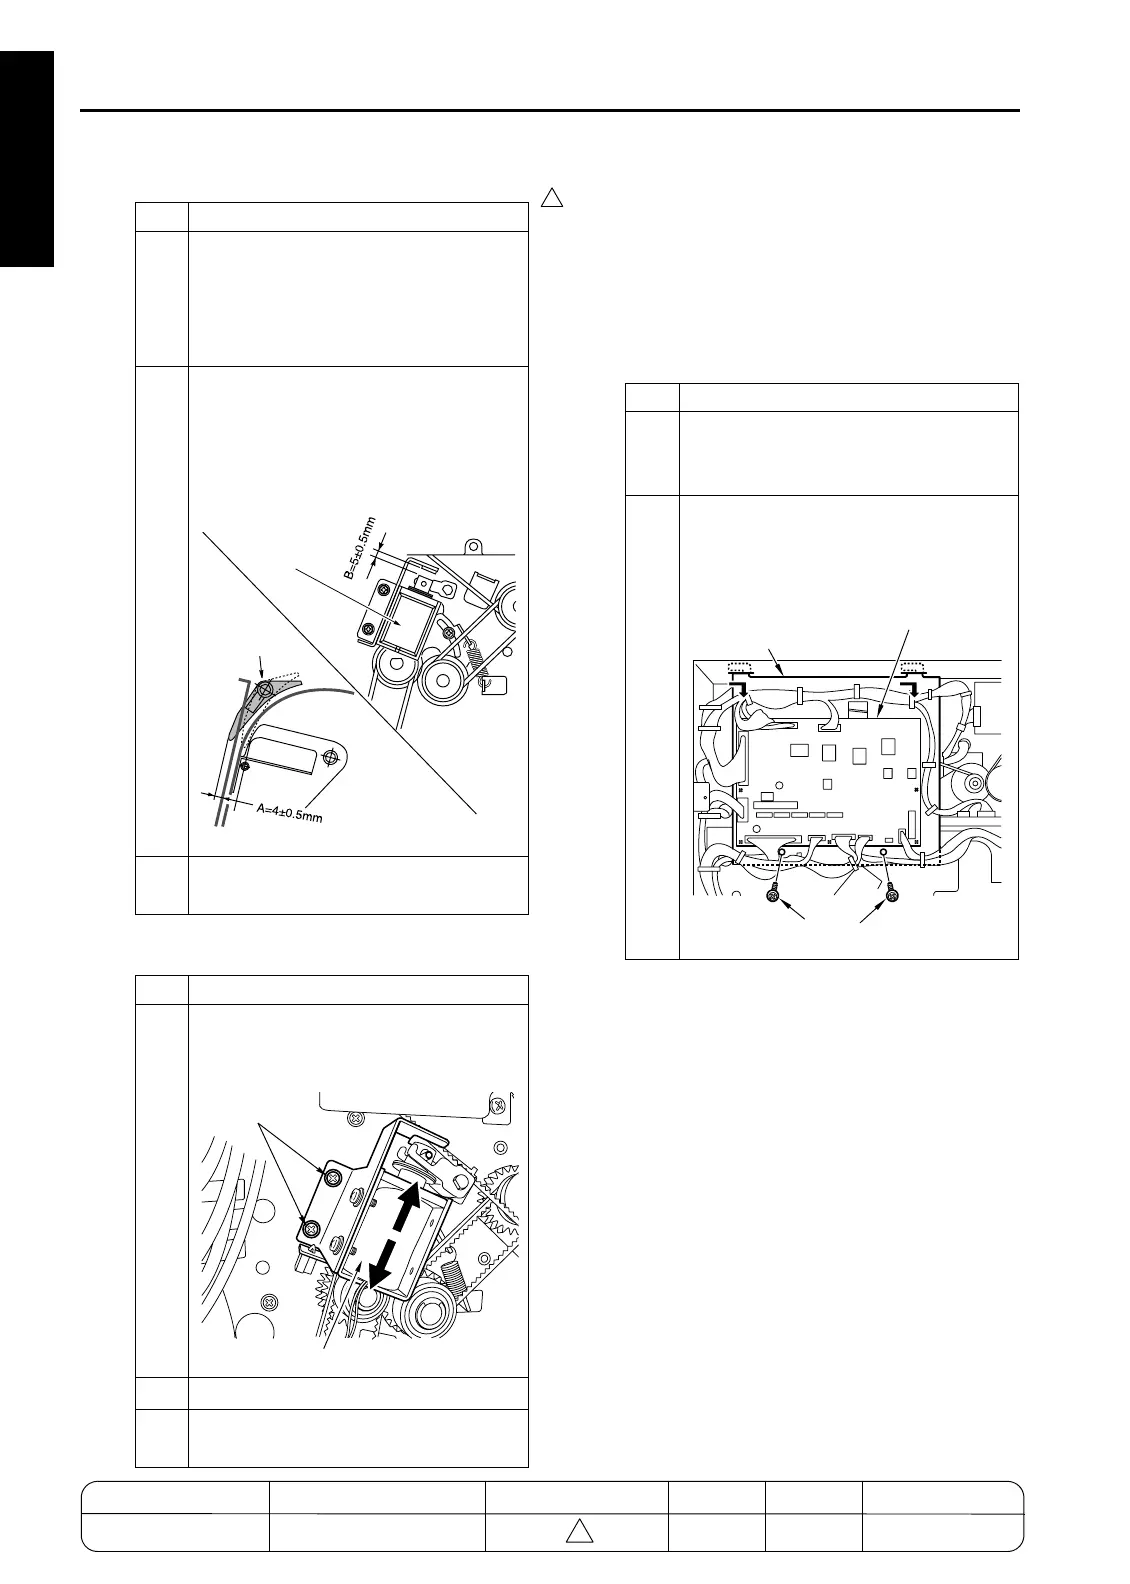
3
With SD2 (sub-tray paper exit) OFF,
measure the gap between the sub-tray
gate and the guide plate (indicated by A
in the illustration).
Spec value for gap: A = 4 ±0.5mm.
4
With SD2 ON, measure the gap between
the solenoid plunger and the bracket
stopper (indicated by B in the illustra-
tion).
Spec value for gap: B = 5 ±0.5mm.
5
If either gap is out of spec, carry out
adjustment as described below.
Step Operation
1
Loosen the 2 set screws holding the
solenoid in place, and move the solenoid
as necessary to adjust.
2
Retighten the screws.
3
Reinstall in opposite sequence to
removal.
7272fs1021
Sub-tray Gate
SD2
(Sub-tray
Paper Exit)
7272fs1022
Screws
Solenoid
Step Operation
1
Remove the following parts.
• Rear cover
• Top cover
2
Remove the 2 set screws holding the
FNS CB (FNS control board) in place.
Remove the FNS CB together with its
bracket.
7272fs1023
Screws
Bracket
FNS CB (Finisher Control Board)
MODEL MANUAL REVISED EDITION DATE PAGE METHOD
SERVICE MANUAL Dec. 2003
7155/7165/7255/7272
1-140 ADDITION

 Loading...


