CORONA UNIT
3-F-9
3 DIS./ASSEMBLY
[11] Removing and Reinstalling the TSL
Unit
Caution:
Be sure the power cord has been
unplugged from the wall outlet.
a. Procedure
(1) Draw the ADU frame from the main body. (See
"ADU UNIT.")
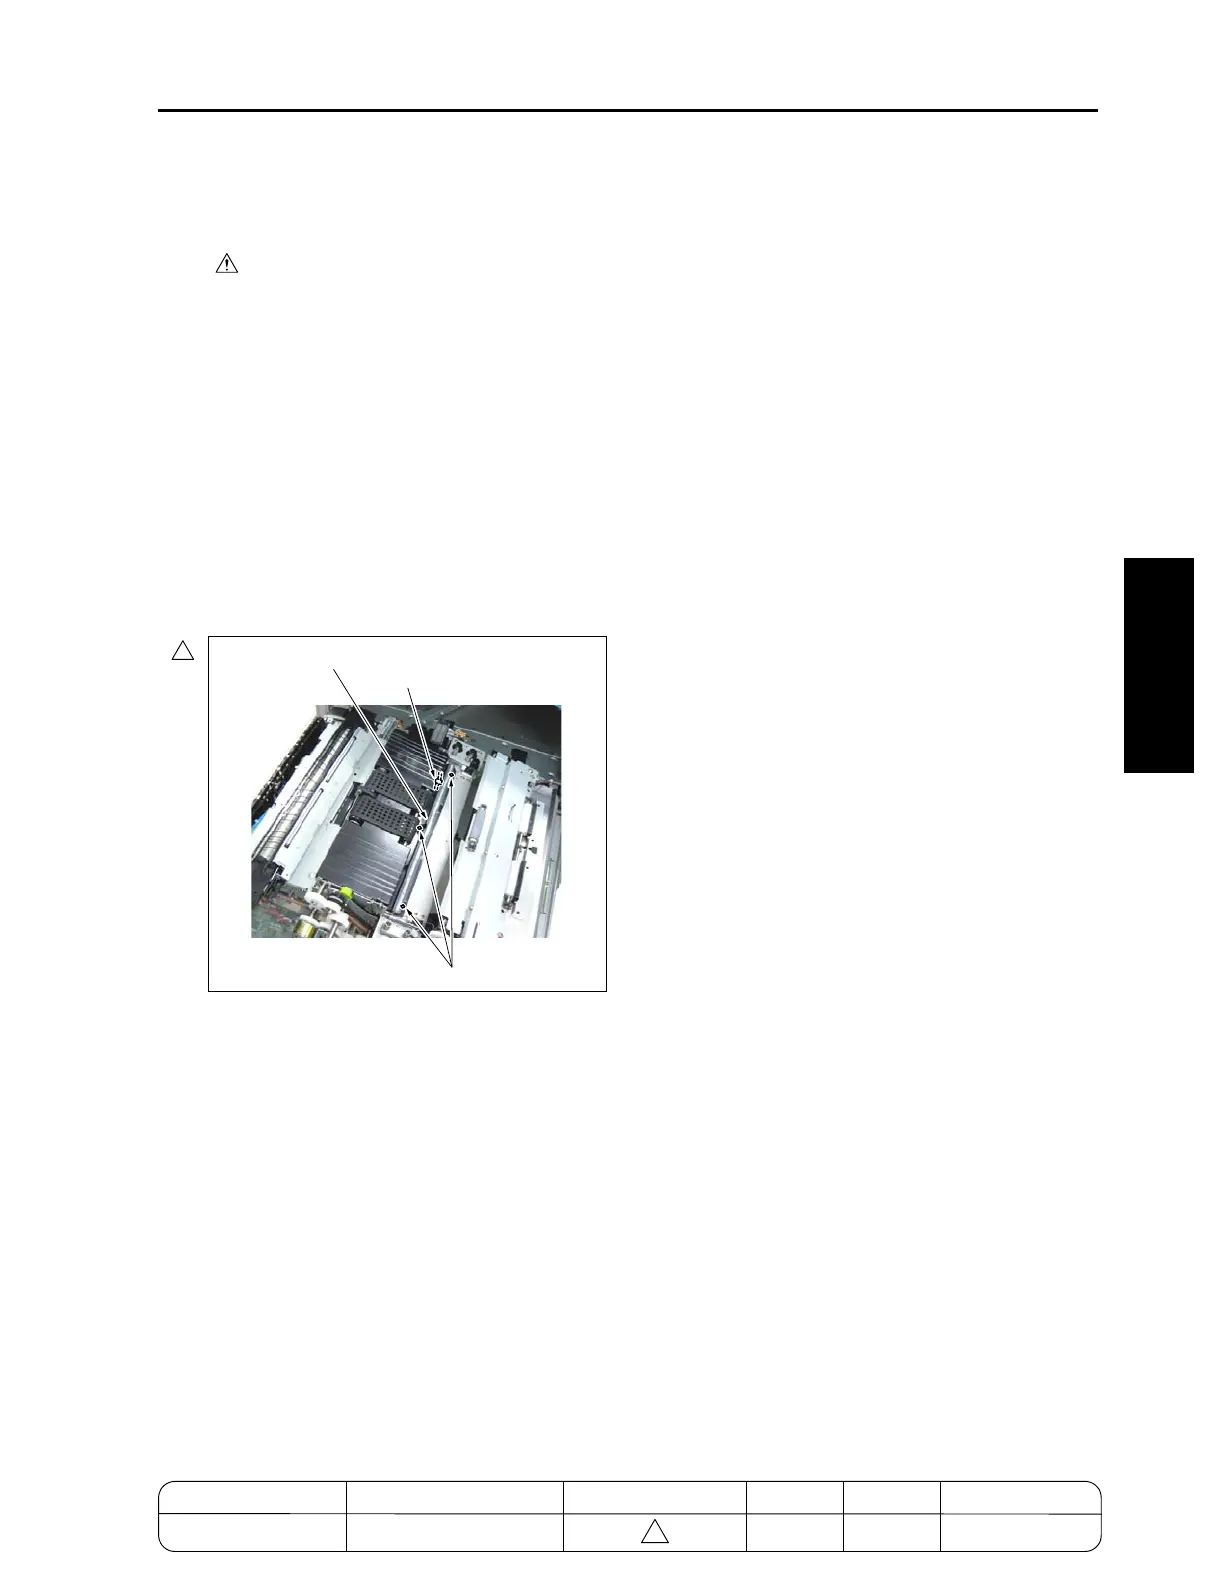
(2) Remove the transfer/separation corona unit.
(3) Remove the relay connector (CN463).
Caution: A relay connector consists of two male
sides and one female side. Be sure to
remove only the male side (shown
below) of the CN463 connector.
(4) Remove the three screws and remove the TSL
unit.
(5) Reinstall the above parts following the removal
steps in reverse.
4
7272ma3034
TSL unit
Relay connector
(CN463)
Screws
3-F-7
MODEL MANUAL REVISED EDITION DATE PAGE METHOD
SERVICE MANUAL Dec. 2003
7155/7165/7255/7272
3-F-7 REPLACEMENT
4

 Loading...


