OTHER ADJUSTMENT
1 ADJUSTMENT
MODEL MANUAL REVISED EDITION DATE PAGE METHOD
SERVICE HANDBOOK Apr. 20037155/7165
4
b. Adjustment
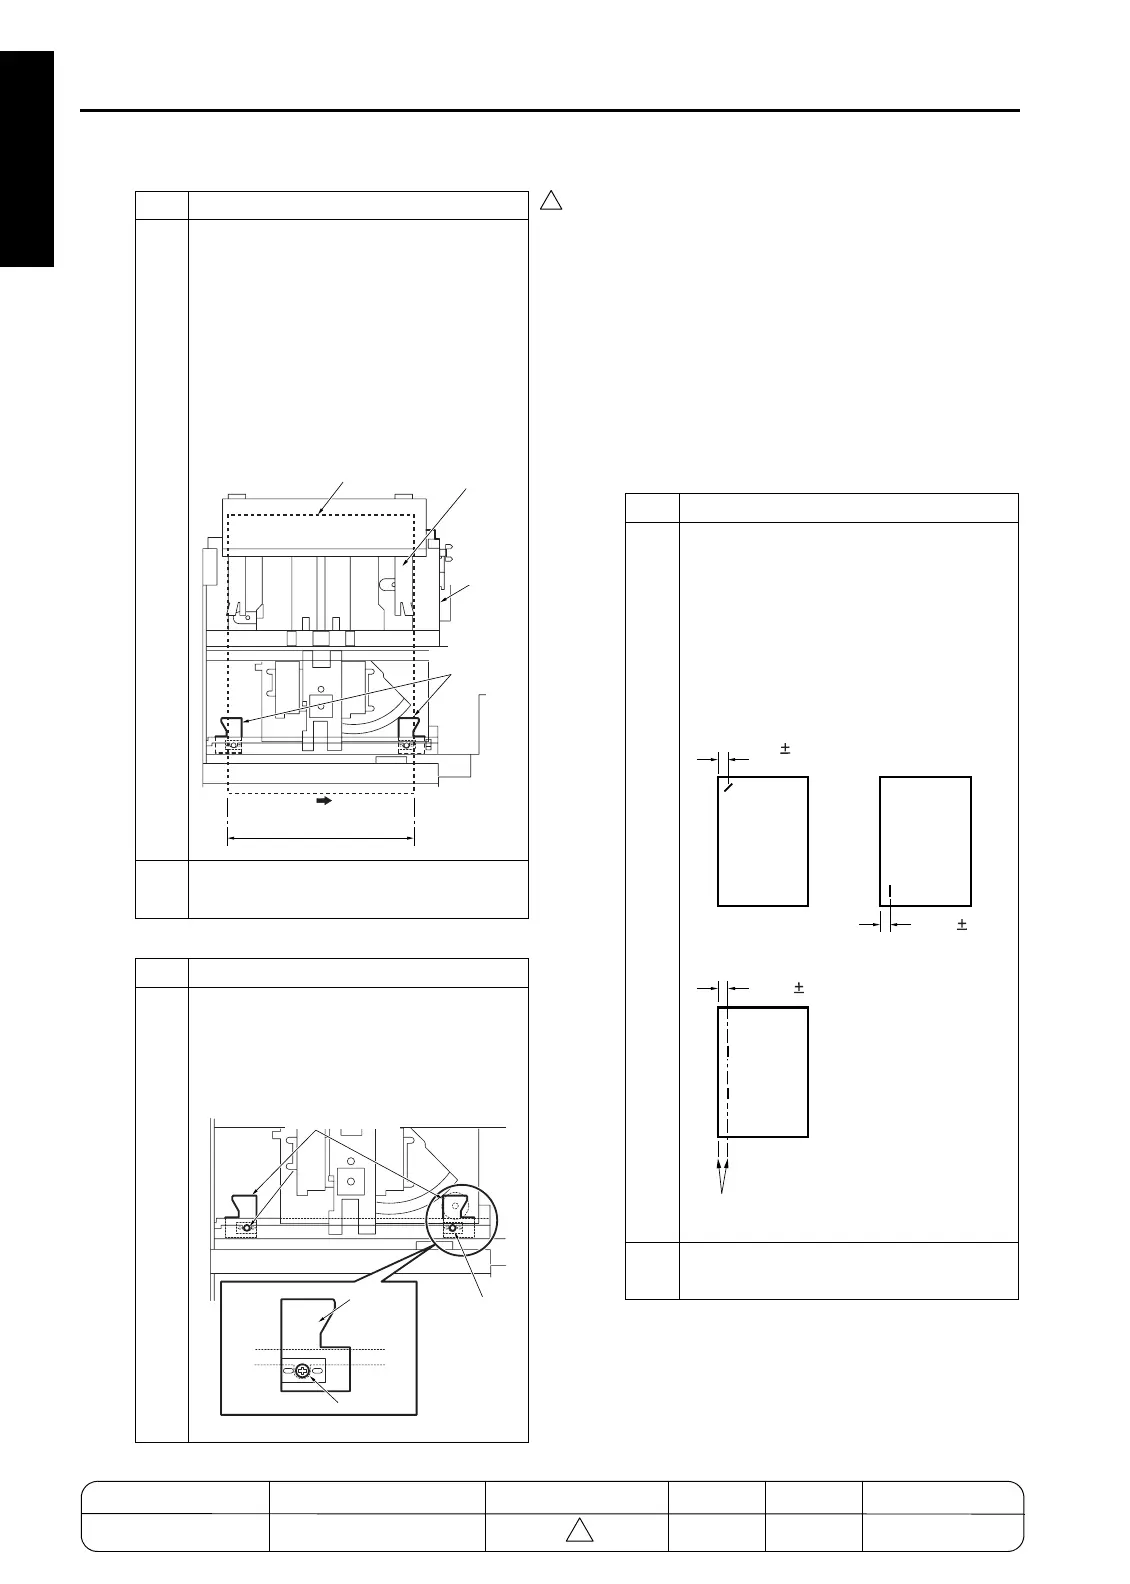
[19] FNS Adjusting the stapling position
(Flat stapling) (FS-110/210)
Caution: Do not use hands to move stapler unit
to horizontal direction.
(Otherwise the belt and the gear teeth
skipping may occur.)
1. Tool
• Screwdriver (Phillips)
•Scale
2. Adjustment method
a. Preparation
6
Load paper sized 8.5x11R or larger, put
the paper against the alignment plate /U
(rear) and the alignment plate /L (rear)
and check whether the paper is plumb.
In addition, check whether the distances
A for the alignment plate /L are within
specification.
7
If they are out of spec, perform the fol-
lowing adjustment:
Step Operation
1
Loosen the two screws and perform the
adjustment so that the mount location of
the alignment plate /L are within specifi-
cation.
Step Operation
Paper
Alignment plate /U
(rear)
Rear panel
surface
Alignment
plate /L
A=340.6 mm
+0
- 0.5
Spec values: A=340.6 mm (within)
+0
- 0.5
Screw
Screw
Alignment plate /L
Alignment plate /L
Step Operation
1
Perform the following stapling actually
and check whether they are within spec-
ification. In the case of flat stapling,
check whether the paper edge is parallel
to the virtual line running between the
staplers.
2
If they are out of spec or not parallel, per-
form the following adjustment:
A=8.5 3mm
B=8.5 3mm
C=8.5 3mm
One-point stapling
(at front)
One-corner stapling
(at rear)
Flat stapling
Parallel
REPLACEMENT
1-1
4
MODEL MANUAL REVISED EDITION DATE PAGE METHOD
SERVICE MANUAL Dec. 2003
7155/7165/7255/7272
1-120 REPLACEMENT

 Loading...


