OTHER ADJUSTMENT
1 ADJUSTMENT
4
4
b. Adjustment
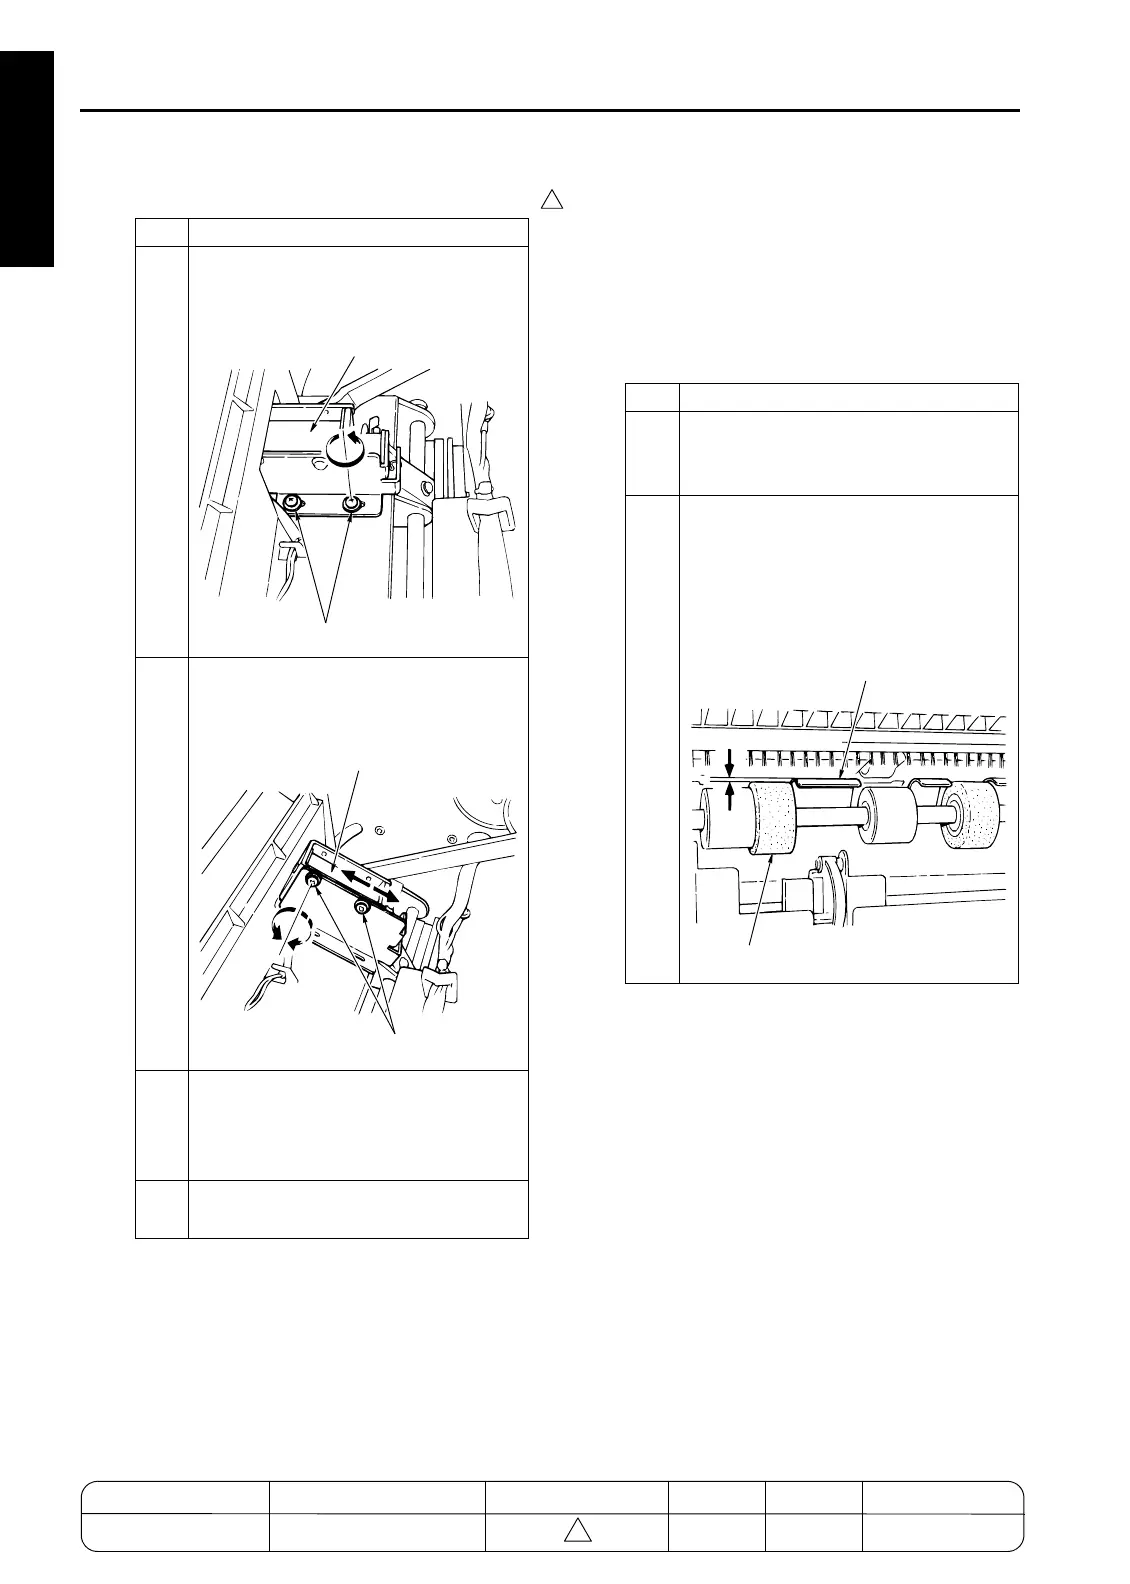
[42] FNS Adjusting the Paper Exit-Open-
ing Lower Guide Plate (FS-111)
1. Tool
• Screwdriver (Phillips)
•Scale
2. Adjustment method
a. Preparation
Step Operation
1
Remove the 2 set screws holding the
solenoid bracket in place, and remove
the solenoid together with the bracket.
2
Loosen the 2 screws holding the sole-
noid to the bracket, and adjust the posi-
tion of solenoid.
3
Retighten the 2 solenoid screws, then
replace the solenoid and bracket into
their original position and screw in the 2
bracket screws.
4
Reassemble in the opposite sequence
to removal.
7272fs1037
Solenoid Bracket
Screws
7272fs1038
Solenoid Bracket
Screws
Step Operation
1
Remove the following parts.
• Rear cover
• Top cover
2
With SD4 (paper exit-opening solenoid)
OFF, confirm that the paper exit-opening
lower guide plate is a sufficient distance
(distance A) higher than the sponge roll-
ers.
Spec value: A = 1.5mm and greater
7272fs1039
A=1.5mm and greater
Lower Guide Plate
Sponge Roller
MODEL MANUAL REVISED EDITION DATE PAGE METHOD
SERVICE MANUAL Dec. 2003
7155/7165/7255/7272
1-146 ADDITION

 Loading...


