ADU UNIT
3-N-17
3 DIS./ASSEMBLY
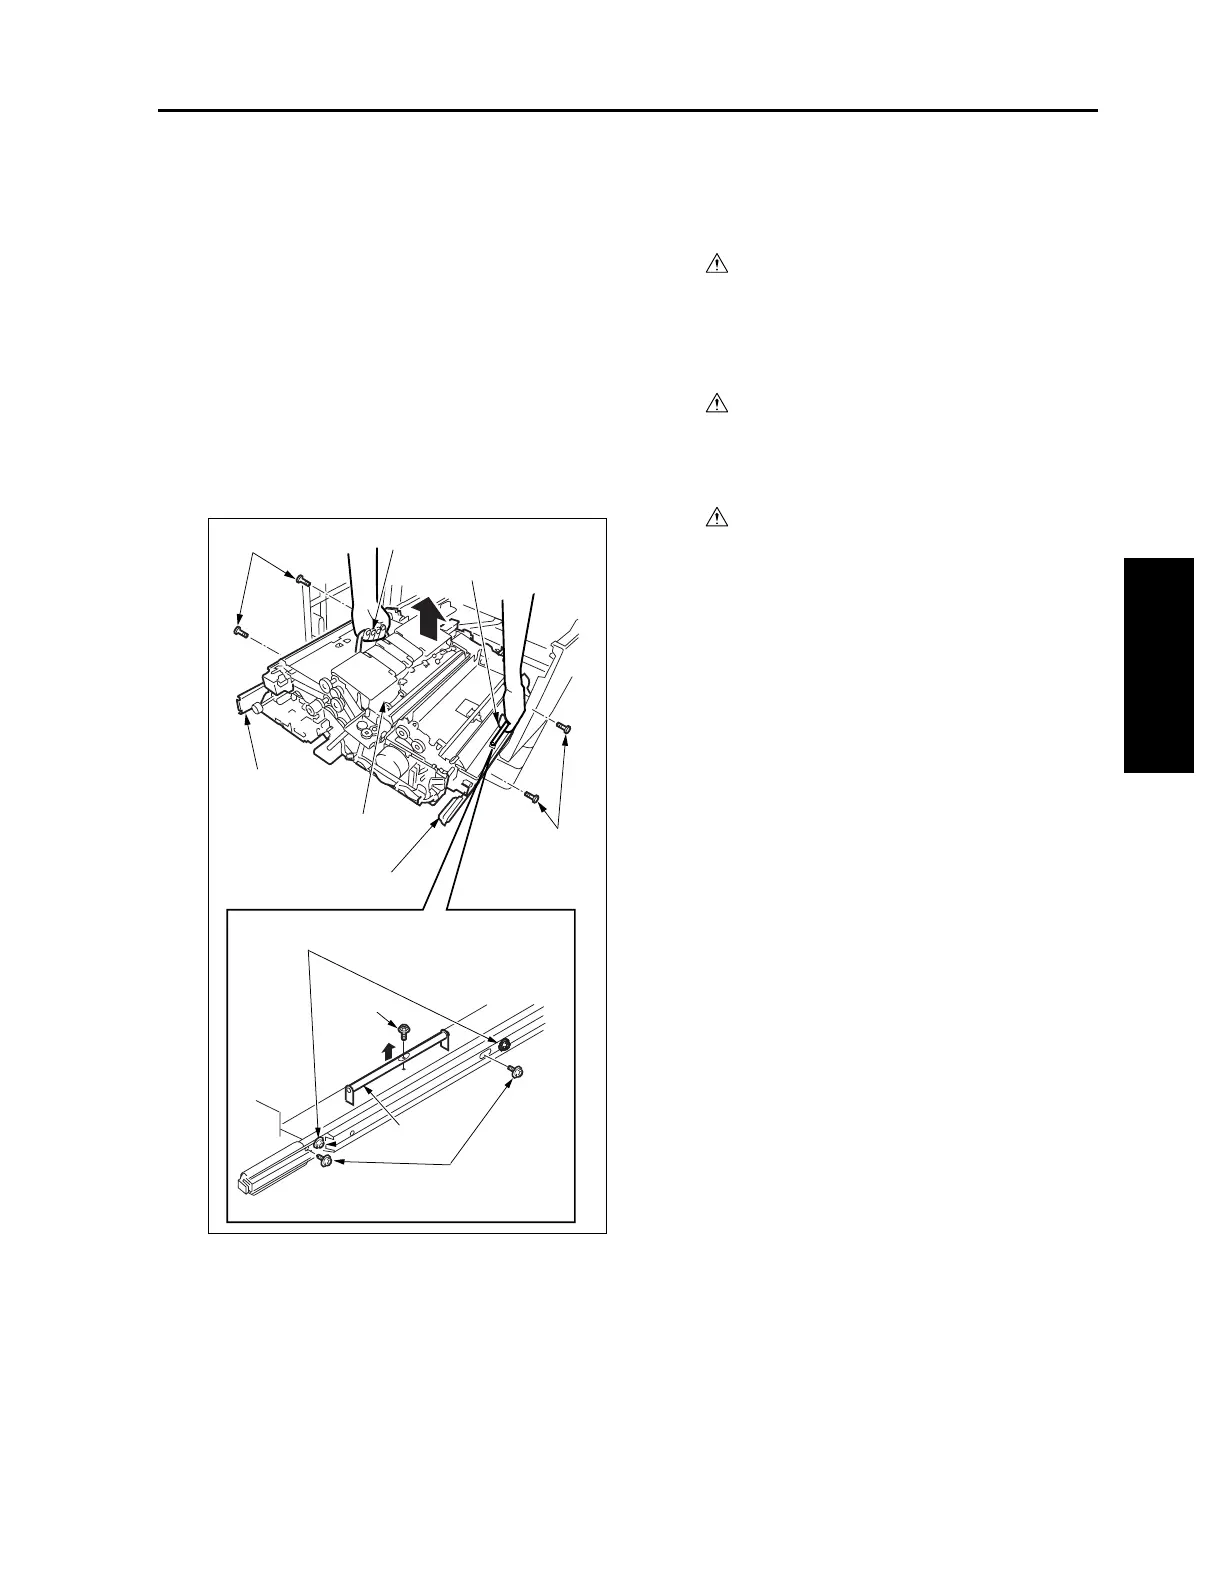
(9) Remove one screw to release the lock of the han-
dle(right).
(10) Remove the two screws securing the guide rails
on the paper feed side and paper exit side.
Caution: Do not mistake the screws securing
the guide rails for screws(black) that
must not be removed. (Black screws
must not be removed)
(11) To remove the ADU stand, one person holds the
handle(right) on the paper-feed side, and the
other holds the the handle(left) on the fixing unit.
Then, they lift up the ADU stand.
(12) Reinstall the above parts following the removal
steps in reverse.
[12] Removing and Reinstalling the
Pre-Registration Roller
Warning:
The interlock which is turned OFF when
the front right or left door opens or closes
should never be turned ON forcibly with
the ADU stand drawn out.
Warning:
Removal and reinstallation of the ADU
stand involve carrying a heavy load so it
should be performed by two persons.
Caution:
Be sure the power cord has been
unplugged from the wall outlet.
a. Procedure
(1) Remove the front and rear registration springs.
Caution: When reinstalling, pay attention to the
location of the registration spring
hook.
(2) Remove the E-ring (
φ
6)
(3) Press the cleaner coupling and pull out the pin.
(4) Remove the spring.
(5) Remove the front and rear E-rings (
φ
8) and
remove each bearing.
Screws
Screws
Screw
Screws
Handle (left)
Handle (right)
ADU stand
Guide rail
Guide rail
Screws that must not be removed (Black)
Handle
(right)
Both the left and right black screws
must not be removeed.
3-N-11

 Loading...


