OTHER ADJUSTMENT
1 ADJUSTMENT
4
4
b. Adjustment
[17] FNS Adjusting the mount location of
the alignment plates / U (FS-110/210)
1. Tool
• Screwdriver (Phillips)
•Scale
2. Adjustment method
a. Preparation
Step Operation
1
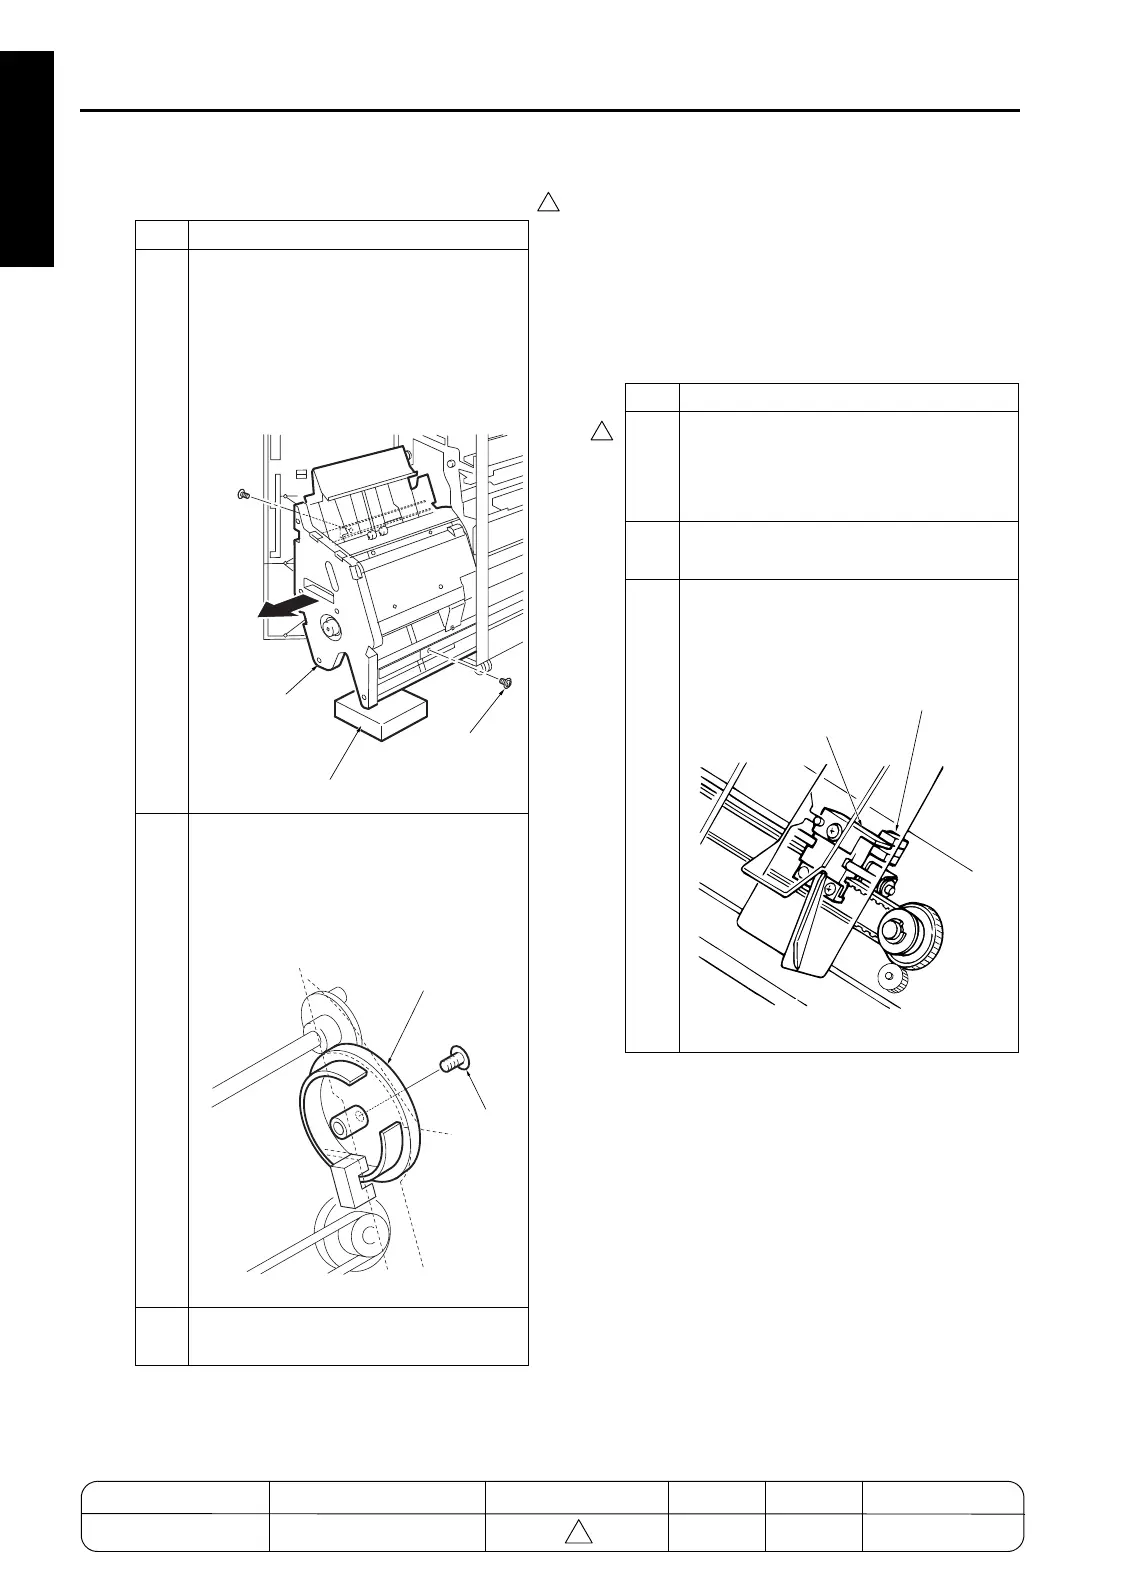
Remove the two screws securing the rail
stopper and pull out the stacker unit
even further.
To prevent the Finisher from toppling
over, place a board or the like to support
the pulled-out unit.
2
Remove the screw of the belt detection
gear, align the paper exit belt arm with
the specified position, and align the
detection gear with the specified position
to secure it.
3
Reassenble in the opposite sequence to
the removal.
Stacker unit
Rail stopper
securing screw
Board to prevent the Finisher from toppling over
Belt detection gear
Screw
Step Operation
1
Power on the main body, perform the 47-
mode Code 75-8: Alignment/U (M705)
home position search, and then power
off.
2
Open the front door and pull out the
stacker unit.
3
Check whether the actuator of the align-
ment HP/U (PS708) is aligned with the
home position.
Alignment HP PS (PS708)
Actuator
MODEL MANUAL REVISED EDITION DATE PAGE METHOD
SERVICE MANUAL Dec. 2003
7155/7165/7255/7272
1-118 REPLACEMENT
4

 Loading...


