OTHER ADJUSTMENT
1 ADJUSTMENT
MODEL MANUAL REVISED EDITION DATE PAGE METHOD
SERVICE HANDBOOK Nov. 20017155/7165
OTHER ADJUSTMENT
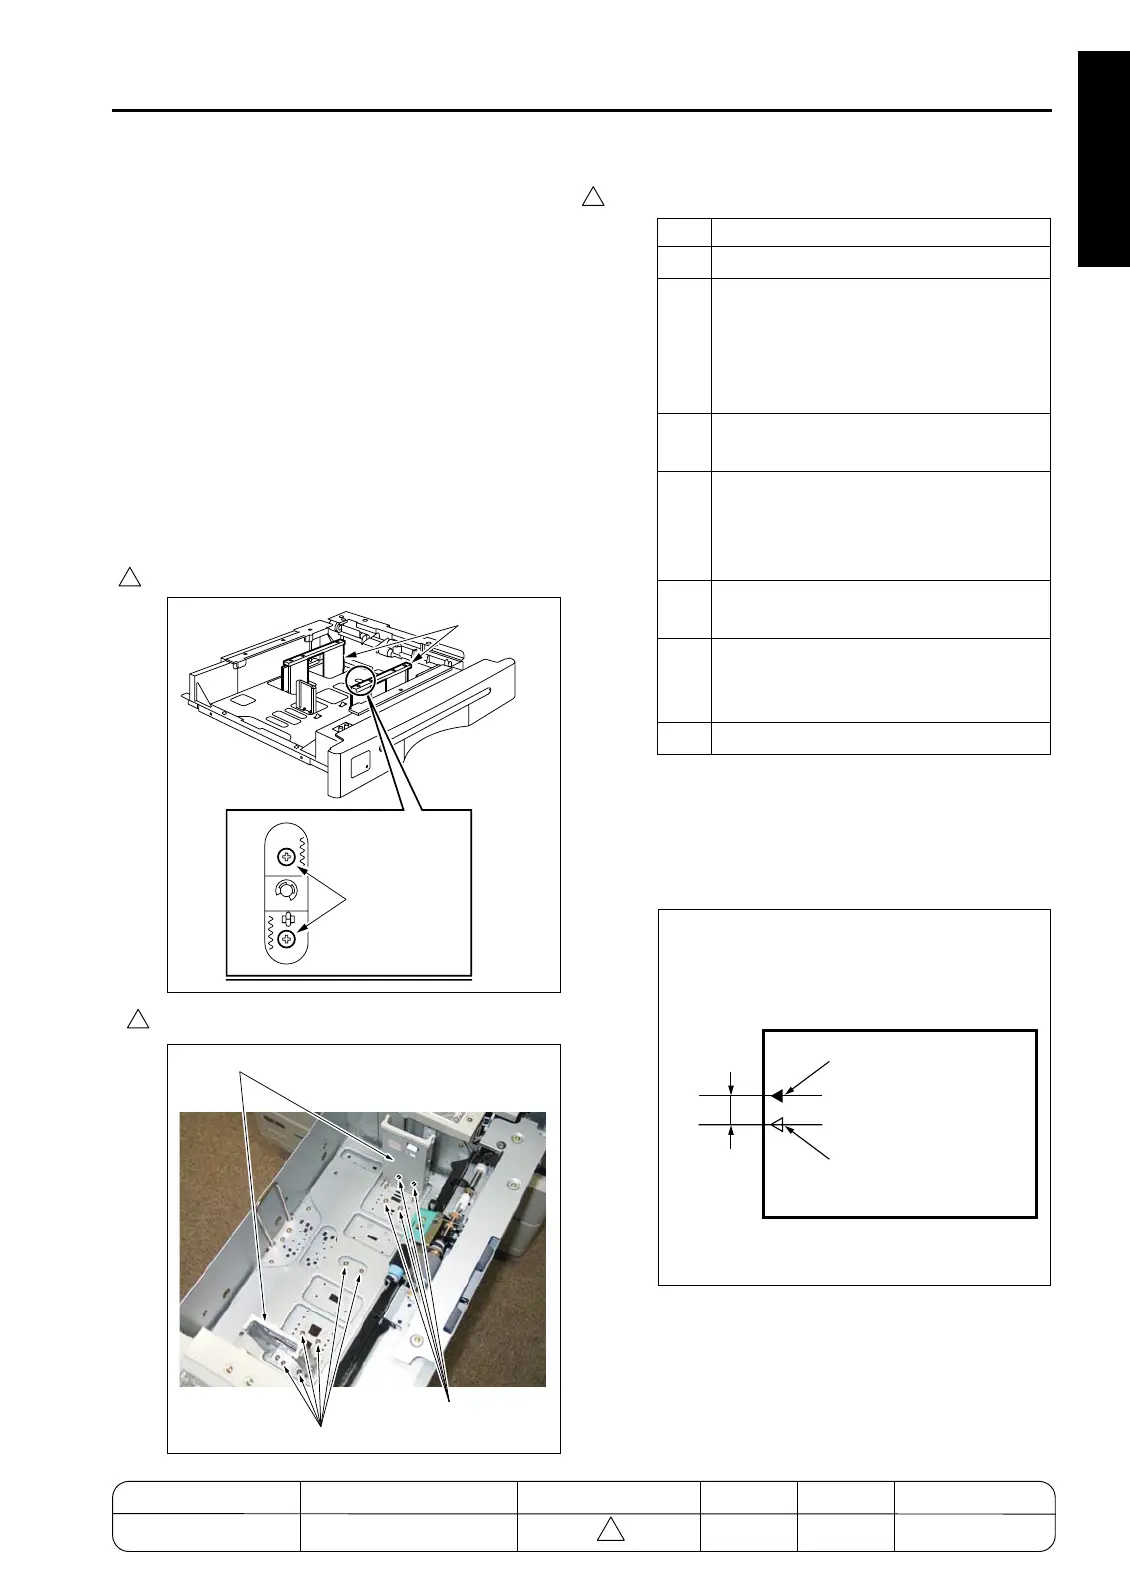
[1] Centring Adjustment
Caution: Centring adjustment need not be per-
formed normally because paper incli-
nation is detected in the second paper
feed section and original image is cor-
rected in the image processing unit to
fit an inclined paper. Centring adjust-
ment is required only when the
detected paper inclination is not within
the automatic image correction range.
1. Tool
• Screwdriver (Phillips)
2. Tray 1/2/3 centring adjustment (7155/7165)
Tray 3/4 centring adjustment (7255/7272)
Tray 1/2 centring adjustment (7255/7272)
a. Adjustment method
Caution: Disable the mis-centering correction
function by setting the dip switch 12-3
and confirm it (Enter 1 to set to ON).
Confirm it using the internal pattern
No.16
Guide plate
Screws
Guide plate
Screws
7272fs1052
Screws
Screws
Guide plate
Step Operation
1
Draw out the tray.
2
Loosen the two screws at the centre of
the tray. (7155/7165 : tray 1/2/3, 7255/
7272 : tray 3/4)
Loosen the ten screws at the centre of
the tray. (7255/7272 : tray 1/2)
3
Slide the guide plate to adjust the centre
position.
4
Tighten the two screws securely. (7155/
7165 : tray 1/2/3, 7255/7272 : tray 3/4)
Tighten the ten screws securely. (7255/
7272 : tray 1/2)
5
Insert the tray and make a copy to check
the result.
6
Perform steps 1-5 repeatedly until mis-
centring is included in the automatic
adjustment range (
±
3mm).
7
Perform the tray adjustment in 36 mode.
Standard value of mis-centring: within 3mm
Within 3mm
Centre of image
Centre of paper
4
MODEL MANUAL REVISED EDITION DATE PAGE METHOD
SERVICE MANUAL Dec. 2003
7155/7165/7255/7272
1-97 REPLACEMENT
4
4
4

 Loading...


