ADU UNIT
3-N-18
3 DIS./ASSEMBLY
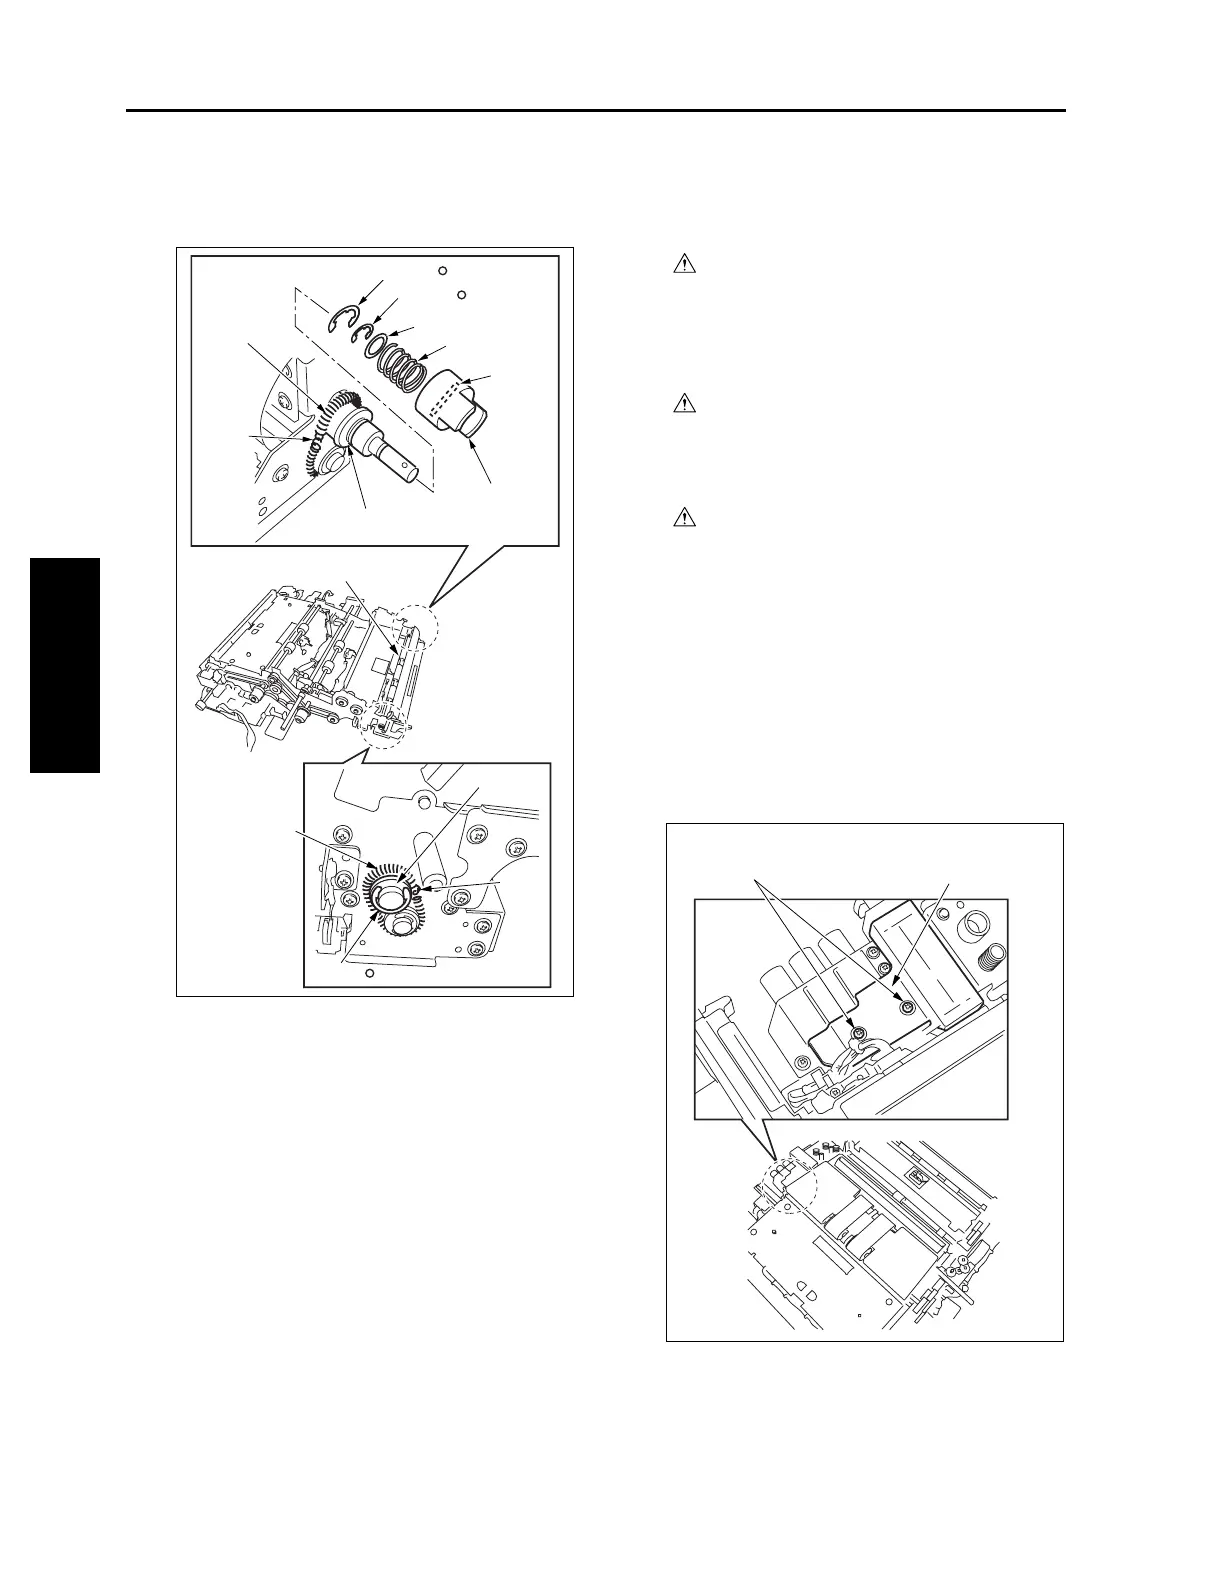
(6) Slide the ADU pre-registration roller back and
forth to remove.
(7) Reinstall the above parts following the removal
steps in reverse.
[13] Removing and Reinstalling the ADU
Conveyance Roller 3 and 4
Warning:
The interlock which is turned OFF when
the front right or left door opens or closes
should never be turned ON forcibly with
the ADU stand drawn out.
Warning:
Removal and reinstallation of the ADU
stand involve carrying a heavy load so it
should be performed by two persons.
Caution:
Be sure the power cord has been
unplugged from the wall outlet.
a. Procedure
(1) Draw out the ADU stand from the main body.
(2) Remove the fixing unit. (See "FIXING UNIT.")
(3) Remove the transfer/separation corona unit.
(See "CORONA UNIT SECTION.")
(4) Remove the second paper feed unit.
(5) Remove the ADU stand.
(6) Remove two screws to detach the conveyance
duct (rear assembly).
E-ring( / 8)
E-ring( / 6)
Hook
Bearing
Spring
Cleaner
coupling
Pin
Registration
spring
Pre-registration roller
Registration
spring
Bearing
Hook
E-ring( / 8)
Polyslider
Conveyance duct
(rear assembly)
Screws
3-N-12

 Loading...


