OTHER ADJUSTMENT
1 ADJUSTMENT
MODEL MANUAL REVISED EDITION DATE PAGE METHOD
SERVICE HANDBOOK Nov. 20017155/7165
[28] FNS Stapler Driver Belt Position
Adjustment (FS-110/210)
CAUTION: Stapler drive belt position adjust-
ment is only performed when the
positions of drive belt and gear are
misaligned when following other
adjustment procedures.
1. Tool
• Screwdriver (Phillips)
• Stapler PS jig
• Hexagonal wrench
2. Adjustment method
a. Preparation
b. Adjustment
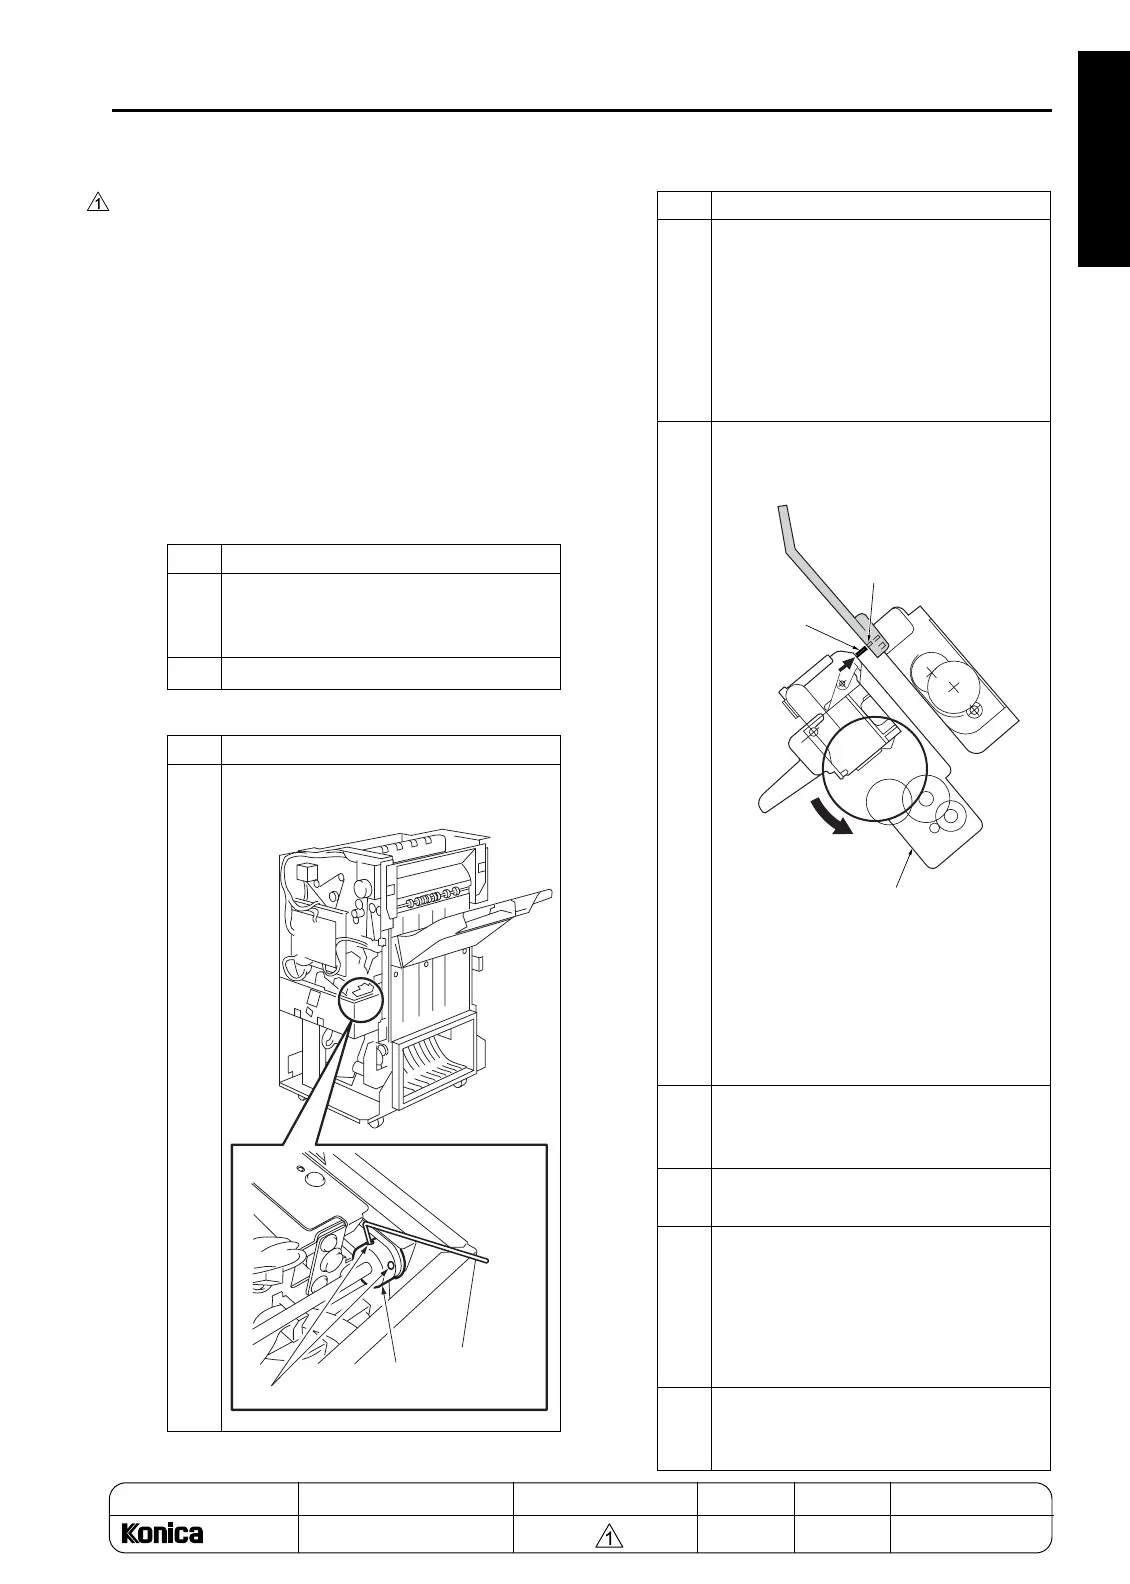
Step Operation
1
Remove the following parts:
• Rear cover
• Stapler unit cover
2
Insert the stacker unit.
Step Operation
1
Loosen two M3 screws of the staple slide
pulley/B from the backside.
Screws
Staple slide pulley/B
2
Move the stapler/clincher to the center at
the same time until it stops at the bear-
ing.
Caution: Make sure to move them at
the same time, otherwise, the
flat-stapling stopper may frac-
ture at the stapler plate.
3
Install the stapler PS jig to the stapler
and clincher/R, and adjust the horizontal
position of the stapler and the clincher.
Caution: Do not loosen the screws on
the clincher. In order to adjust
the position, move the stapler
/R or the clincher/R slightly
toward the horizontal direc-
tion.
4
Insert the stacker while the jig is installed
(that is, when the plate and the jig are
compleetely locked with each other.
5
Tighten two screws of the staple slide
pulley/B from the backside.
6
Pull out the stacker unit and remove the
jig. Then, check the staple for the follow-
ing movements:
• Stapling at one position/rear
• Stapling at one position/front
• Stapling at two positions
7
Install the rear cover and the stapler
cover when the adjustment is com-
pleeted.
Step Operation
Groove
Plate
Stapler
1-131
REPLACEMENT

 Loading...


