OTHER ADJUSTMENT
1 ADJUSTMENT
MODEL MANUAL REVISED EDITION DATE PAGE METHOD
SERVICE HANDBOOK May 20027155/7165
[27] PI Centering Adjustment (PK-110)
Caution1: PI Centering adjustement must be
performed on the upper tray first,
then on the lower tray.
When it is necessary to slide the side
guide plate (rear) a lot, perform step
11 before step 3 and subsequent
procedures.
Caution2: When tightening two screws of the
side guide plate (rear), be careful not
to tighten them too much. (Tighten-
ing torque: less than 5kg/cm)
1. Tool
• Screwdriver (Phillips)
•Scale
2. Adjustment method
a. Preparation
b. Adjustment
Step Operation
1
Check that PK adjusting the punch hole
vertical position has been completed.
2
Perform Tray 1/2/3 centering adjust-
ment.
3
Feed the three sheets from PI with the
punch mode.
4
Check the position of each punch hole
on the three sheets.
Step Operation
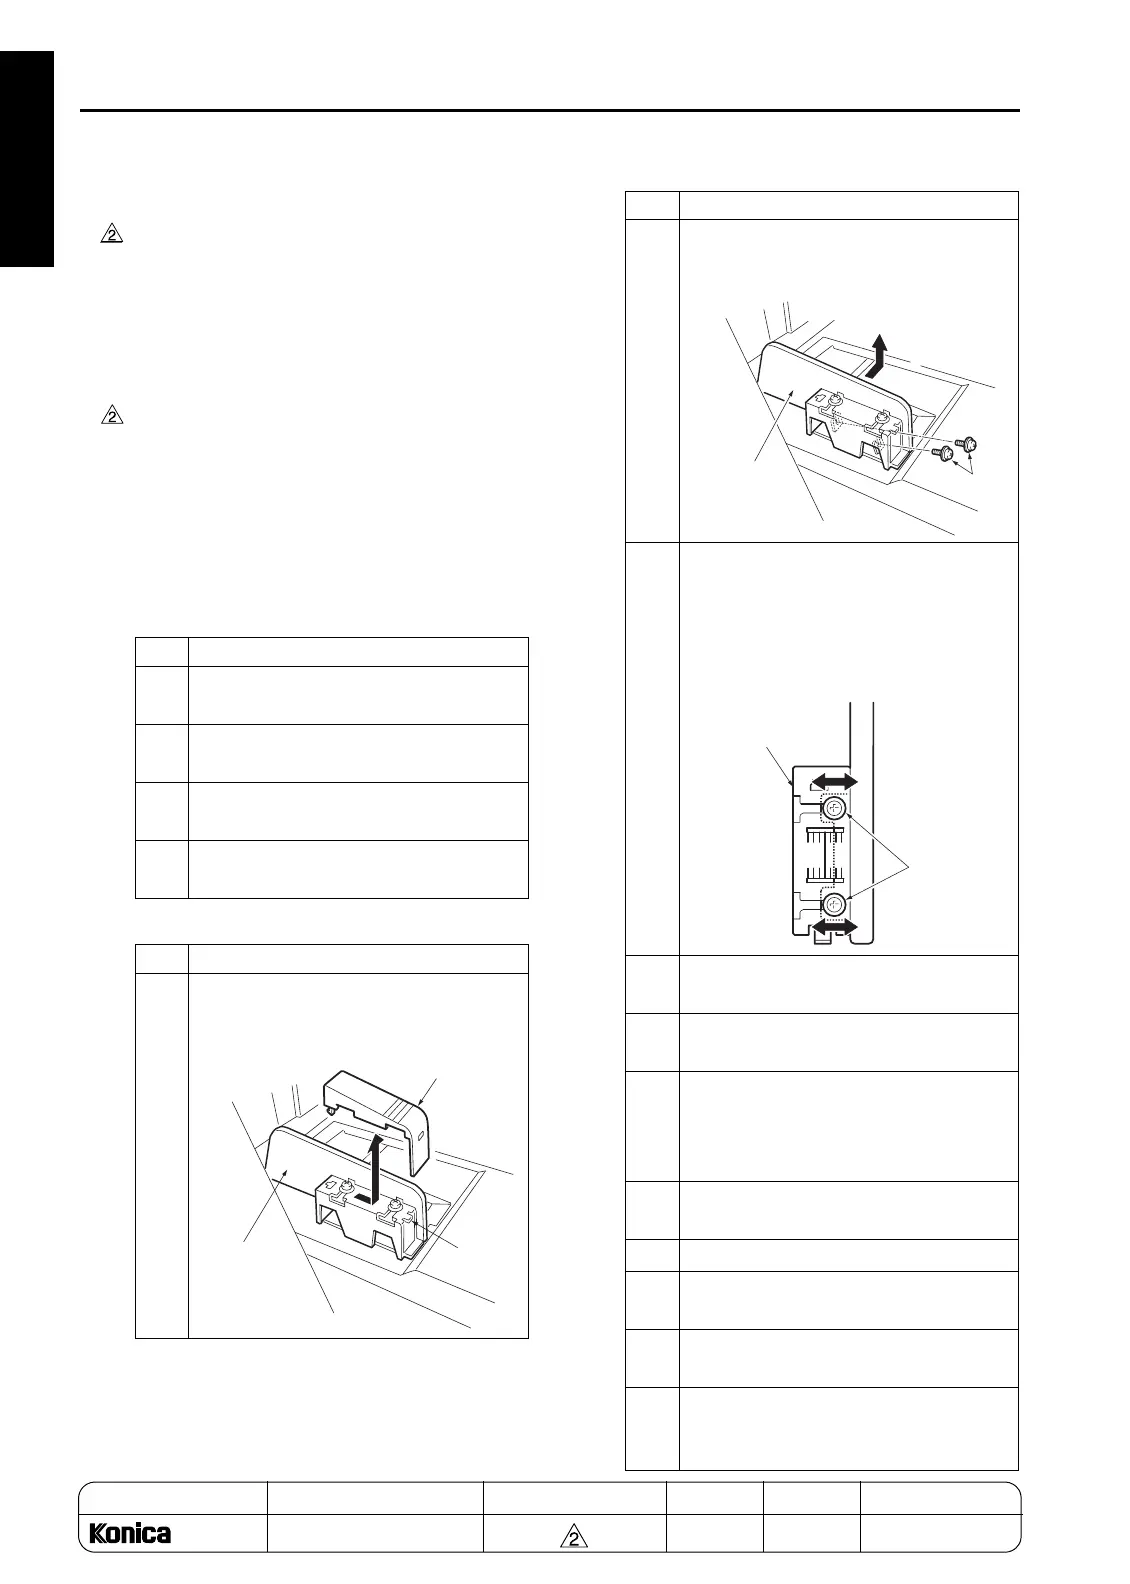
1
Release the hook and remove the
adjustment cover of the side guide plate
(rear).
Adjustment cover
Hook
Side guide plate
(rear)
2
When adjusting for the lower tray,
remove two screws and slide rightward
to remove the side guide plate (rear).
3
Loosen two adjustment screws securing
the side guide plate (rear), and slide it by
the twice the difference. (ie: If there is
1.5mm difference in direction of rear
side, slide by 3mm to rear side.)
1 scale : 2mm
4
Fasten the two adjustment screws
securely to fix the side guide plate (rear).
5
In case of the lower tray, install the side
guide plate (rear).
6
Set a sheet on the tray and fit the side
guide plate (rear) to the sheet to check
that the side guide plate (rear) is parallel
to the sheet.
7
Feed the three sheets from PI with the
punch mode.
8
Check the position of each punch hole.
9
Repeat step 2 to 8 until the difference of
the holes is improved.
10
Install the adjustment cover to the side
guide plate (rear).
11
Set 8.5x11R size paper to the tray and
perform the cover sheet tray size adjust-
ment in 36 mode.
Step Operation
Side guide plate
(rear)
Screws
Adjustment
screws
Side guide plate (rear)
1-130-2
REPLACEMENT

 Loading...


