OTHER ADJUSTMENT
1 ADJUSTMENT
MODEL MANUAL REVISED EDITION DATE PAGE METHOD
SERVICE HANDBOOK Apr. 20037155/7165
b. Adjustment
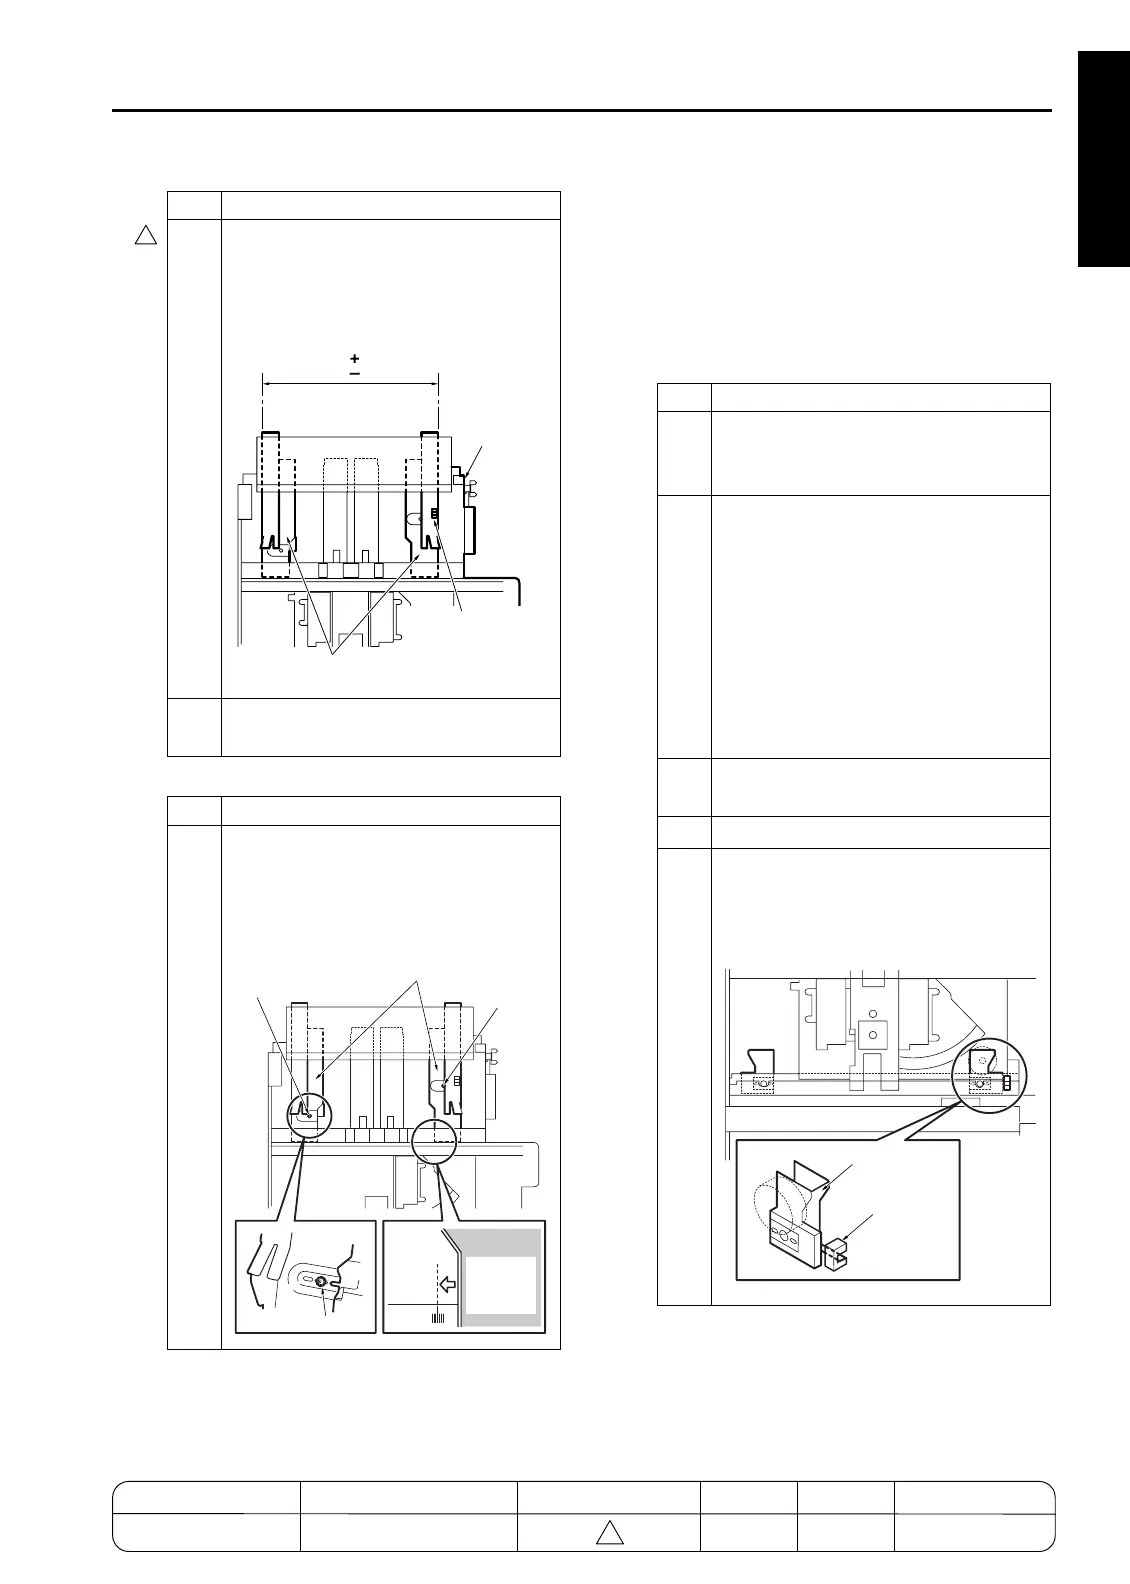
[18] FNS Adjusting the mount location of
the alignment plates / L (FS-210)
1. Tool
• Screwdriver (Phillips)
•Scale
2. Adjustment method
a. Preparation
4
Check whether the distances A for the
alignment plate /U are within specifica-
tion.
5
If they are out of spec, perform the fol-
lowing adjustment:
Step Operation
1
After loosening two screws to position
the rear side of the alignment plate /U to
the center of marking lines, adjust the
location of its front side so that the
mounting location is within specification.
Step Operation
7272fs1048
A=340.6 mm
0
1.5
Rear panel
Alignment plate /U
Alignment HP /U
(PS708)
Spec values: A=340.6 mm (within)
+0
- 1.5
Alignment plate /U
Alignment
plate /U
rear
Screw
Screw
Screw
Step Operation
1
Make sure that "Adjusting the mount
location of the alignment plates / U" is
finished.
2
Power on the main body, drive the
motor(s) using the following codes in the
47 mode, and then power the machine
off.
• Code 75-8: Alignment /U (M705) HP
search
• Code 75-21: Alignment /L (M716) HP
search
• Code 75-40: Stopper (M718) position-
ing shift (larger than 8.5x11R)
3
Open the front door and pull out the
stacker unit.
4
Take off the stapler unit cover.
5
Check whether the actuators for the
alignment HP/ U (PS705) and the align-
ment HP/ L (PS724) are aligned with the
home position.
Alignment plate /L
Alignment HP PS/L
(PS724)
4
MODEL MANUAL REVISED EDITION DATE PAGE METHOD
SERVICE MANUAL Dec. 2003
7155/7165/7255/7272
1-119 REPLACEMENT
4

 Loading...


