OTHER ADJUSTMENT
1 ADJUSTMENT
MODEL MANUAL REVISED EDITION DATE PAGE METHOD
SERVICE HANDBOOK May 20027155/7165
4
b. Adjustment
[25] PK Adjusting the tilt of the punch hole
position (PK-110)
1. Tool
• Screwdriver (Phillips)
•Scale
2. Adjustment method
a. Preparation
Step Operation
1
Power on the main body. Use "7: Three-
hold positions adjustment" from "6: Fin-
isher adjustment" on the 36 Mode,
adjust the first folded line (reference
value a), and perform three-holding.
2
When the first folded line becomes
within the spec value, open the front
door and pull out the stacker unit.
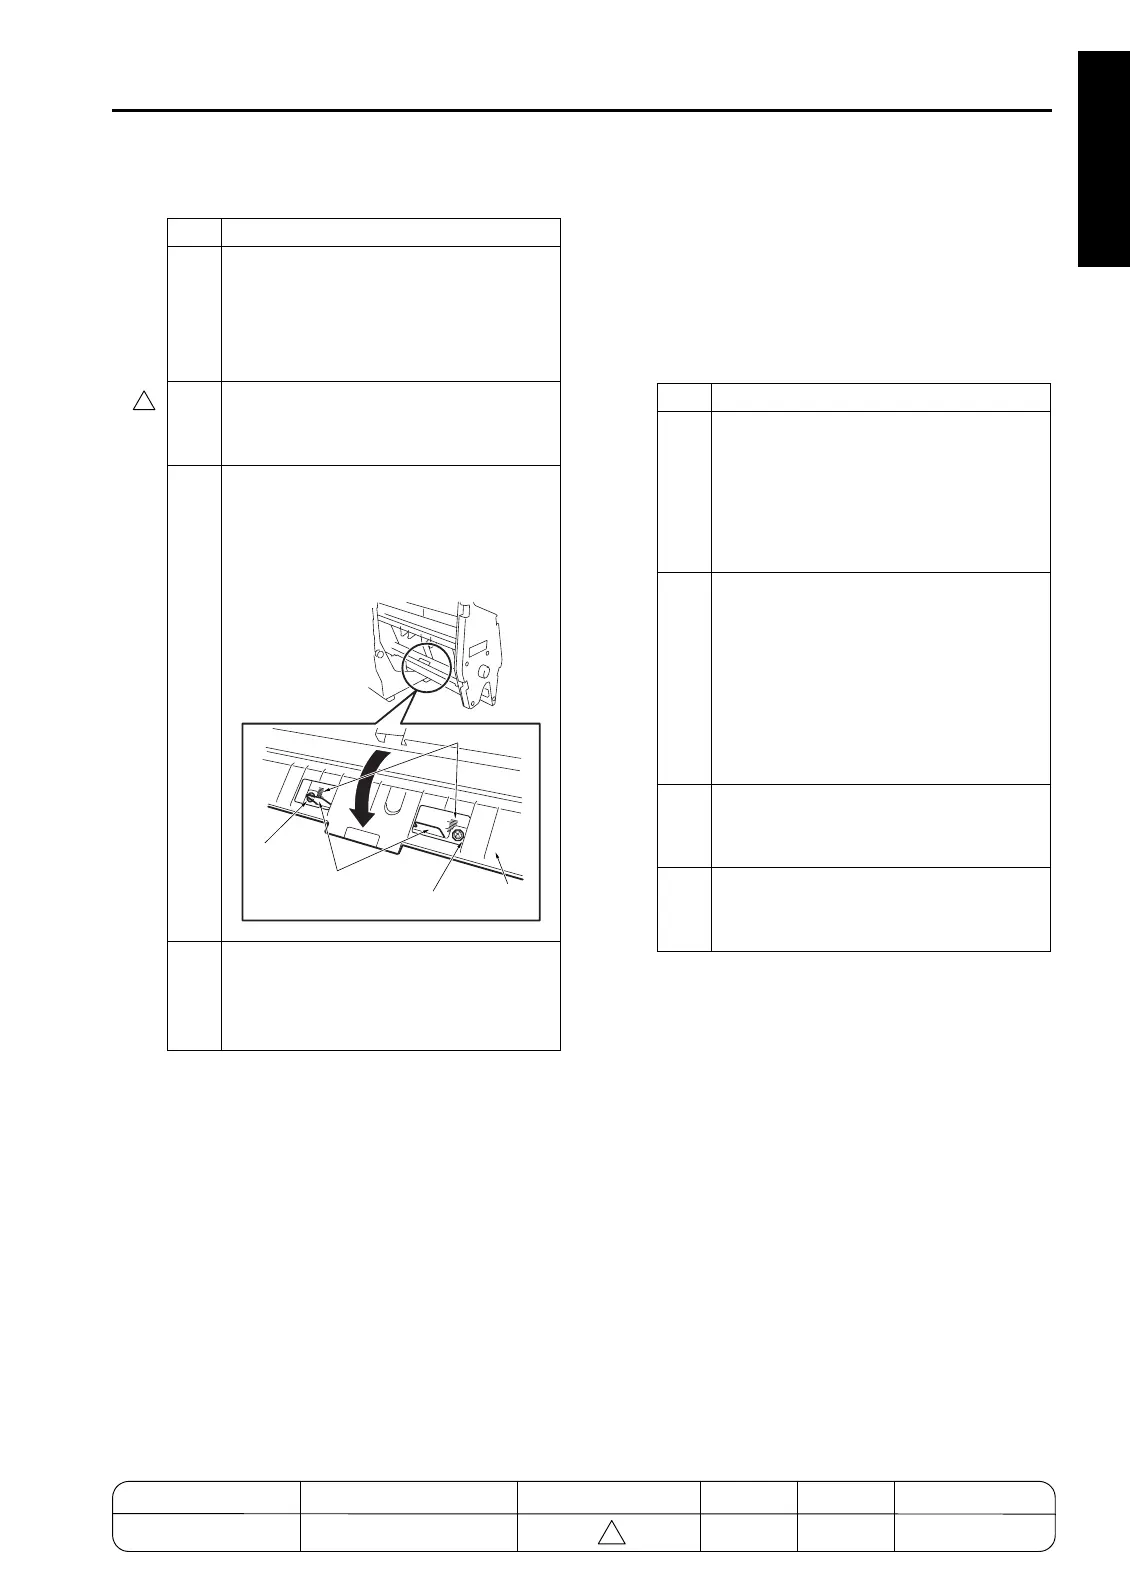
3
Open the three-holding guide plate,
loosen the two screws securing the
three-holding stoppers, and adjust the
stopper positions using the mark as a
guide.
4
After the adjustment, retighten the two
screws and execute three-holding to
check that the three-holding positions
are within the specification.
Screw
Screw
Three-folding stopper
Three-folding
guide plate
Marks
Step Operation
1
Check the following items:
• The finisher is connected to the main
body.
• The main body is loaded with the
paper based on the punch specifica-
tions.
2
Check the skew of output paper in
advance.
• Slide the side guide plate and the rear
guide plate for the main body's feed
tray, and align the paper loaded on the
main body's tray.
• Check the skew by using the platen
copy or adjustment mode.
3
To check the tilt of the punch hole posi-
tion, make a sample copy in the punch
mode.
4
Make three copies each in single side
copy mode and double side copy mode
with the punch mode to check the skew.
4
MODEL MANUAL REVISED EDITION DATE PAGE METHOD
SERVICE MANUAL Dec. 2003
7155/7165/7255/7272
1-127 REPLACEMENT

 Loading...


