OTHER ADJUSTMENT
1 ADJUSTMENT
a. Adjustment method
[9] RADF mounting position adjustment
1. Tool
• Screwdriver (Phillips)
• Open-end wrench or flat-nose pliers.
2. Adjustment method
Step Operation
1
Move the paper up/down plate up.
2
Open the top cover.
3
Remove the paper feed pick-up cover/B.
4
Remove the spring from the paper feed
roller unit.
5
Pull the moving parts of the pick-up sole-
noid and check whether the distance
between the bottom surface of the paper
feed roller and the top surface of the up/
down plate is within specification.
Specification: 0.5 to 2.5mm
If the distance is out of spec, perform
steps 5 and later.
6
Loosen one screw and adjust the mount-
ing position for the pick-up solenoid.
Caution: Take a note to remember the
initial mounting position.
7
Secure the pick-up solenoid by tighten-
ing the screw.
8
Install the spring.
9
Install the paper feed pick-up cover/B.
10
Close the top cover.
Top cover
Spring
Paper feed
roller unit
Paper feed roller unit
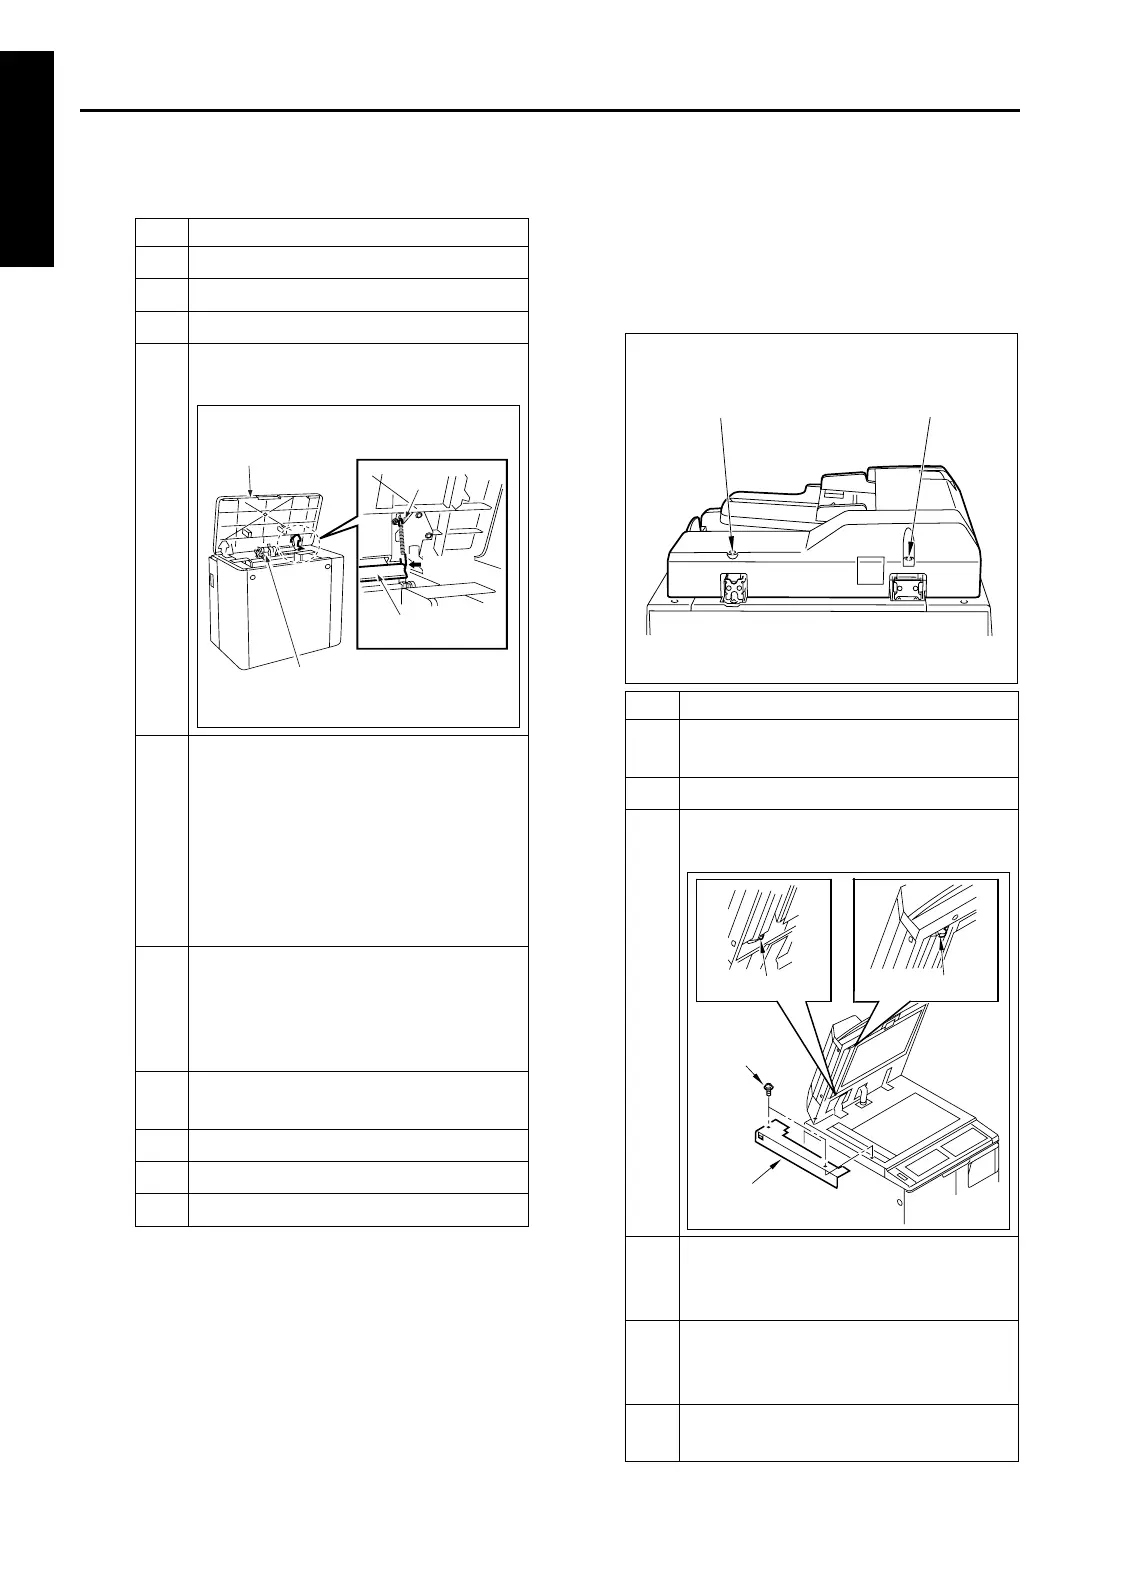
Step Operation
1
Open the RADF, remove two screws and
detach the top cover (left).
2
Close the RADF.
3
Check if both stopper pieces on the
RADF side touch the slit glass.
4
If both stopper pieces do not touch the
slit glass, make adjustments using
adjusting screws A and B alternately.
5
Perform steps 3 and 4 repeatedly until
the two stopper pieces touch the slit
glass at the same time.
6
Using the two screws, install the top
cover (left).
Adjusting screw B
Adjusting screw A
Stopper piece
Stopper piece
Screws
Top cover (left)
1-108

 Loading...


