OTHER ADJUSTMENT
1 ADJUSTMENT
4
4
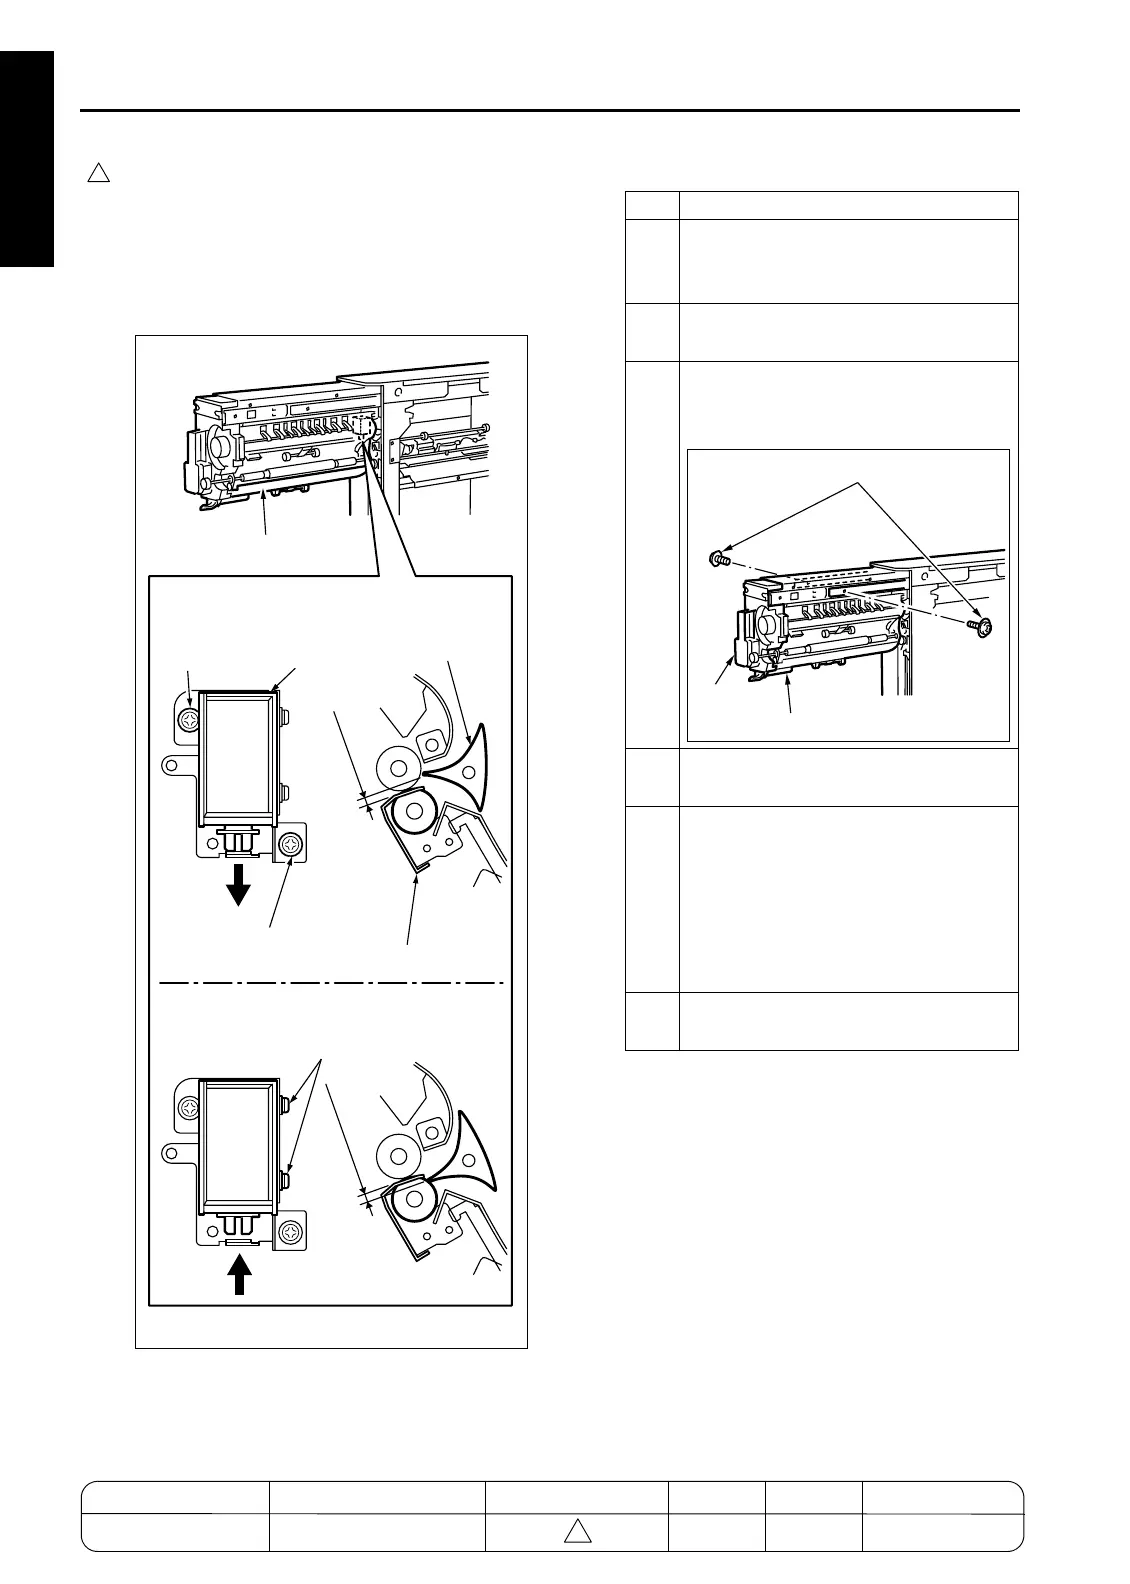
[29] Adjusting the PZ Paper-Path Switch-
ing Solenoid (PZ)
1. Tool
• Screwdriver (Phillips)
2. Adjustment method
7272fs1001
A=5mm
B=2mm or less
Gate SD/L (SD1) OFF
Gate SD/L (SD1) ON
OFF
ON
Registration guide plate
Registration guide plate
Screw (for
bracket)
Screws (for solenoid)
Screw (for bracket)
Gate SD/L
(SD1)
Gate/L
Step Operation
1
Open the front door of FNS, remove the
front cover of PZ (three screws), and
remove PZ from the main body.
2
Remove the AC cord and the rear cover
(four screws).
3
Pull out the z-folding/conveyance unit.
Remove the two screws from the rail and
further draw out the unit.
4
Loosen two screws securing the sole-
noid bracket.
5
Make sure that the gate solenoid/L
(SD1) is OFF, and adjust the position of
the solenoid bracket so that the gap
between the gate tip and the registration
guide plate is within the specification
range. Fasten the two screws.
Spec range: 3 to 5mm (viewing)
6
Loosen two screws securing the sole-
noid.
7272fs1002
Screws
Front cover
Z-folding/conveyance unit
MODEL MANUAL REVISED EDITION DATE PAGE METHOD
SERVICE MANUAL Dec. 2003
7155/7165/7255/7272
1-132 ADDITION

 Loading...


