SCANNER SECTION
3-C-4
3 DIS./ASSEMBLY
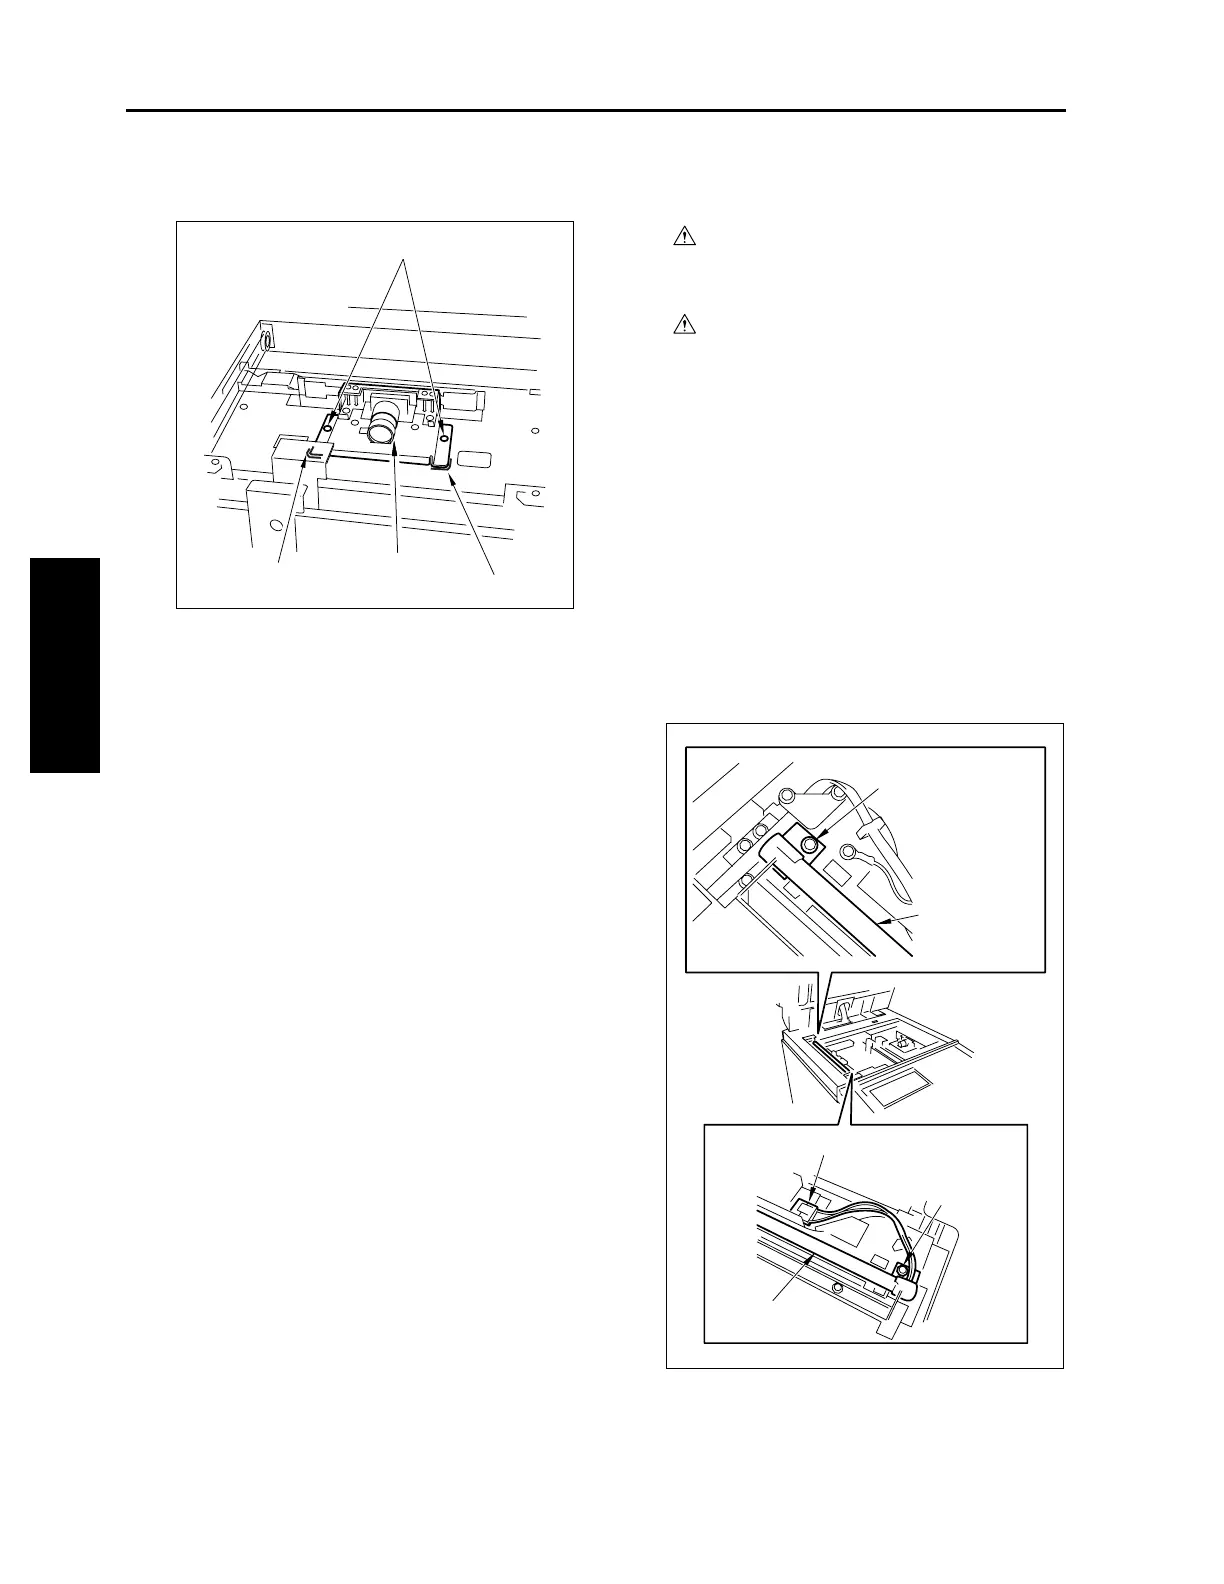
(4) Remove two screws to remove the CCD unit.
Caution: Mark the place where the CCD unit is
installed before removing it.
(5) Reinstall the above parts following the removal
steps in reverse.
[3] Replacing the Exposure Lamp
Caution1:
Be sure the power cord has been
unplugged from the wall outlet.
Caution2:
Do not touch the exposure lamp with bare
hands.
Caution: Be sure to check the image after
installing the exposure lamp. (See
"ADJUSTMENTS.")
a. Procedure
(1) Remove the original stopper plates (left and
rear), platen glass and top cover (right, middle
front, and middle rear). (See "EXTERNAL SEC-
TION.")
(2) Move the exposure unit to the notch in the main
body frame on the paper exit side.
(3) Remove the connector and two screws, then
remove the exposure lamp.
(4) Reinstall the above parts following the removal
steps in reverse.
Screws
CCD unit
Marking
Marking
Screw
Screw
Exposure lamp
Exposure lamp
Connector
3-C-2

 Loading...


