DRUM UNIT
3-E-2
3 DIS./ASSEMBLY
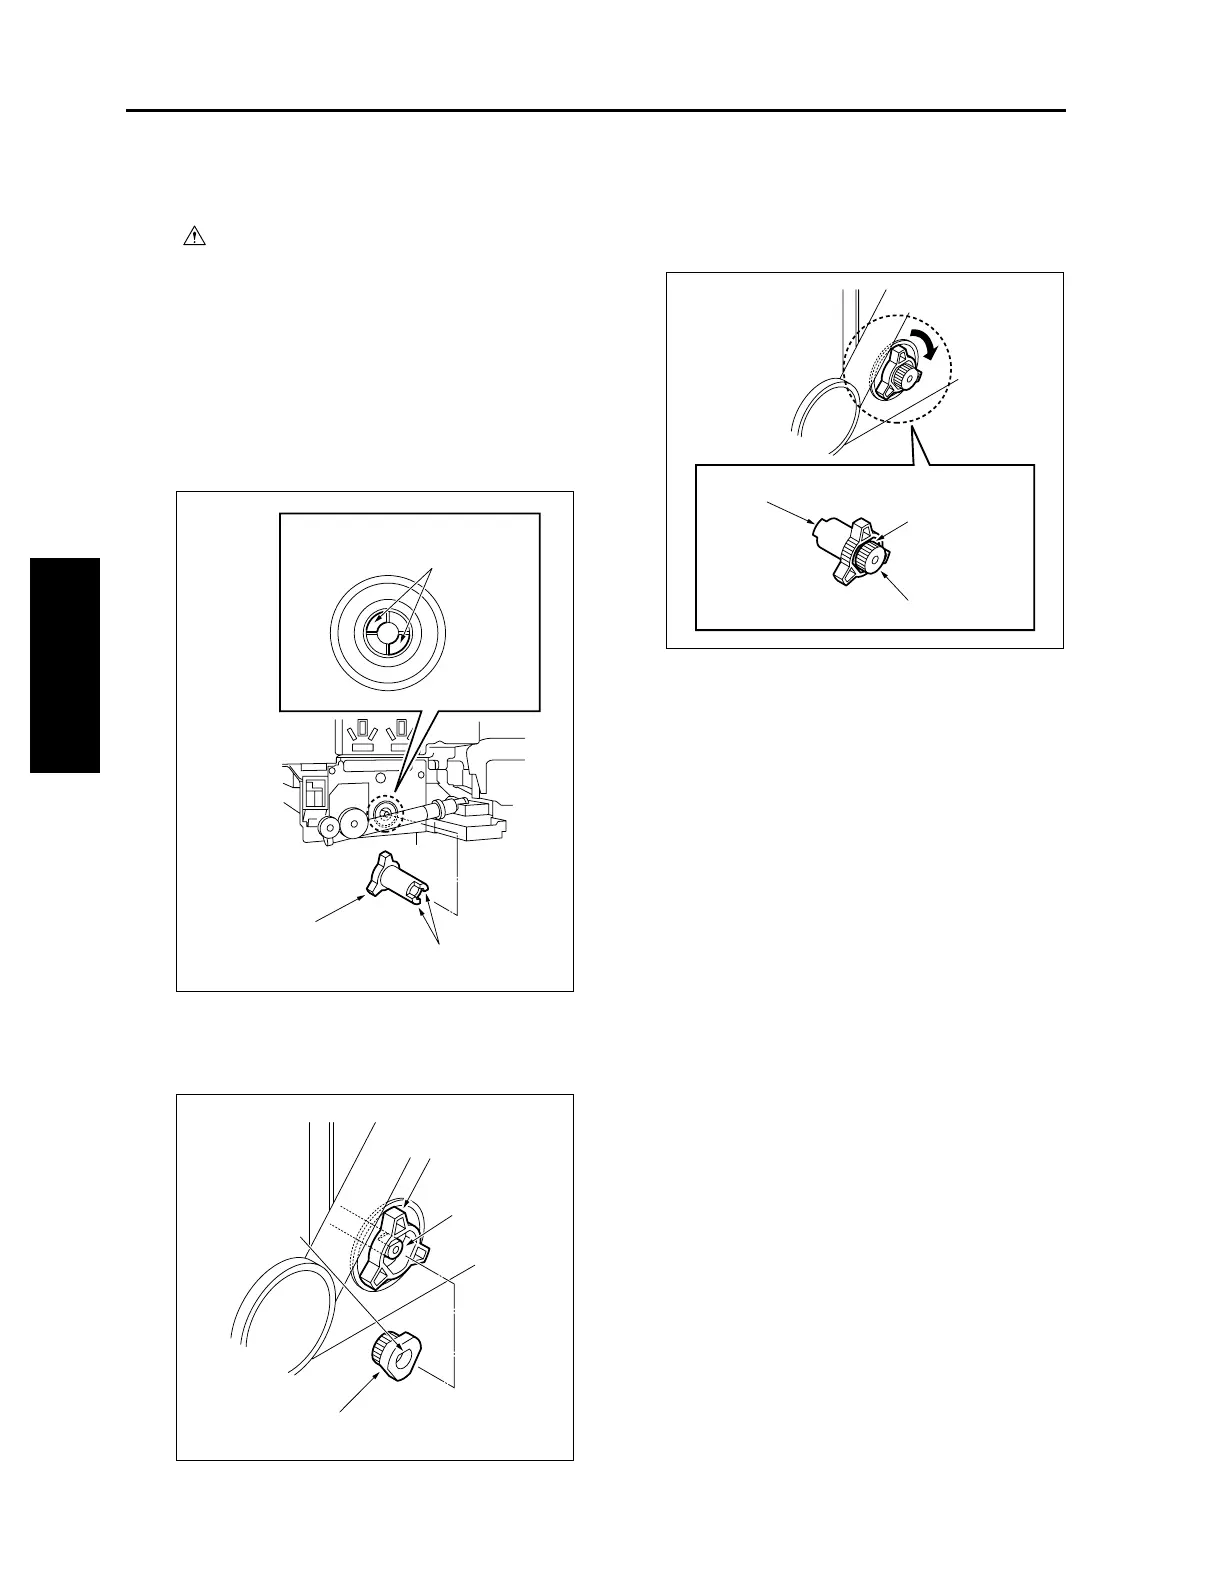
[2] Installing the Coupling
Caution:
Be sure the power cord has been
unplugged from the wall outlet.
a. Procedure
(1) Clean the outer surface of the drum coupling and
drum shaft coupling with drum cleaner and
cleaning pad.
(2) Insert the drum coupling aligning the protrusions
on the drum coupling with the notches in the
drum.
(3) Insert the drum shaft coupling so that the D cut
section of the drum shaft coupling matches the
drum shaft.
(4) Turn the head of the drum coupling clockwise so
that the flange section on the drum shaft coupling
is flush.
(5) Tighten with screw.
Drum notches
Drum coupling
Protrusions
Drum coupling
D cut section
Drum shaft
Drum shaft coupling
Drum coupling
Flange section
Drum shaft coupling

 Loading...


