FIXING UNIT
3-O-7
3 DIS./ASSEMBLY
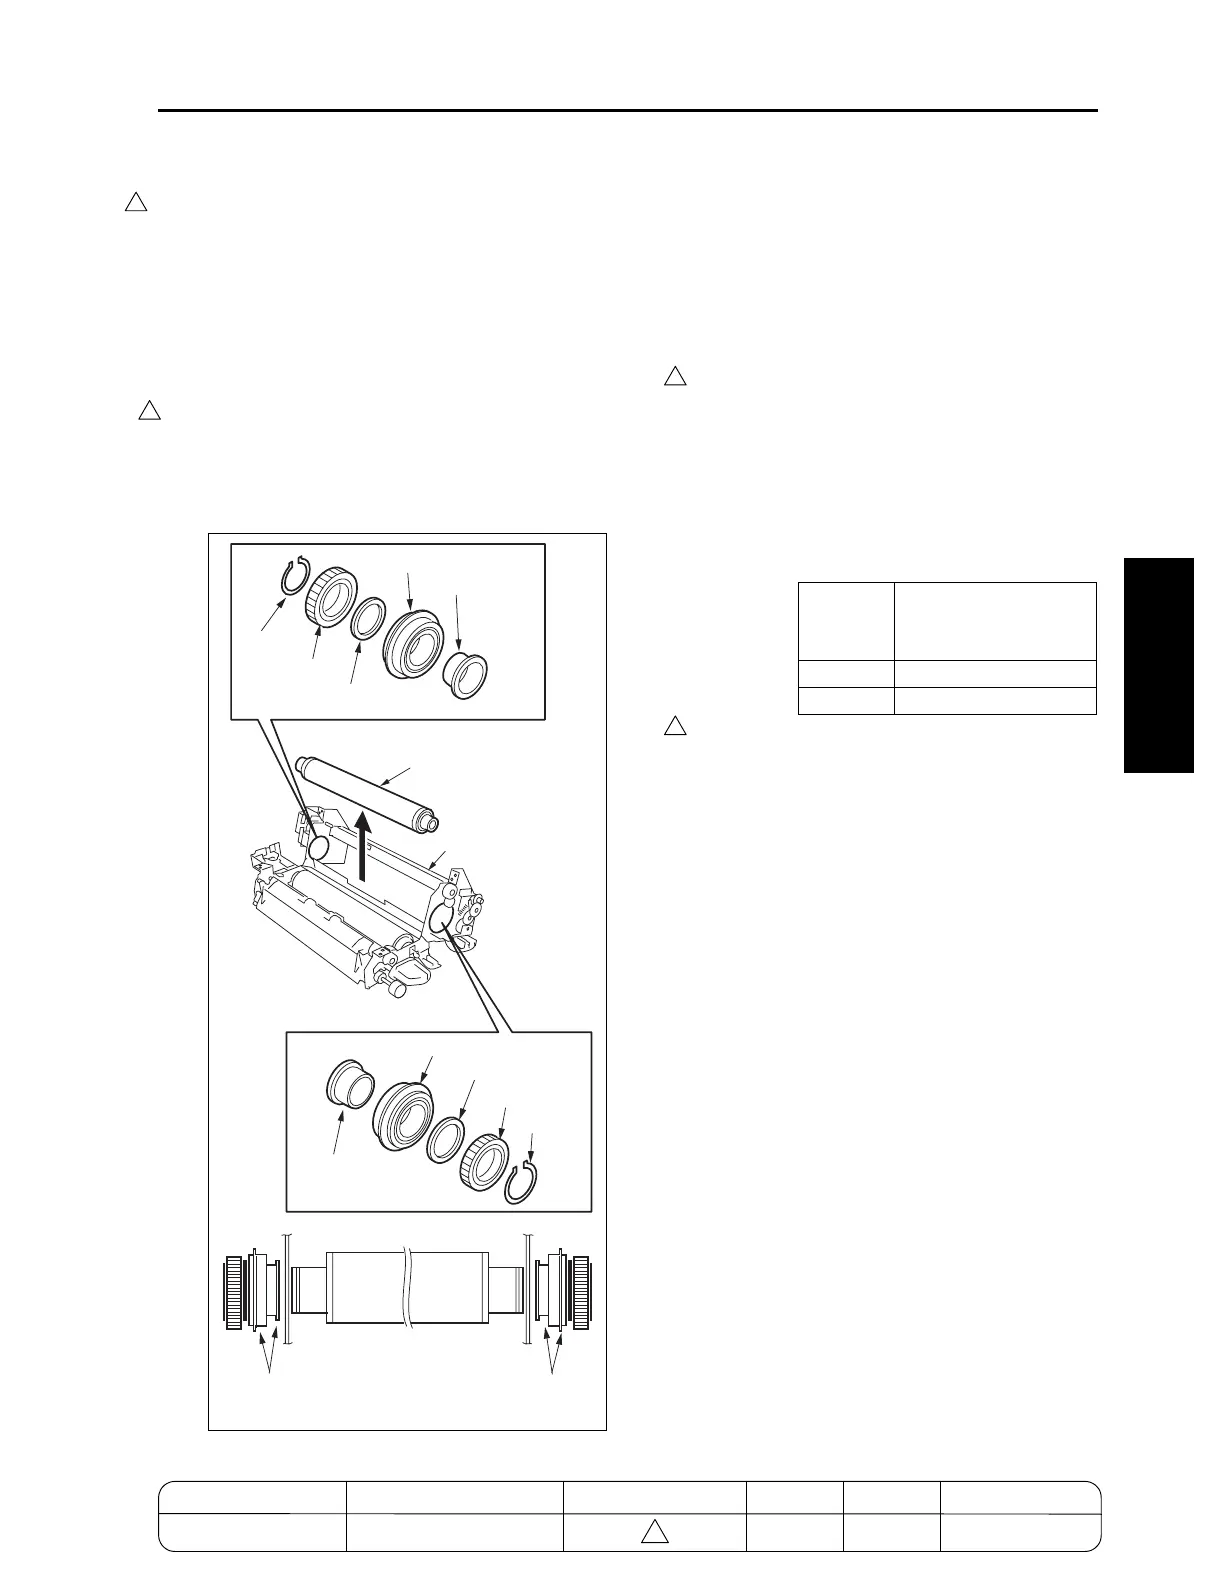
[9] Removing and Reinstalling the Fixing
Upper Roller and Fixing Drive Gear
a. Procedure
(1) Remove the fixing unit.
(2) Remove the fixing unit front cover.
(3) Remove the fixing separation claw (upper) unit.
(4) Open the fixing unit (top).
(5) Remove the fixing heater lamps (L2, L3).
(6) Remove the two C-rings, fixing drive gear, gear,
two bearings, two washers (7255/7272: one
washer) and two insulating sleeves from the fix-
ing upper roller.
(7) Remove the fixing upper roller from the frame.
(8) Reinstall the above parts following the removal
steps in reverse.
Caution1: Before reinstalling the insulating
sleeve, coat the inside with Tri-flow.
Caution2: Reinstall the bearings and insulating
sleeves with the collars facing the
directions shown in the figure.
Caution3: When reinstalling the fixing upper
roller, the Lot No. or the grooves
located on the circumference of the
roller edge should be directed
toward the front side.
And, refer to the following list for
checking the type of the fixing upper
rollers.
Caution4: The fixing drive gear of 7155/7165 is
different from that of 7255/7272.
The fixing drive gear of 7255/7272 is
designated for periodical replace-
ment parts.
4
7272ma3035
C-ring
Gear
Washer
Bearing
Insulating sleeve
Fixing upper roller
Fixing unit (upper)
C-ring
Fixing drive gear
Washer
(7155/7165 only)
Bearing
Insulating sleeve
Collars
Collars
Number of grooves on
the circumference of
the roller edge
7155/7255
2
7165/7272
None (only Lot No.)
4
4
MODEL MANUAL REVISED EDITION DATE PAGE METHOD
SERVICE MANUAL Dec. 2003
7155/7165/7255/7272
3-O-7 REPLACEMENT
4
4

 Loading...


