Maintenance
Repair
426 MagneMotion
Rockwell Automation Publication MMI-UM002F-EN-P - October 2022
AC Fuse
1. Turn off power to the MM LITE Power Supply and unplug the power cable.
NOTE: When unplugging the cable from the power supply, the lock on the connector
must be released before disconnecting the cable.
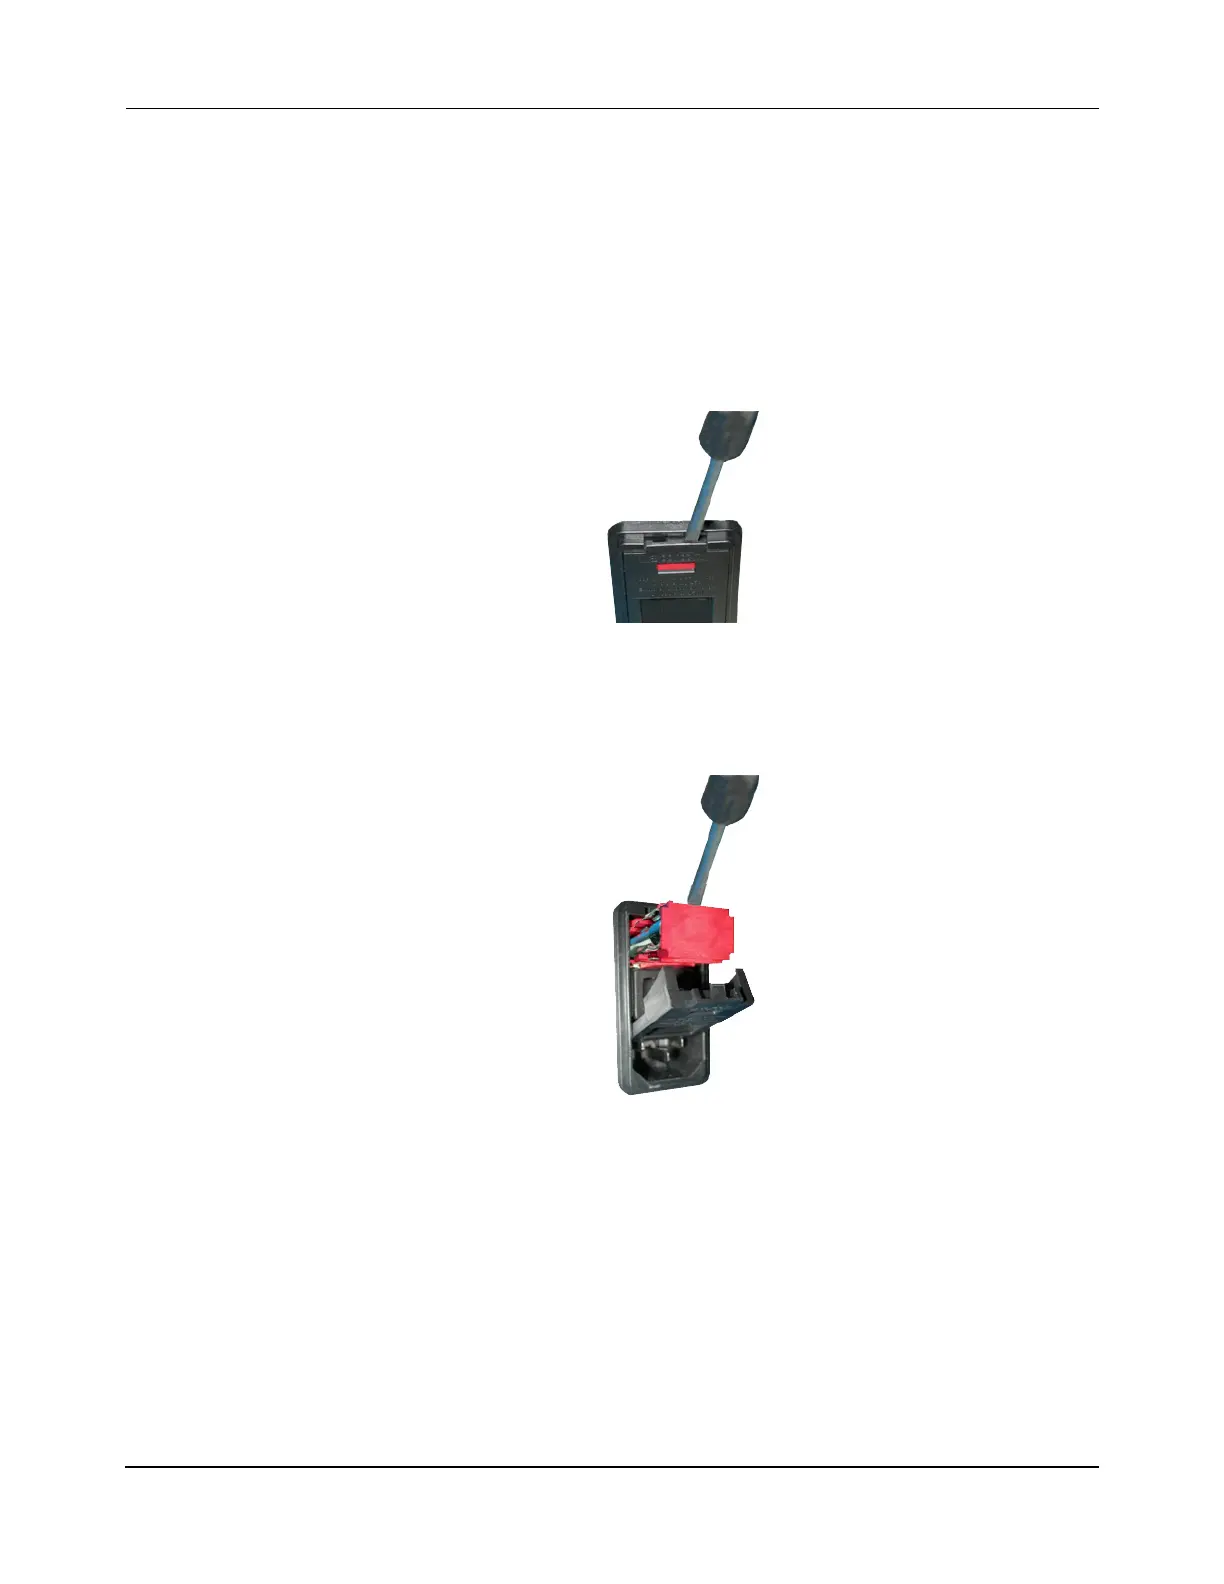
2. Open the Power Entry Module (PEM), as shown in Figure 7-32, by inserting a small
flat-blade screwdriver into the slot at the top and pressing outward as shown in
Figure 7-33.
Figure 7-33: Open the Power Entry Module
3. Remove the fuse module from the PEM by inserting a small flat-blade screwdriver
into the slot at the top and pressing outward as shown.
Figure 7-34: Remove the PEM Fuse Module
4. Remove the old fuse.
5. Install a new fuse.
Fuse Type Fuse Location
250V, 10 A time-lag fuses Single fuse on the right-hand side.
Single fuse on the left-hand side.
 Loading...


