FUSING UNIT
B064/B140 Series/G126 3-60 SM
3.9 FUSING UNIT
CAUTION
Switch off the machine, remove the plug from the power source, then allow
sufficient time for the fusing unit to cool before you remove it from the
machine.
3.9.1 FUSING UNIT
NOTE: Before you begin, spread a mat or some clean paper on the floor where
you intend to set the fusing unit.
Open the front door.
Pull out the transfer unit.
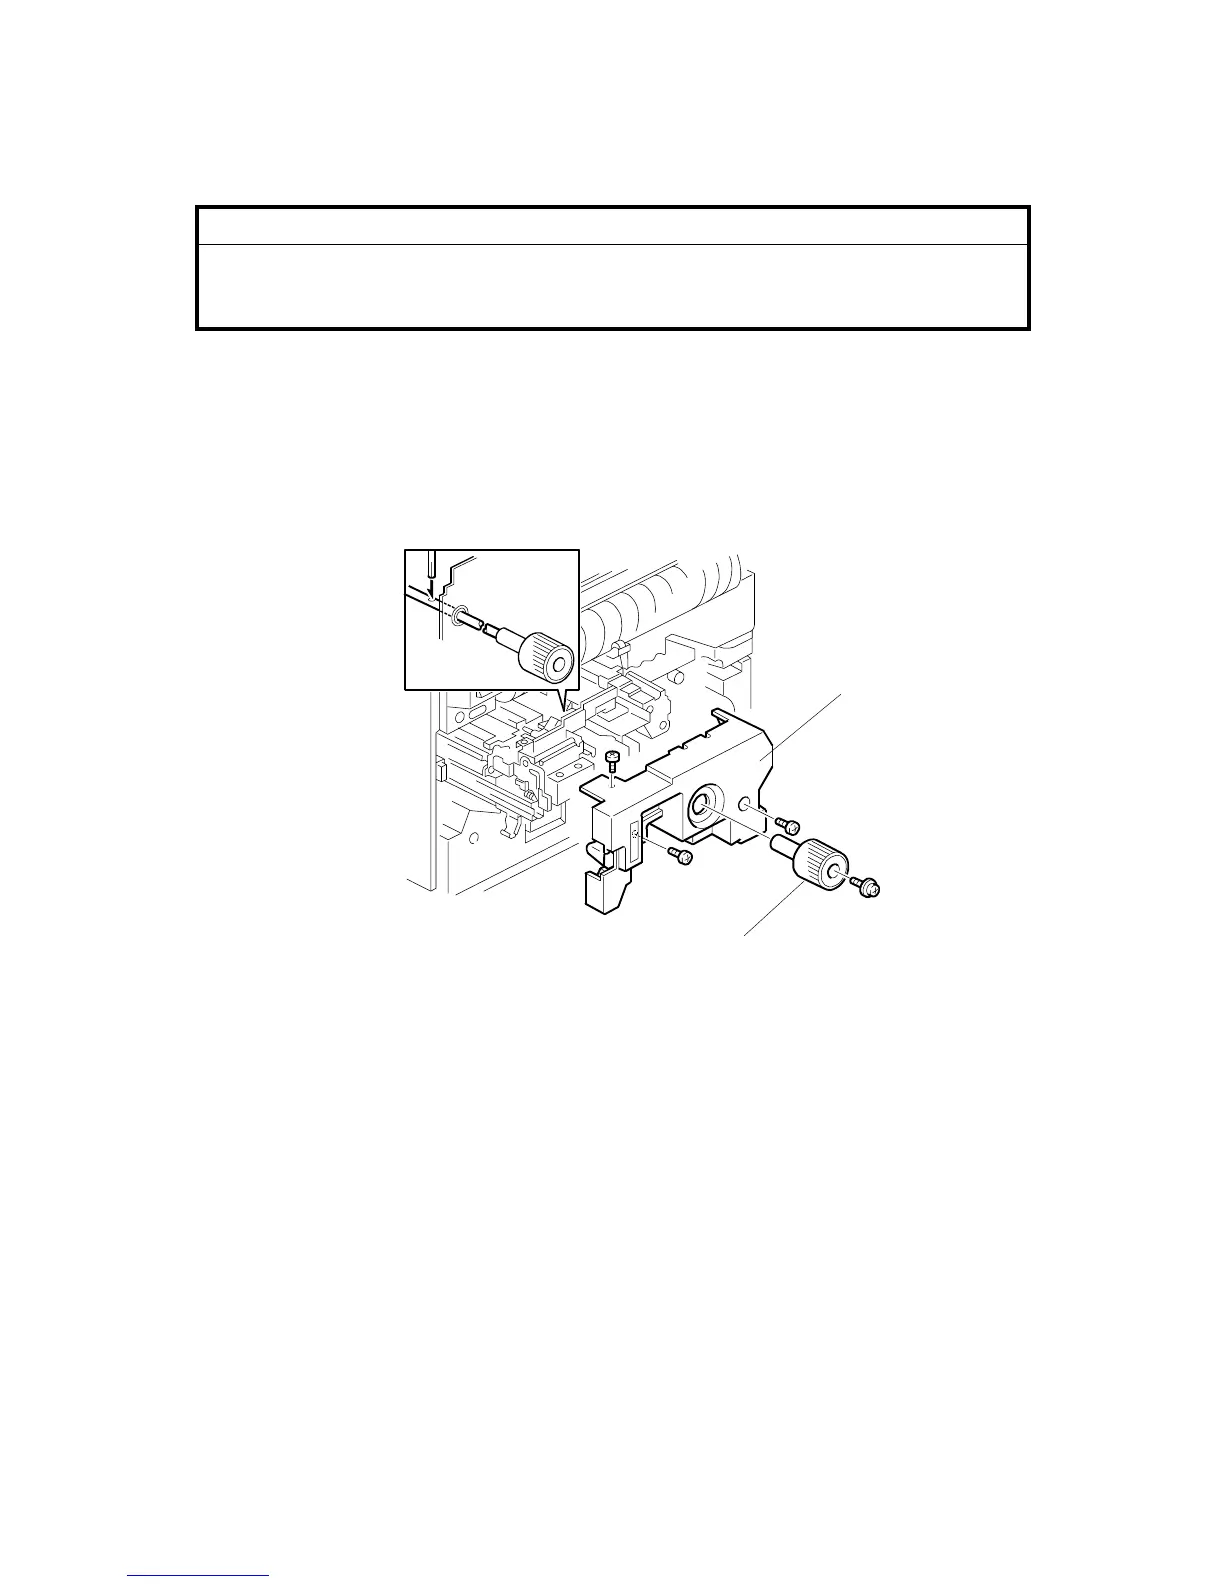
[A]: Knob ( x 1)
• Open D3 and D4 until you can see the hole in the shaft.
• Insert the tip of a screwdriver into the hole of the shaft to hold it in position
as the knob is turned to remove or install it.
[B]: Inner cover ( x 3)
• Pull the fusing unit release lever, then pull the unit out on the rail supports.
• At reassembly, make sure that the harness of the web drive motor is not
pinched by the inner cover.
B140R979.WMF
[A]
[B]
 Loading...