Emission Control Devices: 1B-13
Installation
Install the EVAP system purge control solenoid valve in
the reverse order of removal. Pay attention to the
following point:
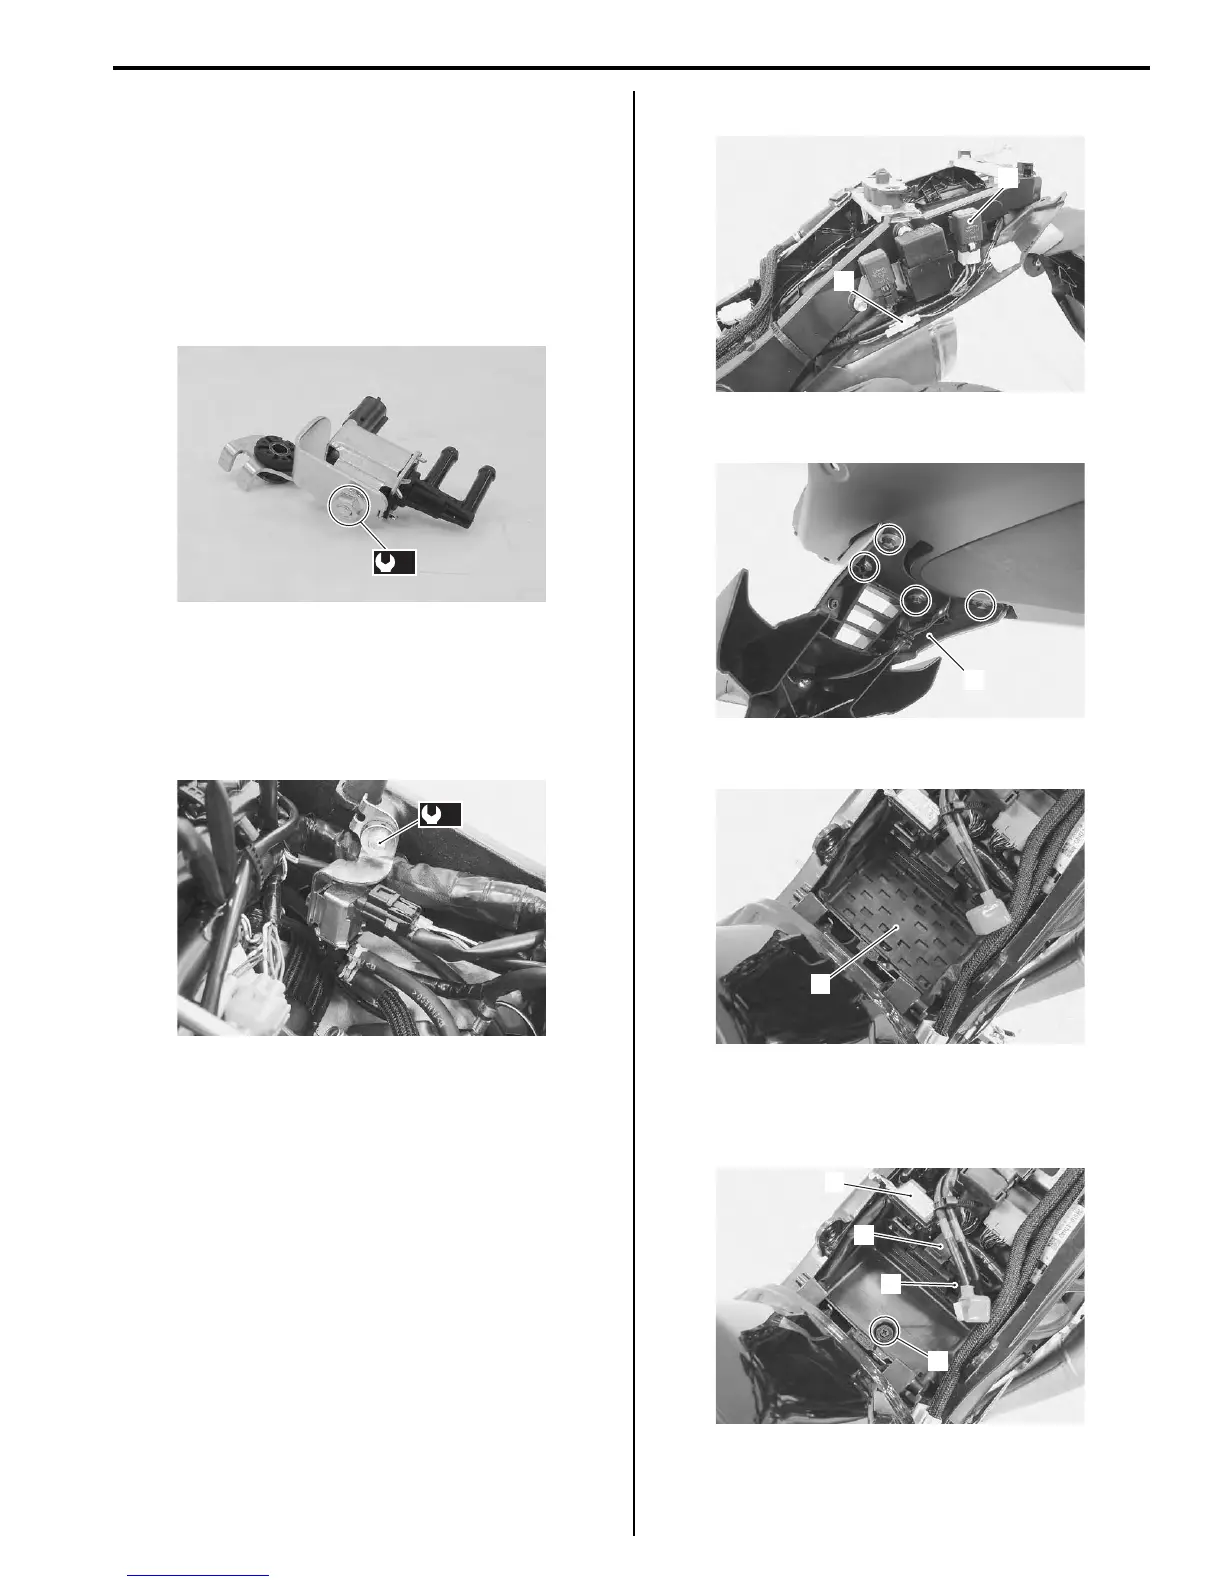
• Tighten the EVAP system purge control solenoid valve
mounting nut to the specified torque.
Tightening torque
EVAP system purge control solenoid valve
mounting nut (a): 6.5 N·m (0.65 kgf-m, 4.5 lbf-ft)
• Tighten the EVAP system purge control solenoid valve
bracket bolt.
Tightening torque
EVAP system purge control solenoid valve
bracket bolt (b): 10 N·m (1.0 kgf-m, 7.0 lbf-ft)
Fuel Shut-off Valve
Removal
1) Remove the front seat. Refer to “Exterior Parts
Removal and Installation” in Section 9D (Page 9D-
6).
2) Remove the battery. Refer to “Battery Removal and
Installation” in Section 1J (Page 1J-11).
3) Remove the ECM. Refer to “ECM Removal and
Installation” in Section 1C (Page 1C-1).
4) Remove the frame cover assembly. Refer to
“Exterior Parts Removal and Installation” in Section
9D (Page 9D-6).
5) Disconnect the cooling fan relay (1) from the rear
fender (front).
6) Disconnect the license plate light coupler (2).
7) Remove the rear fender (rear) (3).
8) Remove the battery mat (4).
9) Disconnect the fuse box (5), AP sensor (6) and TO
sensor (7) from the rear fender (front).
10) Remove the rear fender (front) mounting bolt (8).
(a)
I947H1120030-01
(b)
I947H1120041-01
1
2
I947H1120031-01
3
I947H1120032-01
4
I947H1120033-01
5
6
7
8
I947H1120034-01
Manuals by Motomatrix / The Solution For Lost Motorcycle Coded Keys
email: info@motomatrix.co.uk / www.motomatrix.co.uk

 Loading...


