4B-2 Front Brakes:
Front Brake Pad Inspection
B947H14206002
The extent of brake pads wear can be checked by
observing the grooved limit line “A” on the pads. When
the wear exceeds the grooved limit line, replace the
pads with new ones. Refer to “Front Brake Pad
Replacement” (Page 4B-2).
CAUTION
!
Replace the brake pad as a set, otherwise
braking performance will be adversely
affected.
Front Brake Pad Replacement
B947H14206003
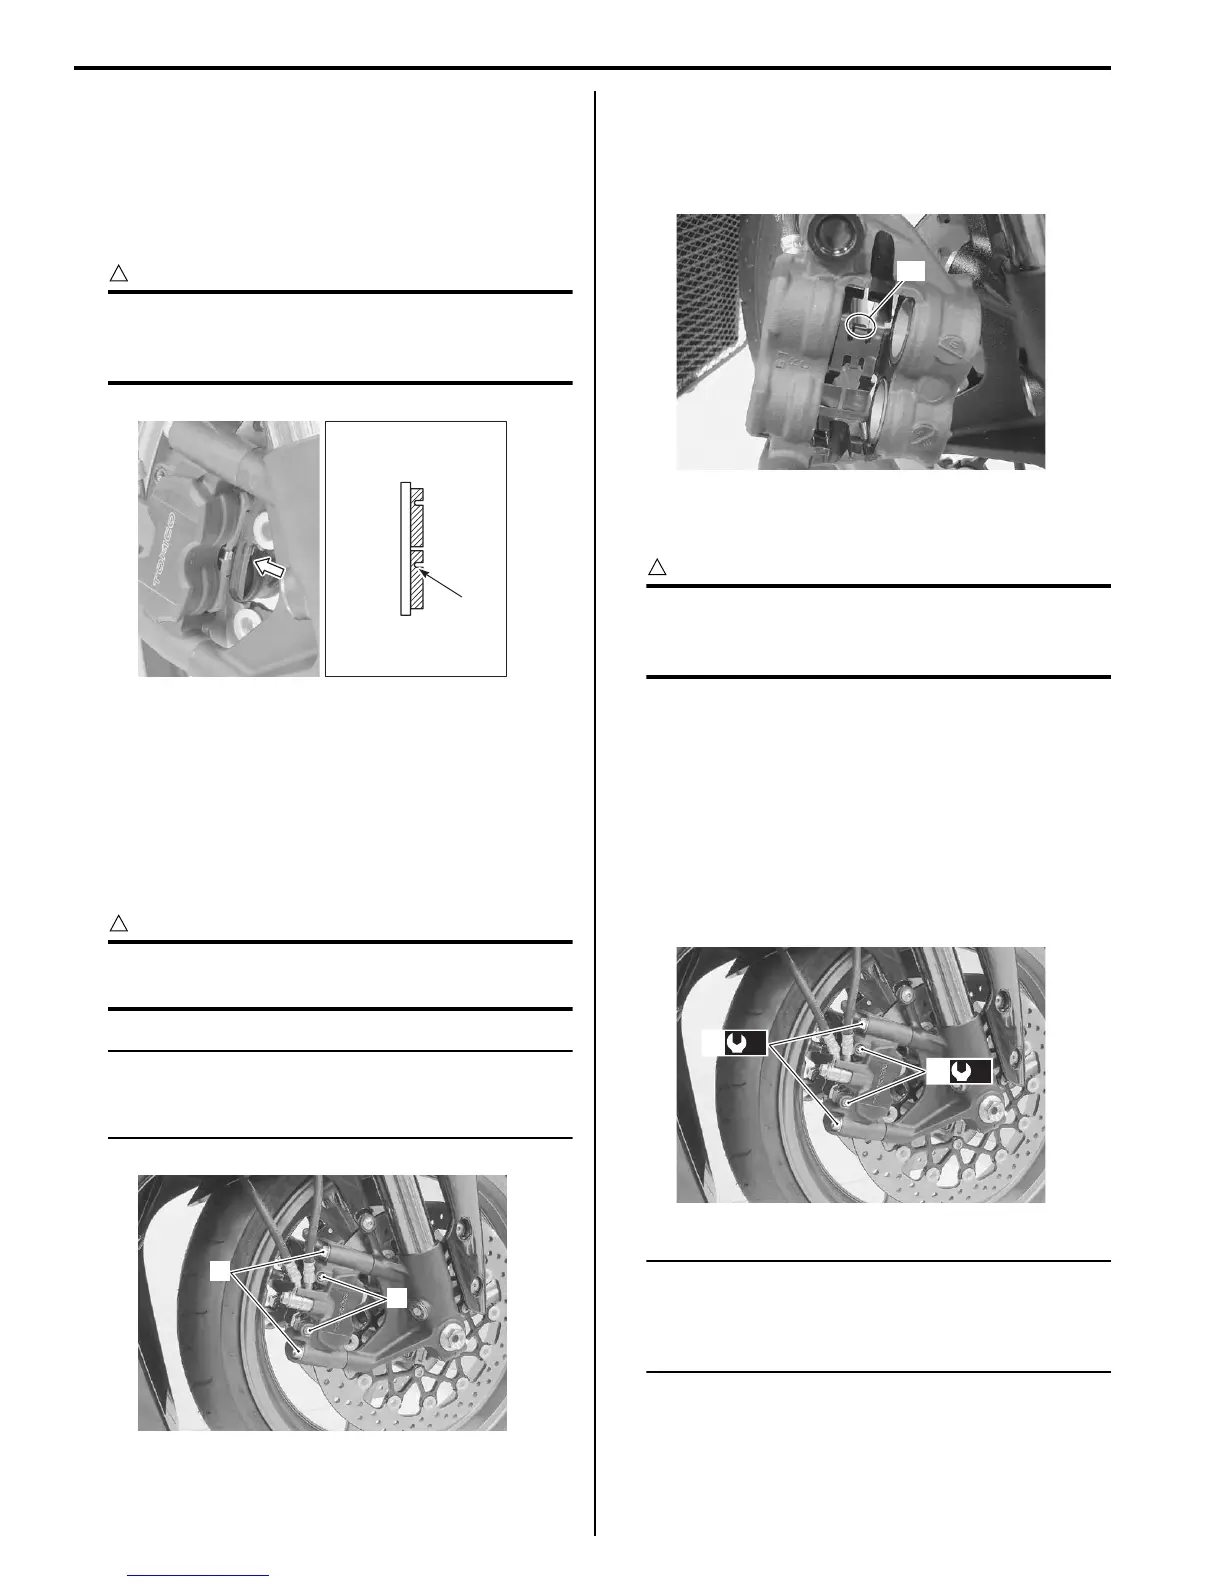
1) Loosen the pad mounting pins (1).
2) Remove the brake caliper by removing the caliper
mounting bolts (2).
3) Remove the pad mounting pins (1), brake pads and
spring.
CAUTION
!
Do not operate the brake lever while the pads
are removed.
NOTE
When removing the pads and pad spring,
push the pistons all the way into the brake
caliper.
4) Clean up the caliper especially around the caliper
pistons.
5) When installing the spring to caliper, bring its wider
pawl “A” to top side.
6) Install new brake pads and temporarily tighten the
pad mounting pins.
CAUTION
!
Replace the brake pads as a set, otherwise
braking performance will be adversely
affected.
7) Install the brake caliper.
8) Tighten the front brake caliper mounting bolts (2) and
front brake pad mounting pins (1) to the specified
torque.
Tightening torque
Front brake caliper mounting bolt (a): 39 N·m (
3.9 kgf-m, 28.0 lbf-ft)
Front brake pad mounting pin (b): 15 N·m (1.5
kgf-m, 11.0 lbf-ft)
NOTE
After replacing the brake pads, pump the
brake lever several times to check for proper
brake operation and then check the brake
fluid level.
“A”
I947H1420001-02
1
2
I947H1420002-01
“A”
I947H1420018-01
(a)
2
(b)
1
I947H1420003-02
Manuals by Motomatrix / The Solution For Lost Motorcycle Coded Keys
email: info@motomatrix.co.uk / www.motomatrix.co.uk

 Loading...


