Exhaust System: 1K-6
EXCV Cable Removal and Installation
B947H11B06003
Removal
1) Turn the ignition switch OFF.
2) Remove the front seat. Refer to “Exterior Parts
Removal and Installation” in Section 9D (Page 9D-
6).
3) Remove the left side cowling. Refer to “Exterior
Parts Removal and Installation” in Section 9D
(Page 9D-6).
4) Connect the special tool (Mode select switch) to the
dealer mode coupler. Refer to “Self-Diagnostic
Procedures” in Section 1A (Page 1A-12).
5) After turning the mode select switch ON, turn the
ignition switch ON.
Special tool
(A): 09930–82720 (Mode selection switch)
6) Check that the cable slots of the EXCVA pulley
comes to the middle (Adjustment position) “A”.
7) Turn the ignition switch OFF.
CAUTION
!
Before removing the EXCV cables, be sure to
set the EXCVA pulley to the adjustment
position.
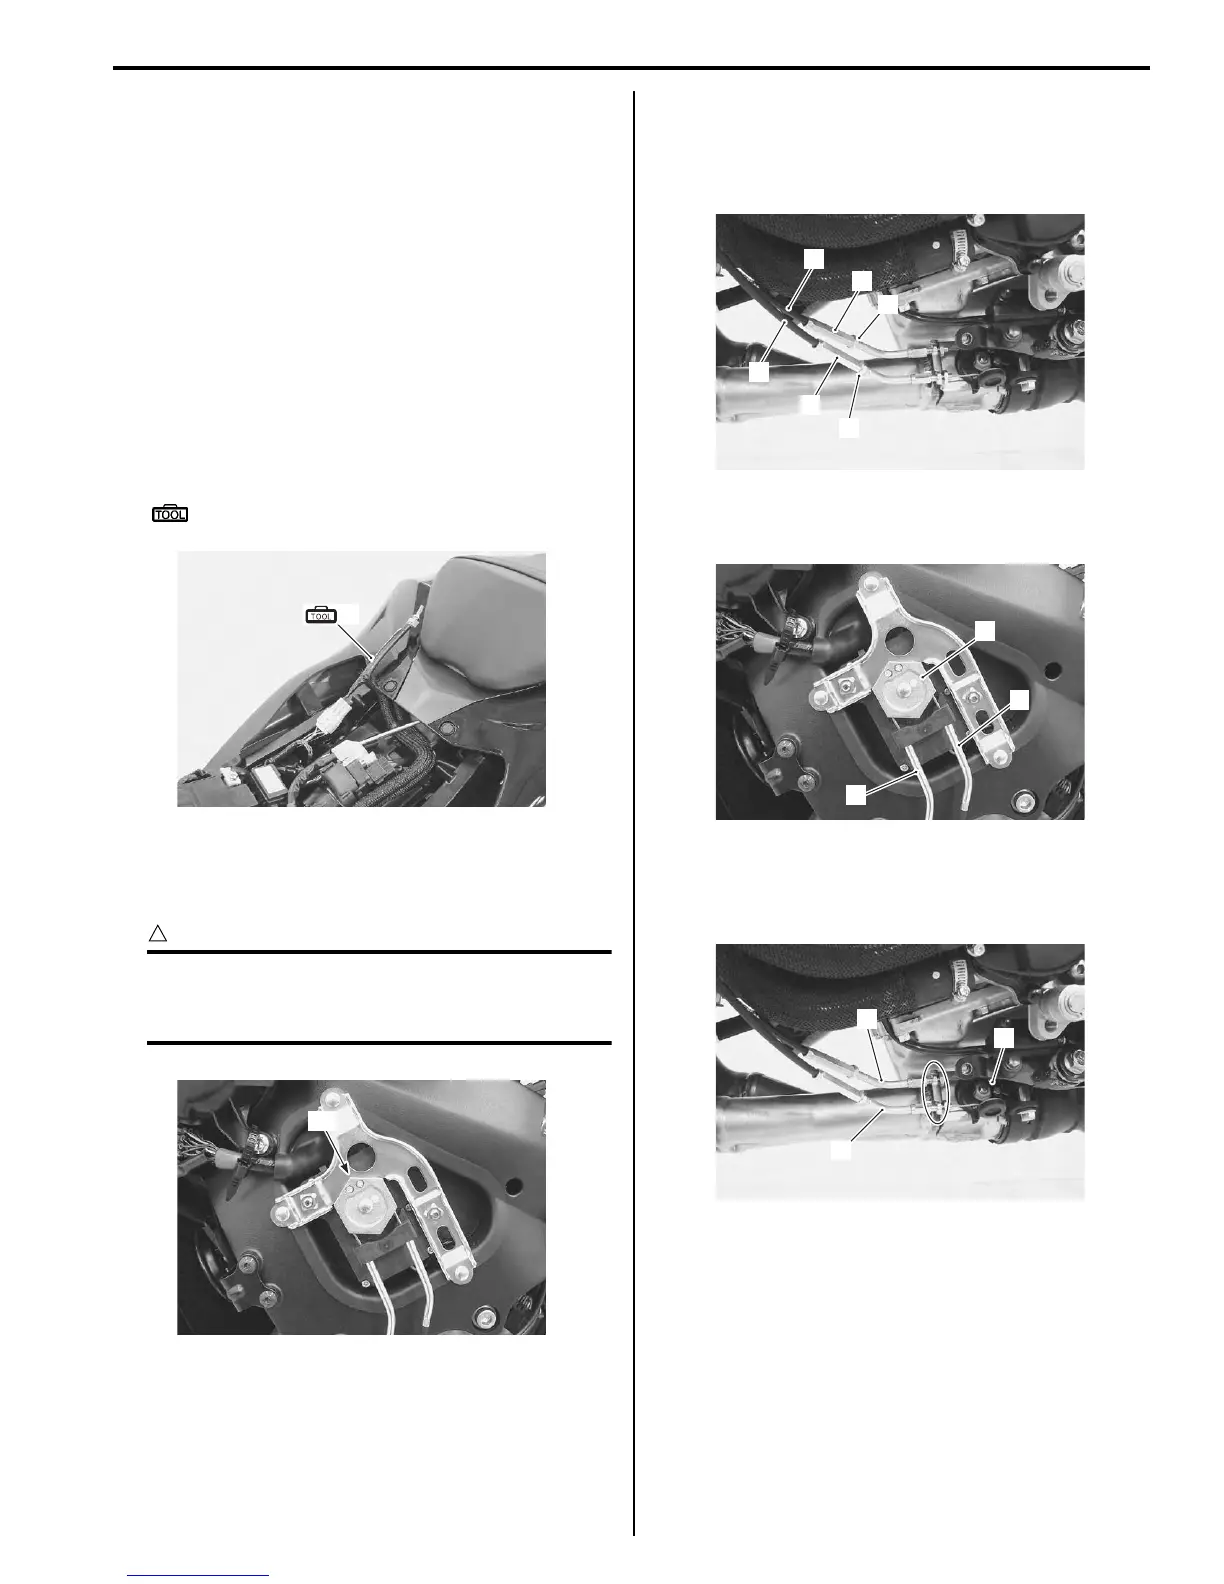
8) Loosen the lock-nut (1) on the No. 2 cable (2) and
turn in the cable adjuster (3) fully.
9) Loosen the lock-nut (4) on the No. 1 cable (5) and
turn in the cable adjuster (6) fully.
10) Disconnect the No. 2 cable (2) and No. 1 cable (5)
from the EXCVA pulley (7).
11) Loosen the lock-nuts.
12) Disconnect the No. 2 cable (2) and No. 1 cable (5)
from the EXCV pulley (8).
(A)
I947H11B0006-01
“A”
I947H11B0007-01
1
2
3
5
6
4
I947H11B0008-01
2
5
7
I947H11B0009-02
2
5
8
I947H11B0010-02
Manuals by Motomatrix / The Solution For Lost Motorcycle Coded Keys
email: info@motomatrix.co.uk / www.motomatrix.co.uk

 Loading...


