Front Suspension: 2B-2
Front Fork Removal and Installation
B947H12206002
NOTE
The right and left front forks are installed
symmetrically and therefore the removal
procedure for one side is the same as that for
the other side.
Removal
1) Remove the front wheel. Refer to “Front Wheel
Assembly Removal and Installation” in Section 2D
(Page 2D-4).
CAUTION
!
• Make sure that the motorcycle is
supported securely.
• Do not operate the front brake lever with
the front wheel removed.
2) Disconnect the brake hoses from the clamps on the
front fender.
3) Remove the reflex reflectors (1). (Except for E-02,
19, 51)
4) Remove the front fender (2) by removing the bolts.
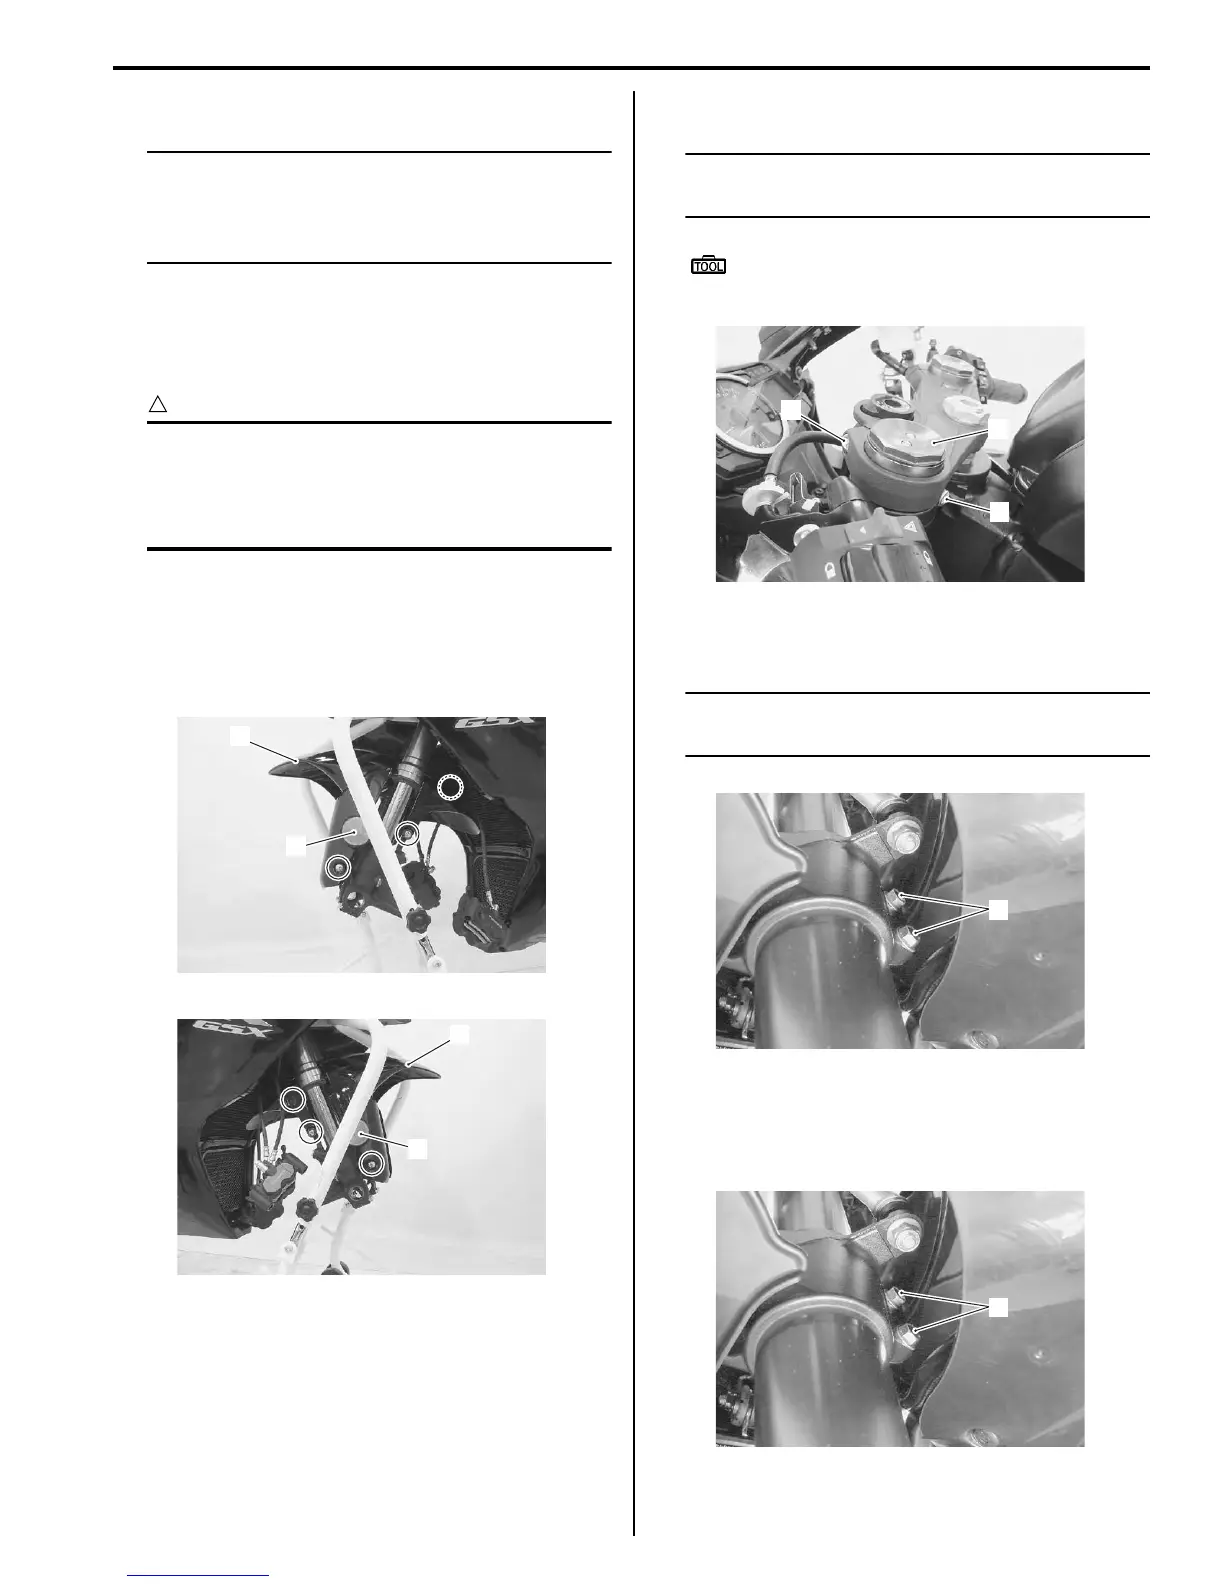
5) Loosen the front fork upper clamp bolt (3).
6) Loosen the handlebar clamp bolt (4).
NOTE
Slightly loosen the front fork cap (5) to
facilitate later disassembly.
Special tool
: 09941–53670 (Front fork cap socket
wrench (45 mm))
7) Loosen the front fork lower clamp bolts (6) and
remove the front fork.
NOTE
Hold the front fork by hand to prevent it
sliding out of the steering stem.
Installation
1) Set the front fork to the steering stem lower bracket
temporarily by tightening the lower clamp bolts (1).
1
2
I947H1220002-01
1
2
I947H1220003-01
3
5
4
I947H1220004-01
6
I947H1220005-01
1
I947H1220006-01
Manuals by Motomatrix / The Solution For Lost Motorcycle Coded Keys
email: info@motomatrix.co.uk / www.motomatrix.co.uk

 Loading...


