1H-11 Ignition System:
Ignition Switch Removal and Installation
B947H11806008
Removal
1) Remove the air cleaner box. Refer to “Air Cleaner
Box Removal and Installation” in Section 1D
(Page 1D-7).
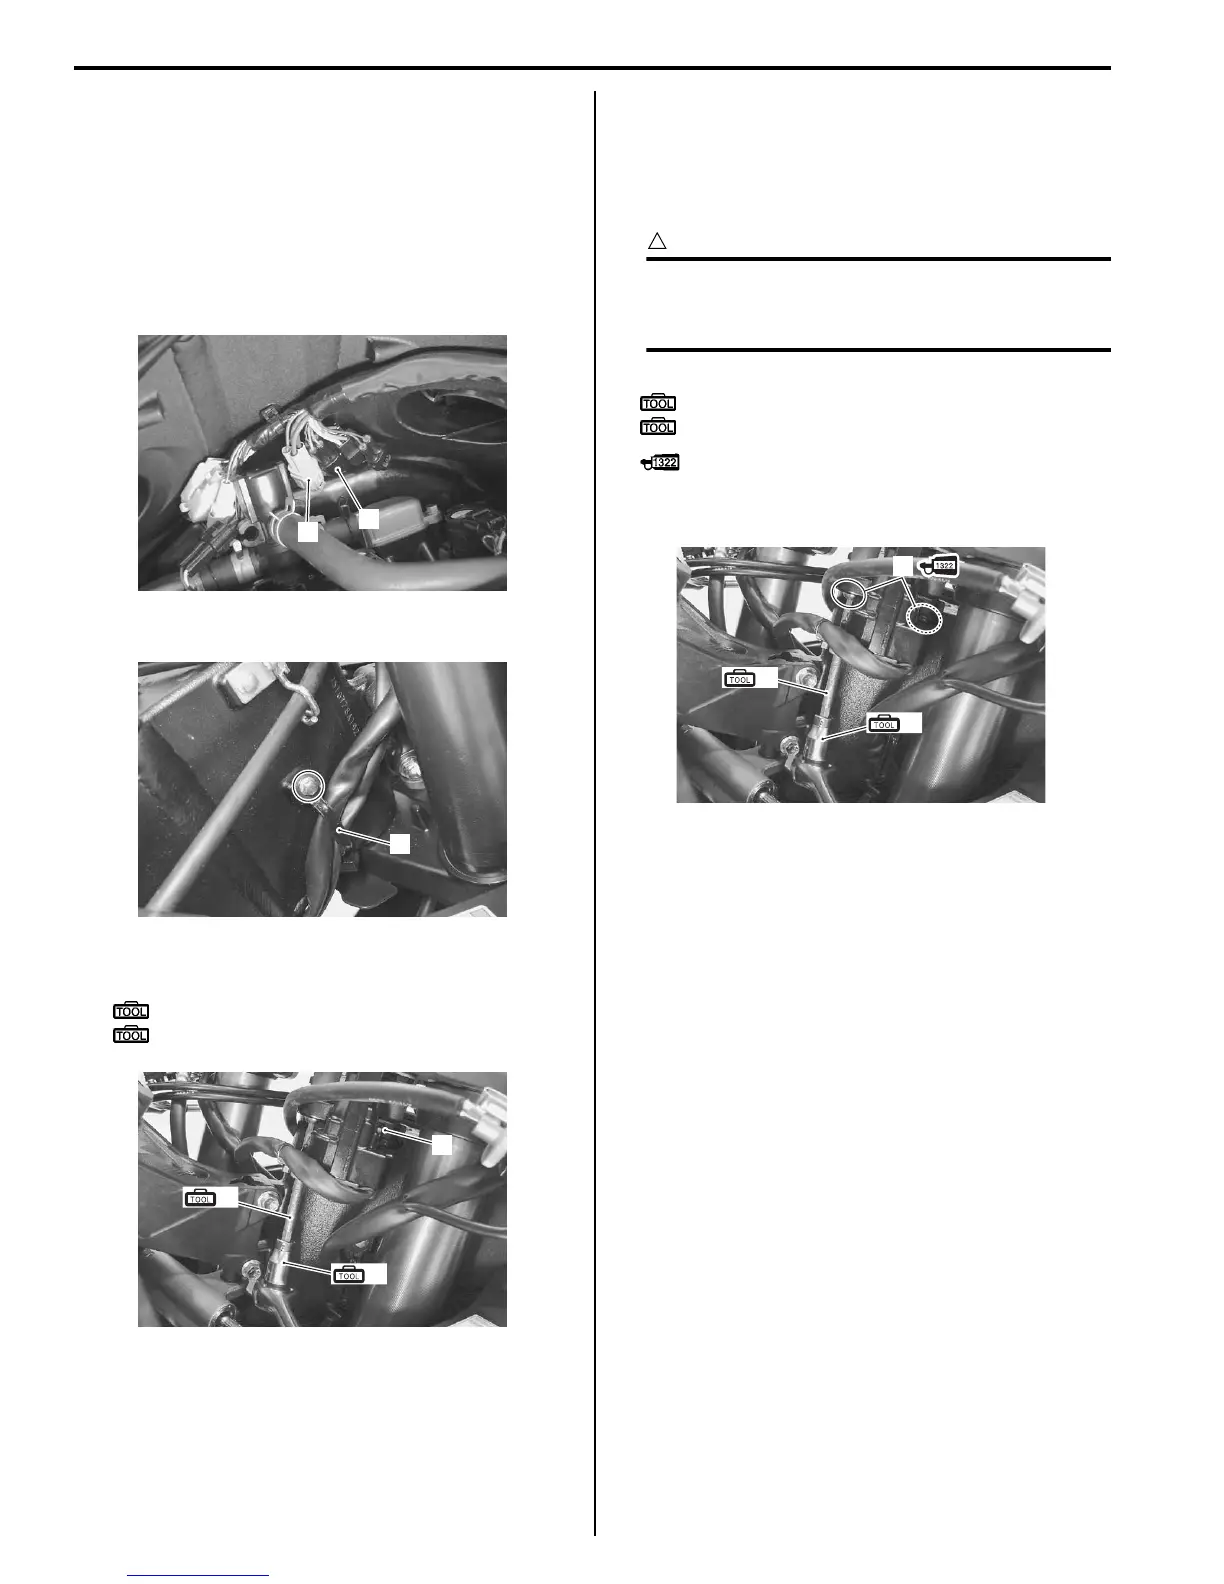
2) Disconnect the ignition switch lead wire coupler (1).
3) Disconnect the immobilizer lead wire coupler (2).
(For E-02, 19, 24, 51)
4) Remove the harness clamp (3).
5) Remove the ignition switch (4) with the special tools.
Special tool
(A): 09930–11920 (Torx bit (JT40H))
(B): 09930–11940 (Torx bit holder)
Installation
Install the ignition switch in the reverse order of removal.
Pay attention to the following points:
• Tighten the ignition switch mounting bolts (1), right
and left with the special tools.
CAUTION
!
When reusing the ignition switch bolts, clean
the threaded part and apply a thread lock to
them.
Special tool
(A): 09930–11920 (Torx bit (JT40H))
(B): 09930–11940 (Torx bit holder)
: Thread lock cement 99000–32110
(THREAD LOCK CEMENT SUPER “1322” or
equivalent)
2
1
I947H1180014-01
3
I947H1180016-01
(A)
(B)
4
I947H1180017-01
(A)
(B)
1
I947H1180018-01
Manuals by Motomatrix / The Solution For Lost Motorcycle Coded Keys
email: info@motomatrix.co.uk / www.motomatrix.co.uk

 Loading...


