3A-2 Drive Chain / Drive Train / Drive Shaft:
Engine Sprocket Removal and Installation
B947H13106002
Removal
1) Remove the gearshift link arm (1) from the gearshift
shaft.
NOTE
Mark the gearshift shaft head at which the
gearshift link arm slit set for correct
reinstallation.
2) Remove the speed sensor (2).
3) Remove the engine sprocket cover (3).
4) Support the motorcycle with a jack or wooden block.
5) Loosen the rear axle nut (4) and left and right chain
adjuster lock-nuts (5).
6) Loosen the chain adjusters (6) to provide additional
chain slack.
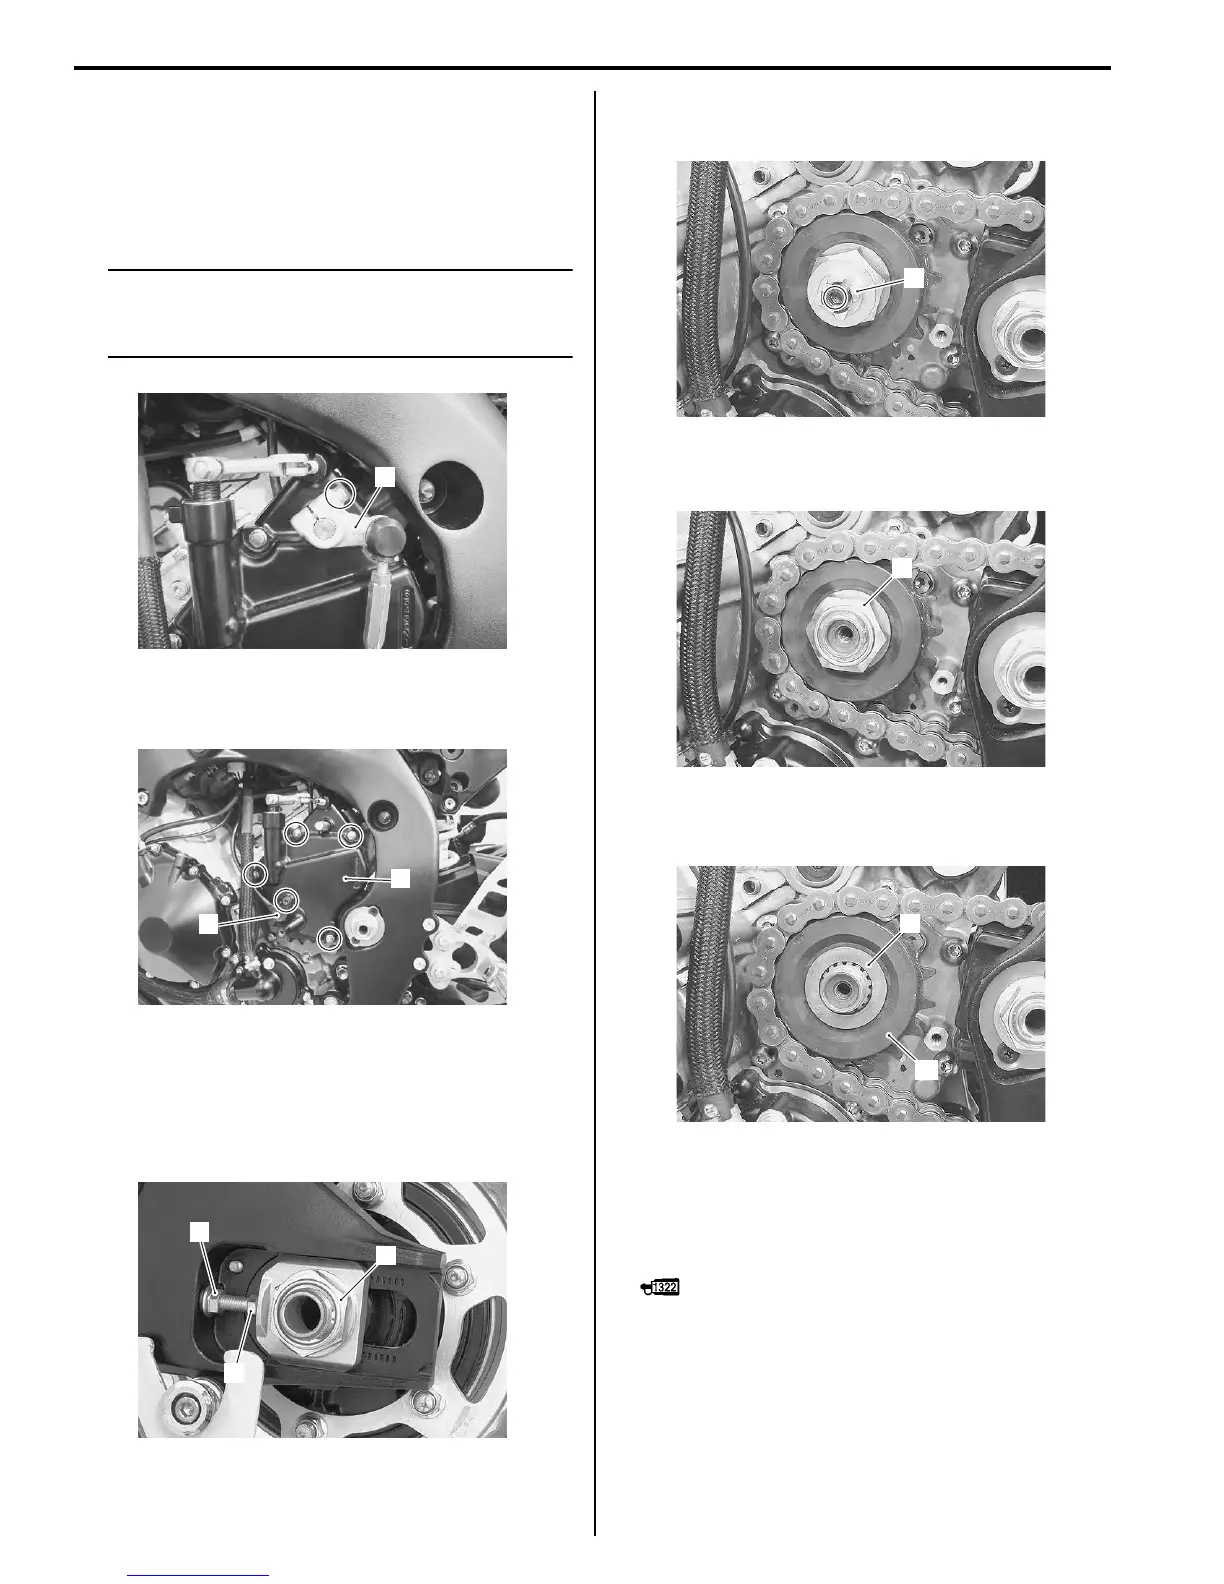
7) Remove the speed sensor rotor (7) by removing its
bolt while depressing the rear brake pedal.
8) Remove the engine sprocket nut (8) while
depressing the rear brake pedal.
9) Remove the washer (9).
10) Remove the engine sprocket (10).
Installation
Install the engine sprocket in the reverse order of
removal. Pay attention to the following points:
• Apply thread lock to the driveshaft.
: Thread lock cement 99000–32110
(THREAD LOCK CEMENT SUPER “1322” or
equivalent)
1
I947H1310018-01
2
3
I947H1310019-01
4
5
6
I947H1310020-01
7
I947H1310021-01
8
I947H1310022-01
9
10
I947H1310023-01
Manuals by Motomatrix / The Solution For Lost Motorcycle Coded Keys
email: info@motomatrix.co.uk / www.motomatrix.co.uk

 Loading...


