Brake Control System and Diagnosis: 4A-5
Front Brake
NOTE
If air is trapped in the master cylinder, bleed
air from the master cylinder first in the same
manner as follows. Refer to “Front Brake
Master Cylinder Assembly Removal and
Installation” (Page 4A-10).
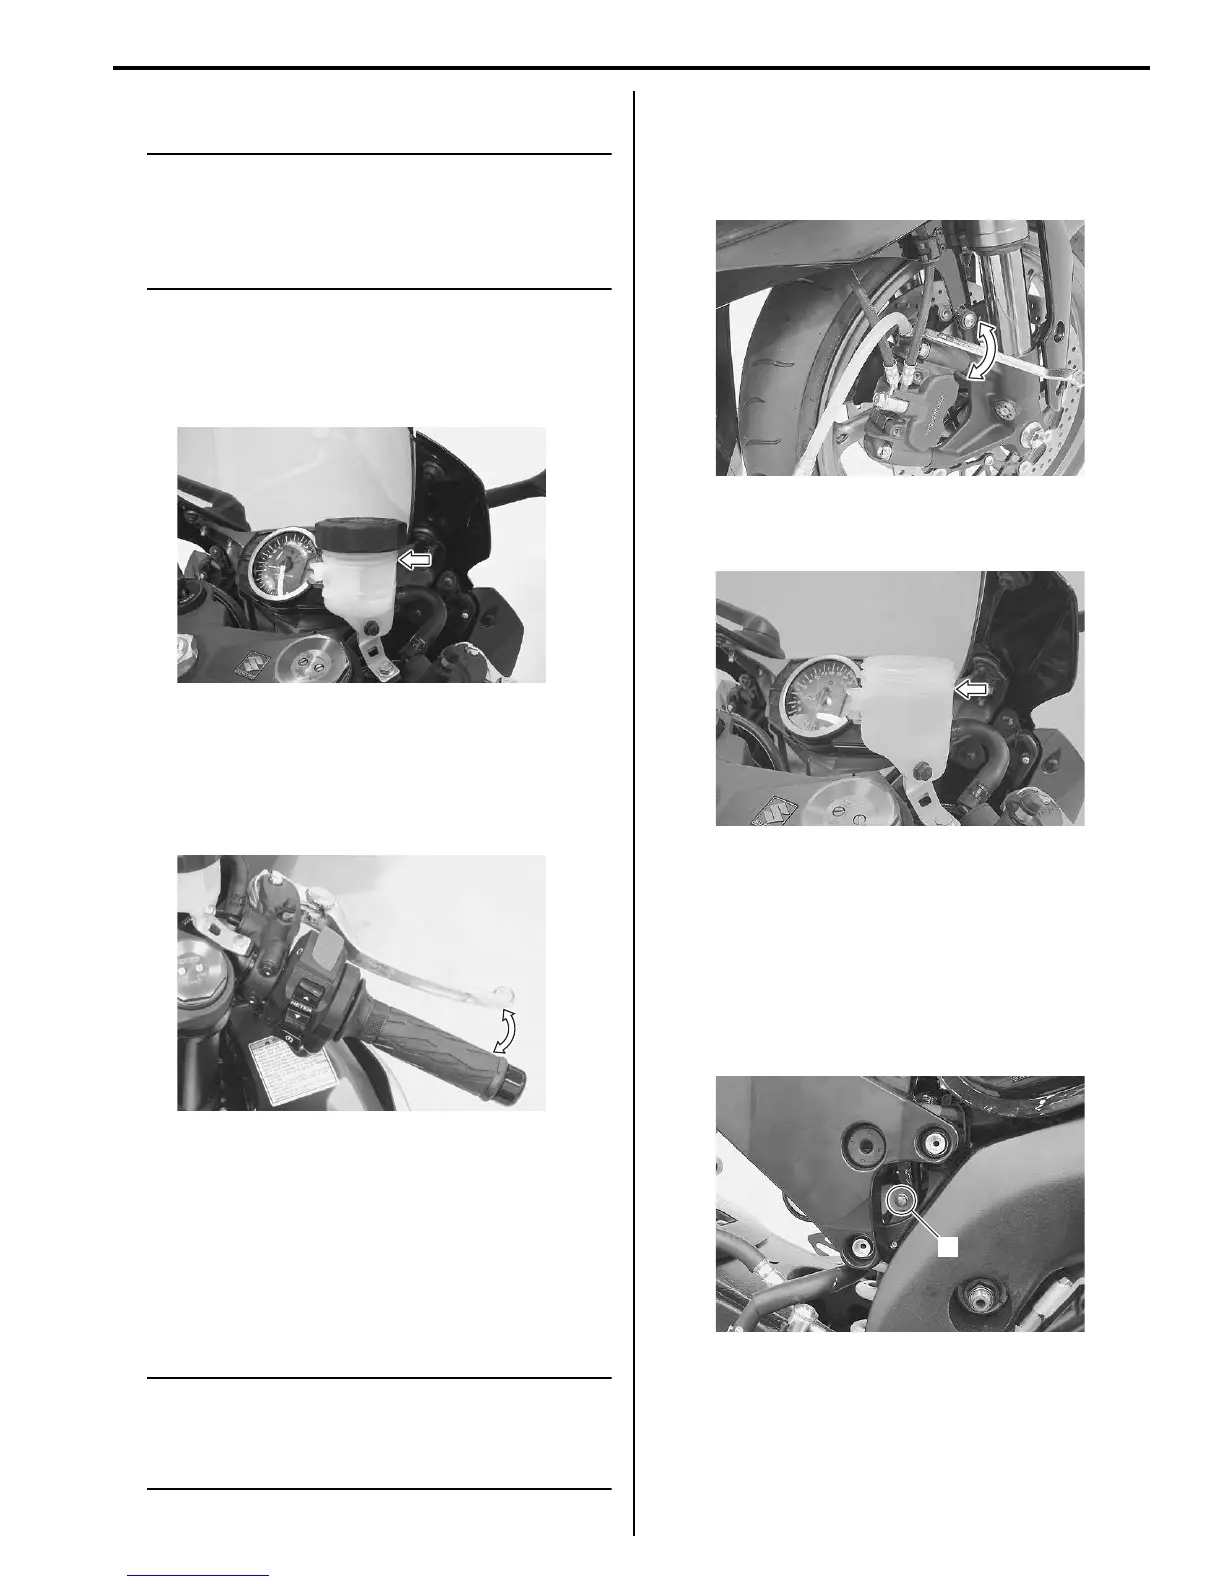
1) Remove the reservoir cap and diaphragm.
2) Fill the reservoir with brake fluid to the upper line of
the reservoir. Place the reservoir cap to prevent dirt
from entering.
3) Attach a hose to the air bleeder valve, and insert the
free end of the hose into a receptacle.
4) Squeeze and release the brake lever several times
in rapid succession and squeeze the lever fully
without releasing it.
5) Loosen the air bleeder valve by turning it a quarter of
a turn so that the brake fluid runs into the receptacle,
this will remove the tension of the brake lever
causing it to touch the handlebar grip.
6) Close the air bleeder valve, pump and squeeze the
lever, and open the valve.
7) Repeat this process until the fluid flowing into the
receptacle no longer contains air bubbles.
NOTE
While bleeding the brake system, replenish
the brake fluid in the reservoir as necessary.
Make sure that there is always some fluid
visible in the reservoir.
8) Close the air bleeder valve and disconnect the hose.
Tightening torque
Air bleeder valve (Front caliper): 7.5 N·m (0.75
kgf-m, 5.5 lbf-ft)
9) Fill the reservoir with brake fluid to the upper line of
the reservoir.
10) Install the diaphragm and reservoir cap.
Rear Brake
1) Remove the right side frame cover. Refer to “Exterior
Parts Removal and Installation” in Section 9D
(Page 9D-6).
2) Remove the rear brake fluid reservoir mounting bolt
(1).
3) Remove the reservoir cap and diaphragm.
I947H1410043-01
I947H1410003-02
I947H1410004-01
I947H1410005-01
1
I947H1410048-01
Manuals by Motomatrix / The Solution For Lost Motorcycle Coded Keys
email: info@motomatrix.co.uk / www.motomatrix.co.uk

 Loading...


