1K-13 Exhaust System:
12) Remove the exhaust pipe assembly by removing the
exhaust pipe bolts.
CAUTION
!
Take care not to bend the radiator/oil cooler
fins.
NOTE
Support the exhaust pipe assembly to
prevent it from falling.
13) Remove the exhaust pipe gaskets (11).
Installation
Installation is in the reverse order of removal. Pay
attention to the following points:
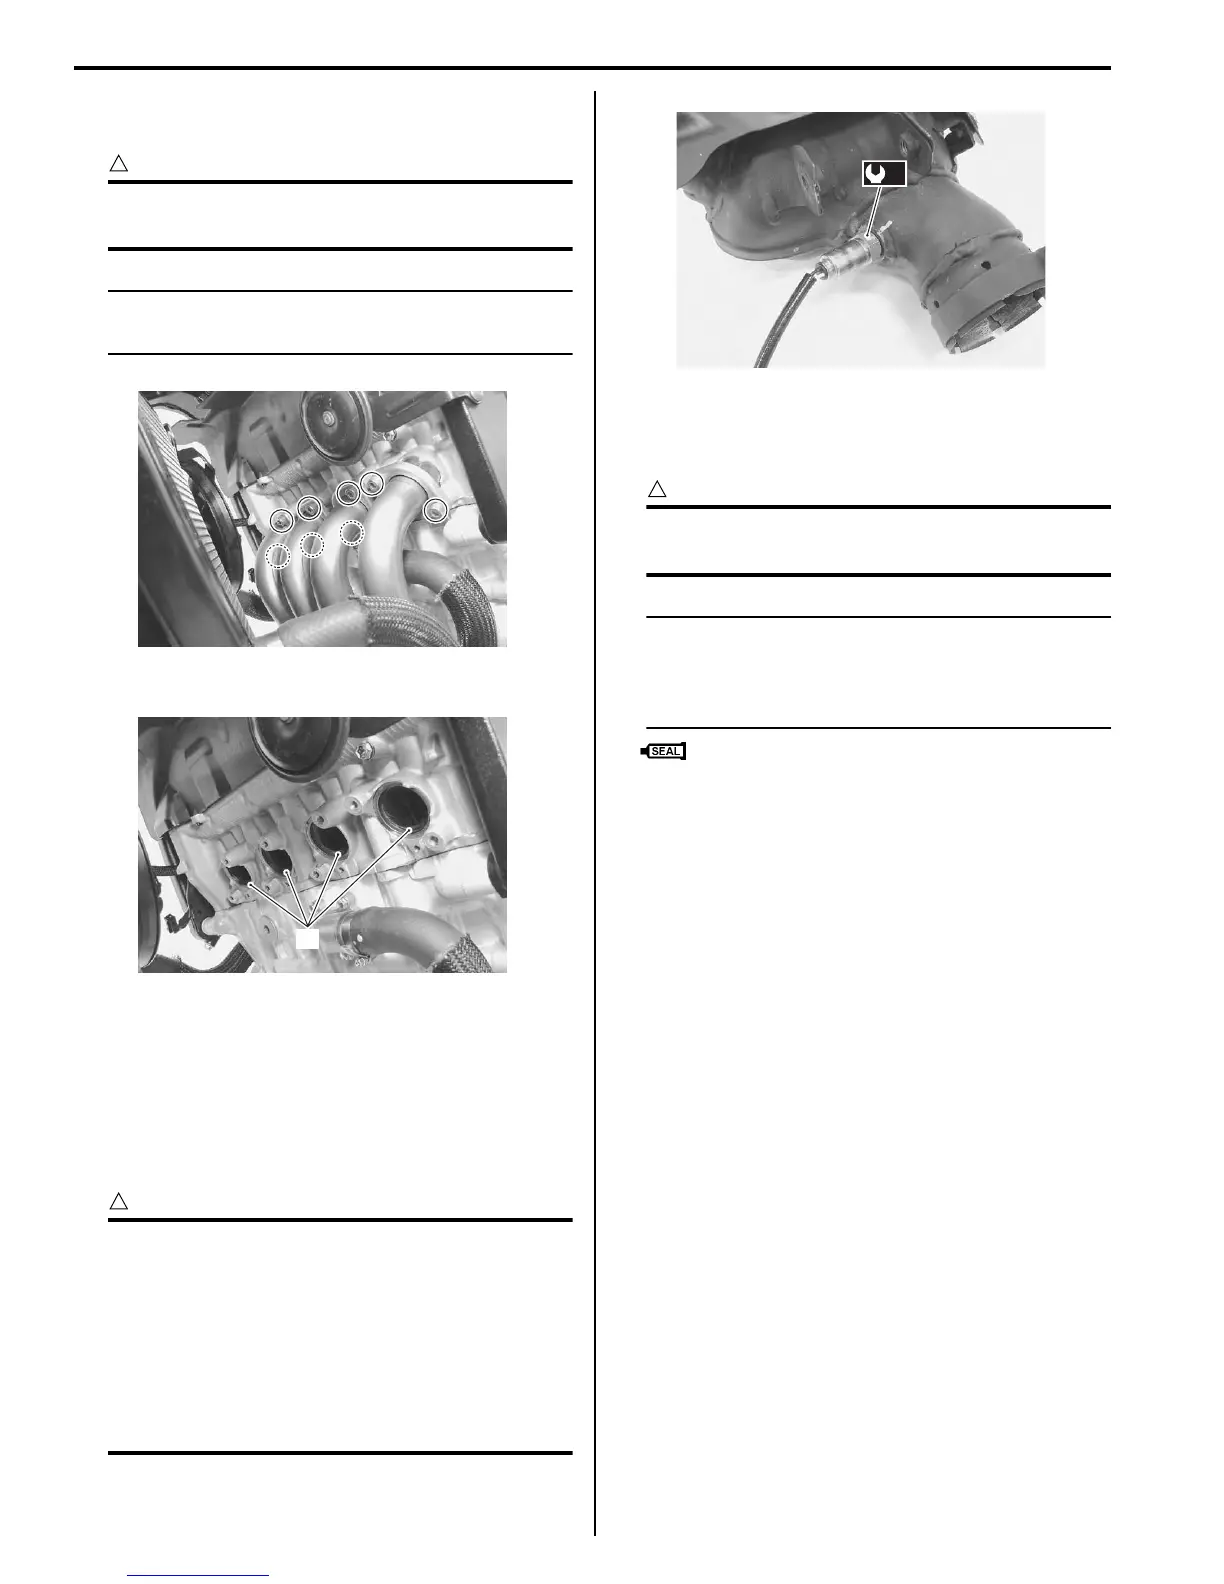
• Tighten the HO2 sensor to the specified torque.
Tightening torque
HO2 sensor (a): 25 N·m (2.5 kgf-m, 18.0 lbf-ft)
CAUTION
!
• Be careful not to expose the HO2 sensor to
an excessive shock.
• Do not use an impact wrench when
installing the HO2 sensor.
• Be careful not to twist or damage the HO2
sensor lead wires.
• Do not apply oil or other materials to the
sensor air holes.
• Install new gaskets and connectors and tighten each
bolt to the specified torque. Refer to “Exhaust System
Components” (Page 1K-5).
CAUTION
!
Replace the gaskets and connectors with
new ones.
NOTE
When installing a new connector, remove all
of the old sealer. Apply the exhaust gas
sealer to both the inside and outside of the
new connector.
: Muffler seal (MUFFLER SEAL LOCTITE
5920 (commercially available) or equivalent)
• Install the EXCVA cables. Refer to “EXCV Cable
Removal and Installation” (Page 1K-6).
Exhaust System Inspection
B947H11B06009
Inspect the exhaust pipe, muffler chamber and muffler
connection for exhaust gas leakage and mounting
condition. If any defect is found, replace the exhaust
pipe, muffler chamber or muffler with a new one.
Check the exhaust pipe bolts, muffler connecting bolts
and muffler mounting bolts are tightened to their
specified torque. Refer to “Exhaust System
Components” (Page 1K-5).
I947H11B0034-01
11
I947H11B0035-01
(a)
I947H11B0036-01
Manuals by Motomatrix / The Solution For Lost Motorcycle Coded Keys
email: info@motomatrix.co.uk / www.motomatrix.co.uk

 Loading...


