COPYRIGHT
©
2001 CANON INC. 2000 2000 2000 2000 CANON iR8500/7200 REV.1 AUG. 2001
CHAPTER 6 TROUBLESHOOTING
6-37
2.5 Fixing System
2.5.1 Points to Note When Mounting the Fixing Heater
1. Do not touch the surface of the heater directly.
2. For both heaters, be sure that the side with the longer heater wire is toward the front.
3. When viewing from the front, mount the main heater (1000 W for 100V model; 900 W
for 208V model; 965W for 230V model) on the right and the sub heater (400 W for
100V model; 600 W for 208V model; 645W for 230V model) on the left.
4. When viewing from the rear, connect the faston for the heater at the rear so that the right
side is to the main heater and the top side is to the sub heater.
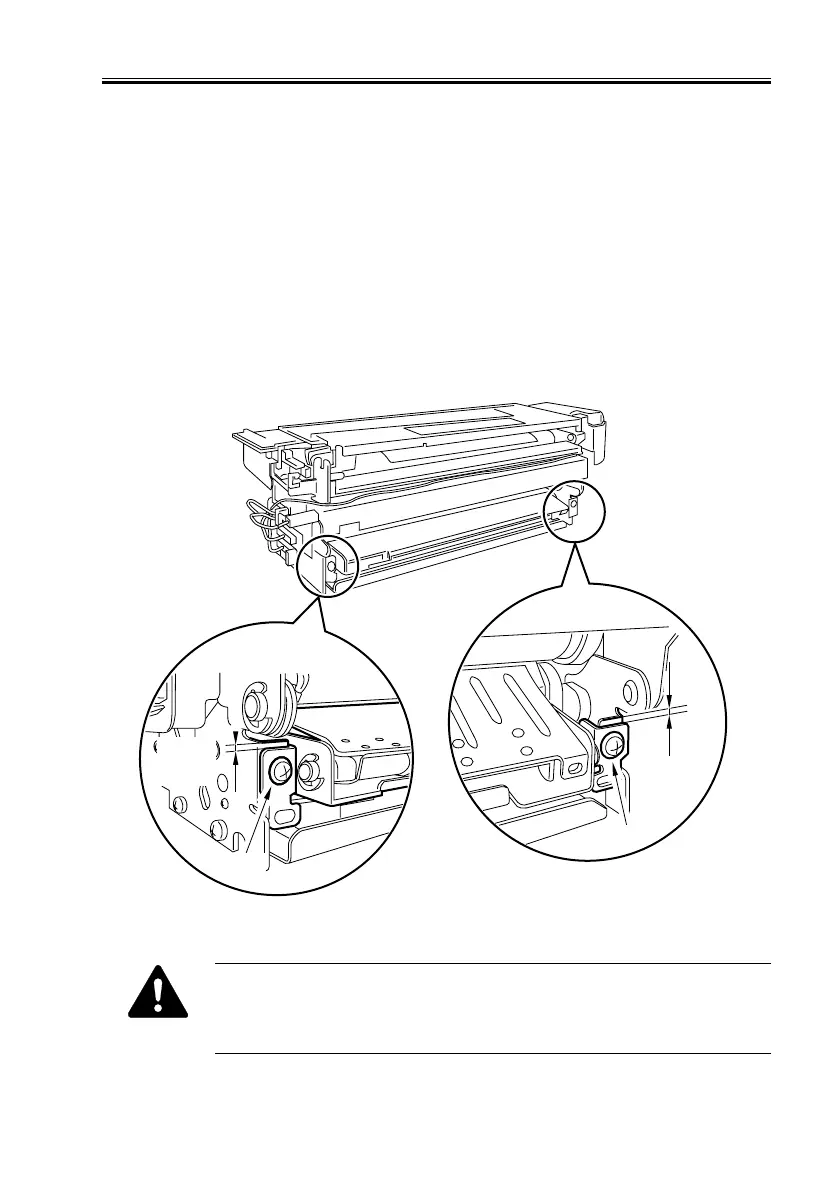
Height of the Fixing Assembly Inlet Guide
F06-205-01
If you should remove the inlet guide base, you will have to adjust the posi-
tion of the inlet guide. Do not loosen the fixing screw on the inlet guide. If
you must, be sure to put it back to its original position with reference to the
scale on the fixing assembly base.
5.8mm
(reference
only)
5.8mm
(reference
only)
Fixing
screw
Fixing
screw
 Loading...