COPYRIGHT
©
2001 CANON INC. 2000 2000 2000 2000 CANON iR8500/7200 REV.1 AUG. 2001
CHAPTER 6 TROUBLESHOOTING
6-47
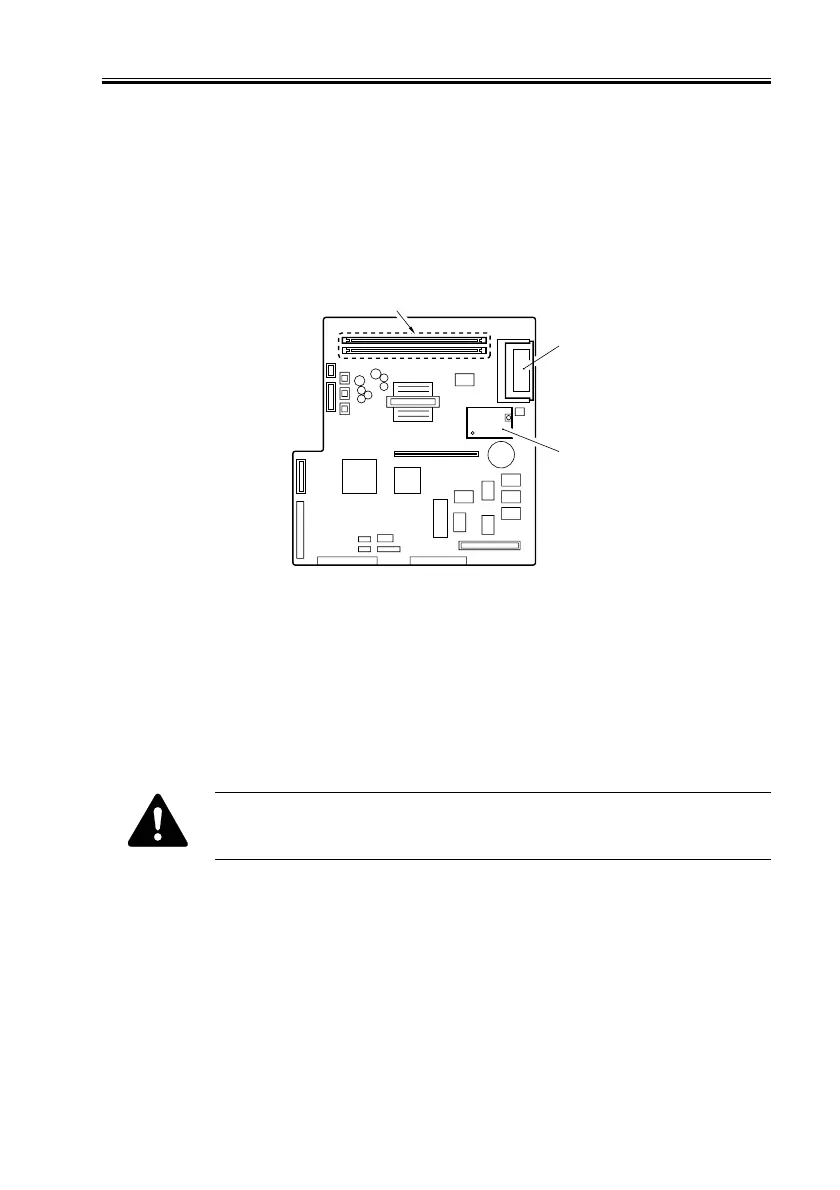
2.7.5 Replacing the Main Controller PCB
1) Make a backup of the data using the Service Support Tool.
2) Replace the main controller PCB.
3) Detach the following PCBs from the existing PCB, and mount it to the new PCB:
• SD-RAM [1]
• BOOT-ROM [2]
• Counter memory PCB [3]
F06-207-03
4) After assembling the machine, connect the power plug to the power outlet, while hold-
ing down ‘2’ and ‘8’ keys on the keypad in the control panel at the same time, turn on
the main power switch.
5) Put the data back in.
2.7.6 Replacing the HDD Unit
When replacing the HDD unit, take note of the following:
1. Provide measures against static charges to avoid static destruction.
2. Protect the HDD unit against impact.
1) Replace the HDD unit.
2) After assembling the machine, connect the power plug to the power outlet.
3) Connect a PC*.
*To which the Service Support Tool has been installed.
4) Turn on the PC; while holding down ‘2’ and ‘8’ keys on the keypad in the control panel
at the same time, turn on the main power switch.
5) Using the Service Support Tool format the HDD unit and install the system software.
[1]
[2]
[3]
 Loading...