COVER INTERPOSER TRAY (B470) 15 February 2006
1-46
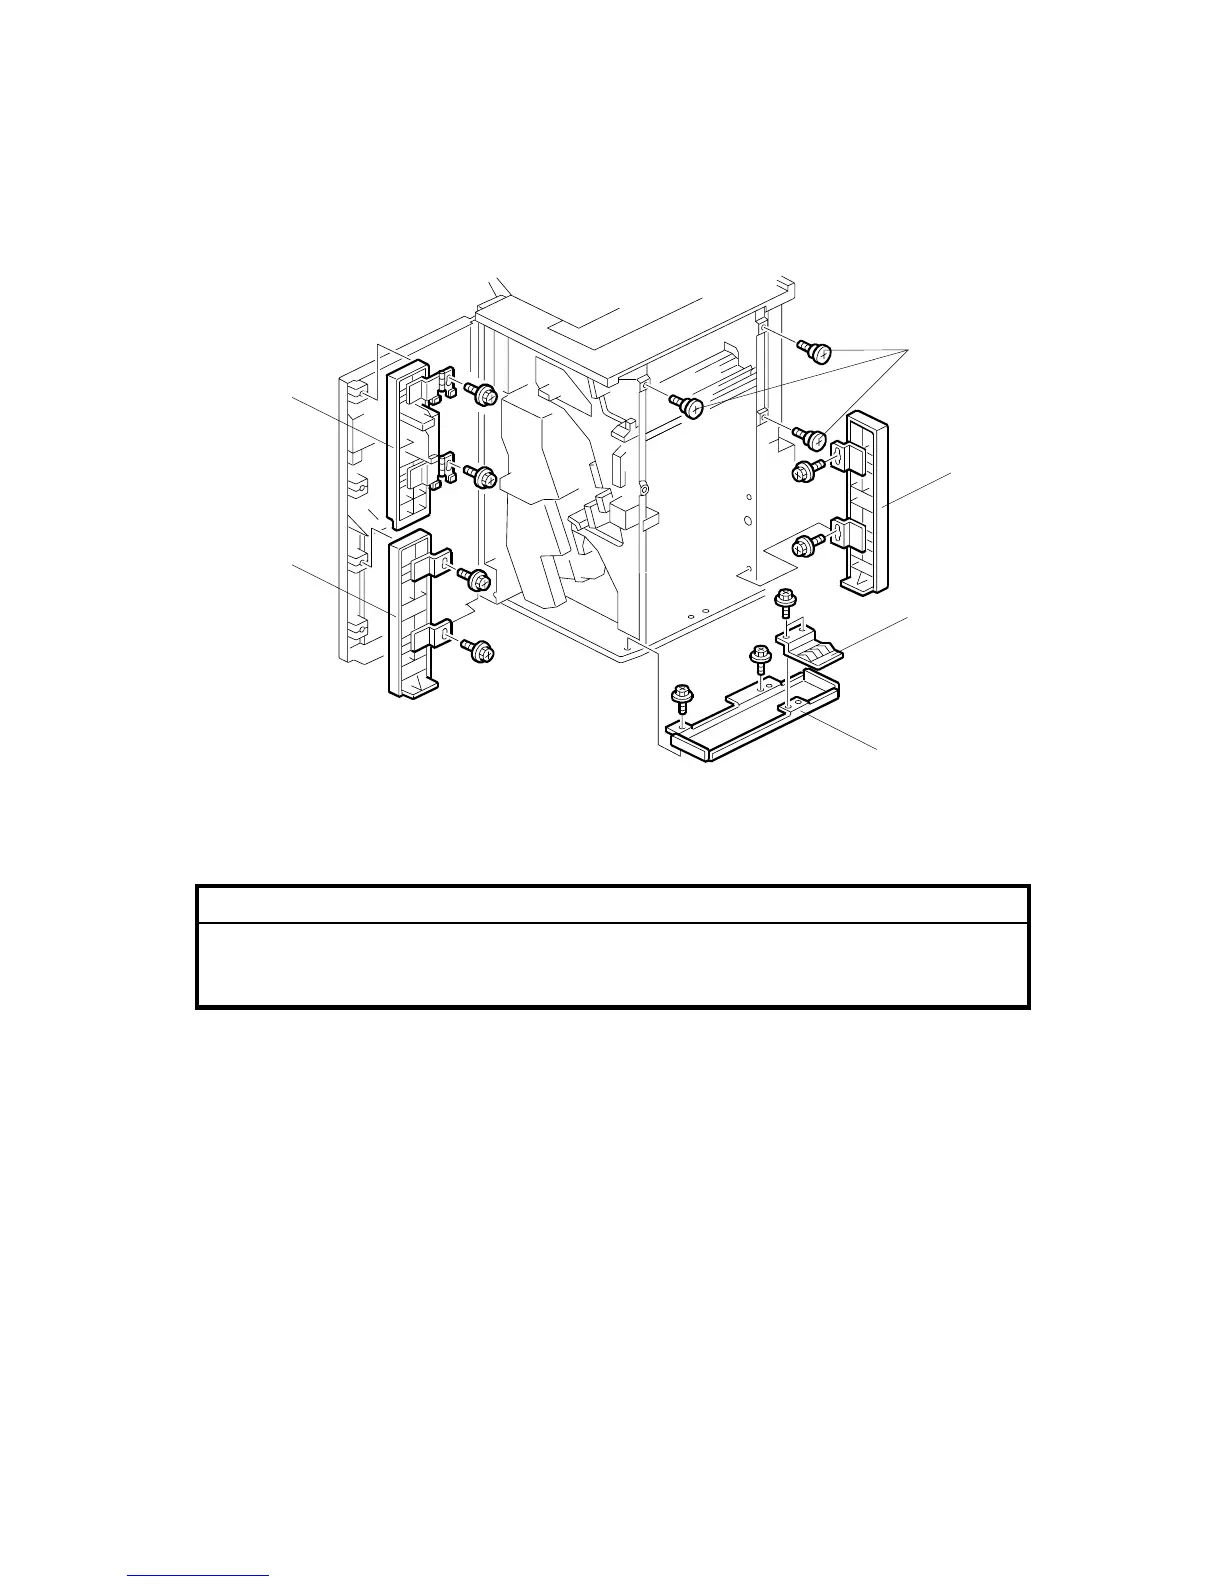
Attaching the Extensions
!CAUTION
Make sure that the finisher is disconnected from the main machine and that
the copier is turned off and disconnected from the power outlet before you
start the following procedure.
1. Attach the three shoulder screws [A] (" x 3).
2. Remove the ground plate [B] from the finisher, and keep the screws
3. Attach the bottom plate [C] (" x 2, M3 x 6). Then attach the ground plate [B] to
the bottom plate (" x 2) with the screws that you removed in step 2.
4. Attach the bottom front door extension [D] (" x 2, M4 x 8).
5. Attach the top front cover extension [E] (" x 2, M4 x 8).
6. Attach the rear cover extension [F] (" x 2, M3 x 6).
B470I003.WMF
[C]
[F]
[E]
[D]
[B]
[A]
 Loading...