February, 2008
6-3
WorkCentre 5225, 5230
UI Diagnostic Mode
General Procedures
Launch Version
UI Diagnostic Mode
Procedure
Access UI Diagnostics by following the procedures below.
Entering UI Diagnostics
1. At the Control Panel, press and hold the 0 key for 6 seconds, then press the Start button
while still pressing the 0 key.
The CE - Passcode screen will appear.
2. Enter the Access Number 6789 and press Confirm.
The colors on the display are reversed to indicate that UI Diagnostics mode is active.
Accessing Diagnostic routines
1. Press the Machine Status button on the Control Panel.
2. Select the Tools tab on the UI.
3. Under Features column, use the down arrow and scroll to and select Maintenance /
Diagnostics.
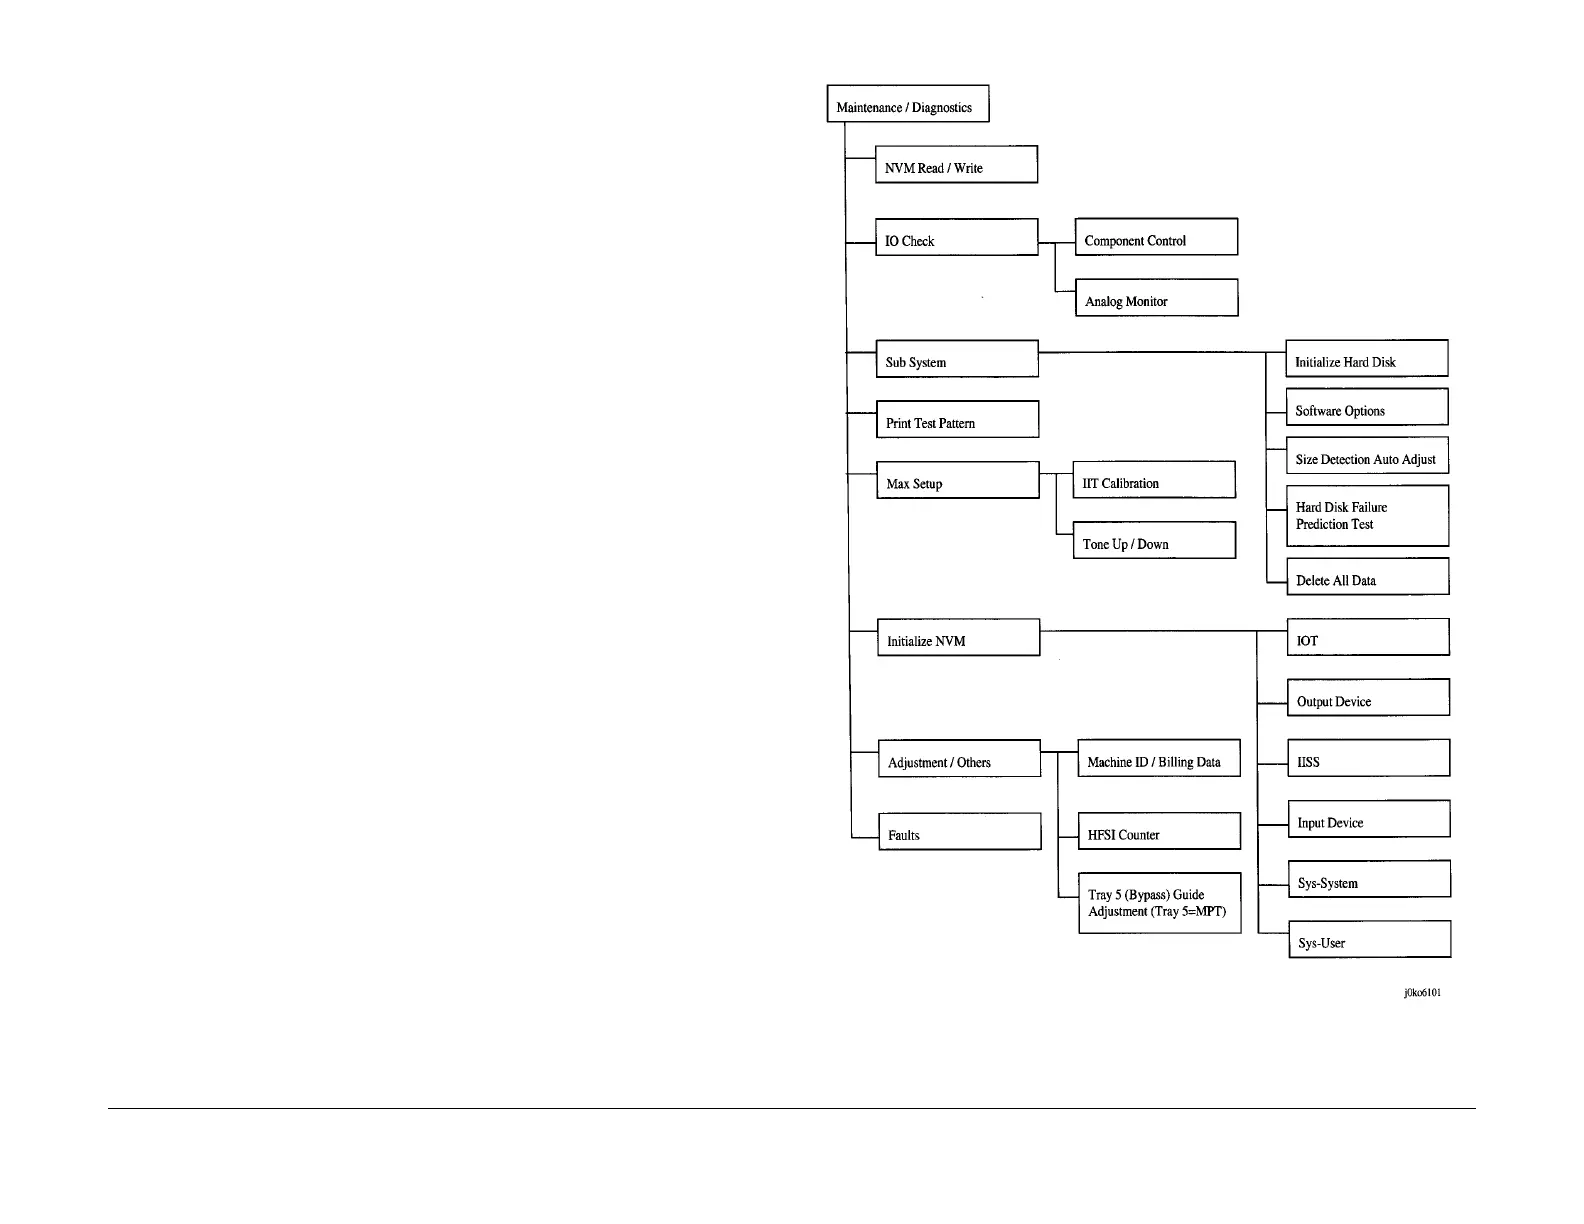
1. The following Diagnostics Routines can be accessed from the UI screen. (Figure 1)
a. NVM Read/Write
– Follow the instructions on the screen. If one or more NVM locations is changed,
the machine will reboot upon exit.
b. IO Check
c. Sub System
– Initialize Hard Disk
– Hard Disk Failure Prediction Test
– Delete All Data
– Software Options
– Fax Diagnostics
d. Print Test Pattern
e. Max Setup
f. Initialize NVM
g. Adjustment/Others
– Machine ID/Billing Data
– Initialize HFSI Counter
– Tray 5(Bypass) Guide Adjustment
h. Faults
Figure 1 Maintenance/Diagnostics

 Loading...


