February, 2008
4-209
WorkCentre 5225, 5230
REP 22.9.3, REP 22.9.4
Repairs and Adjustments
Launch Version
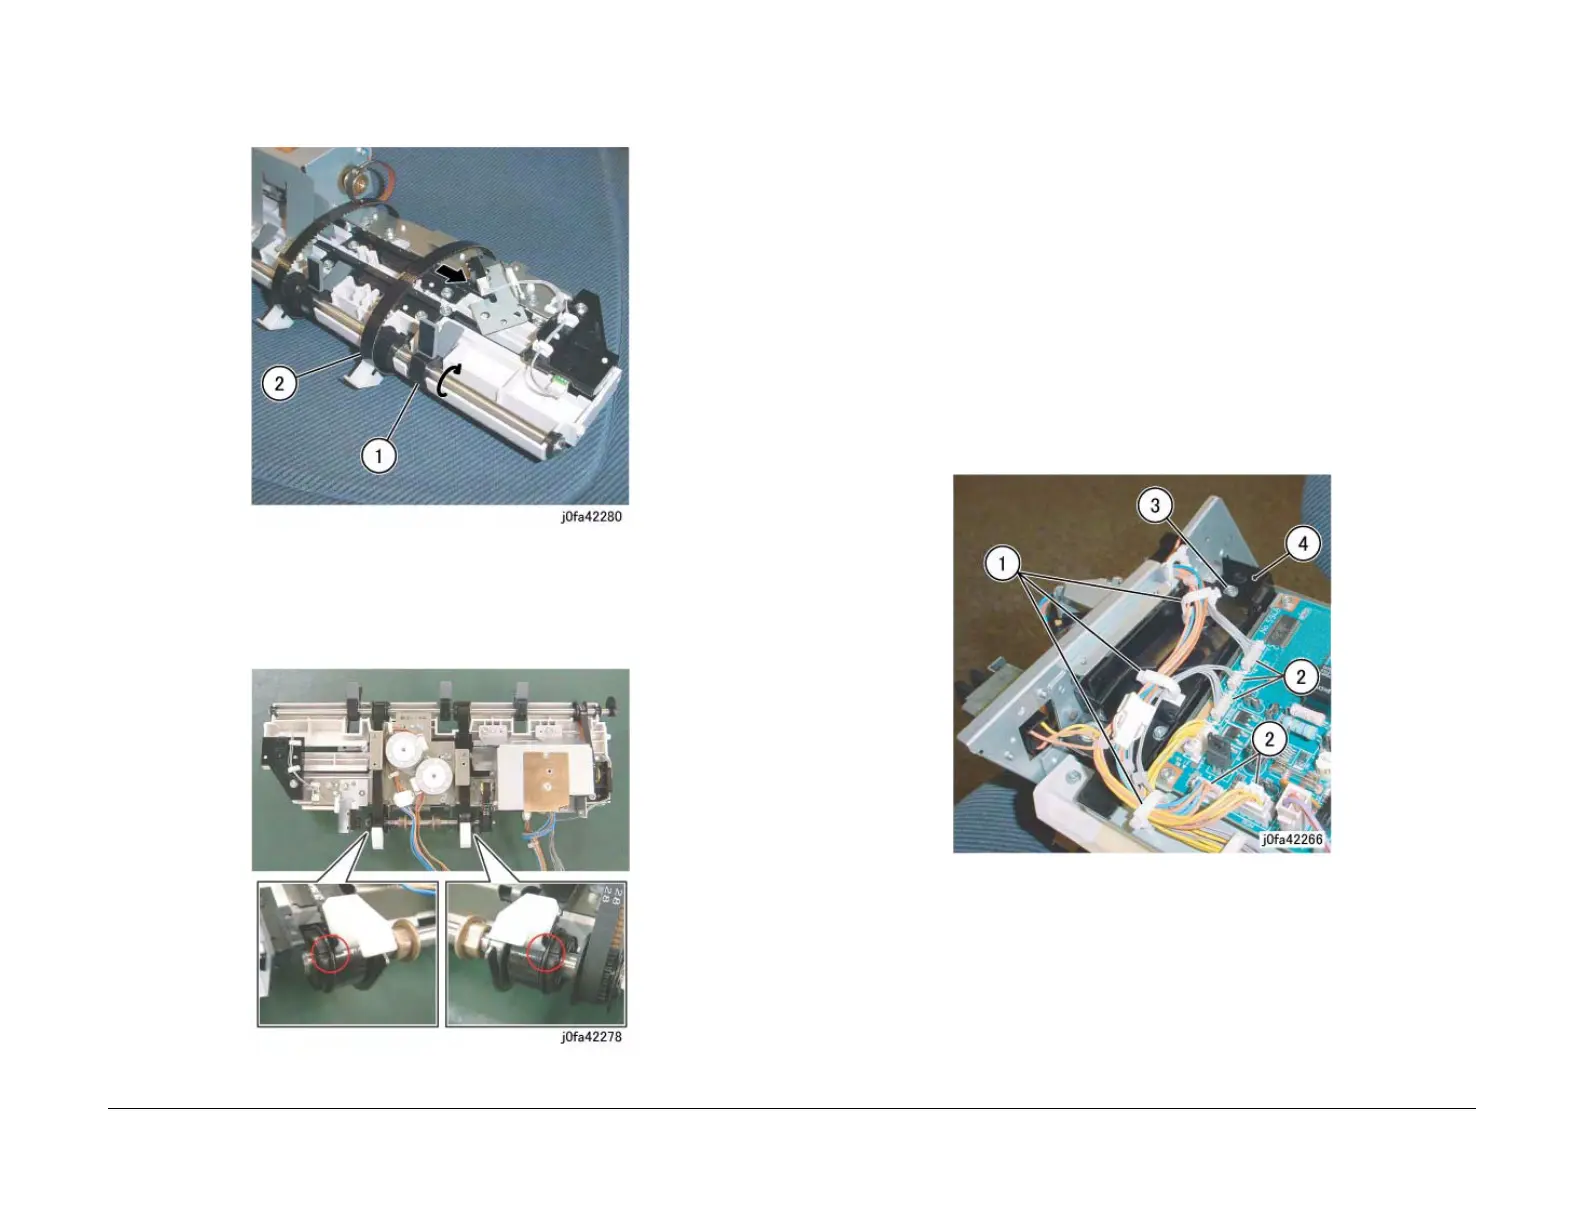
5. Remove the Eject Belts. (Figure 2)
(1)Move the blades of Set Clamp Shaft in the direction of the arrow.
(2)Remove Eject Belts in the direction of the arrow.
Figure 2 Removing the Eject Belts (j0fa42280)
Replacement
1. Reverse the removal procedure for replacement.
2. Install and align the Eject Belts with marks on the Pulleys. (Figure 3)
Figure 3 Installing the Eject Belts (j0fa42278)
REP 22.9.4 Eject/Set Clamp Motor Assembly
Parts List on PL 22.9
Removal
WARNING
To avoid personal injury or shock, do not perform repair or adjustment with electrical
power applied to the machine.
1. Remove the A-Finisher from the machine. (REP 22.1)
2. Remove the Inner Front Cover. (PL 22.1)
3. Remove the Rear Cover. (PL 22.1)
4. Turn over the A-Finisher.
5. Remove the Bottom Cover. (PL 22.2)
6. Remove the Connector Bracket. (Figure 1)
(1)Release Clamps (3) and remove the wires.
(2)Disconnect Connectors (5).
(3)Remove Screws (2).
(4)Remove Connector Bracket.
Figure 1 Removing the Connector Bracket (j0fa42266)

 Loading...


