EasyManuals Logo
Home>Xerox>All in One Printer>WorkCentre 5225

Xerox WorkCentre 5225 Service Manual

Xerox WorkCentre 5225
1457 pages
To Next Page IconTo Next Page
To Previous Page IconTo Previous Page
Page #781 background imageLoading...
Page #781 background image
February, 2008
4-4
WorkCentre 5225, 5230
REP 1.1.1
Launch Version
Repairs and Adjustments
3. Open the L/H Upper Cover.
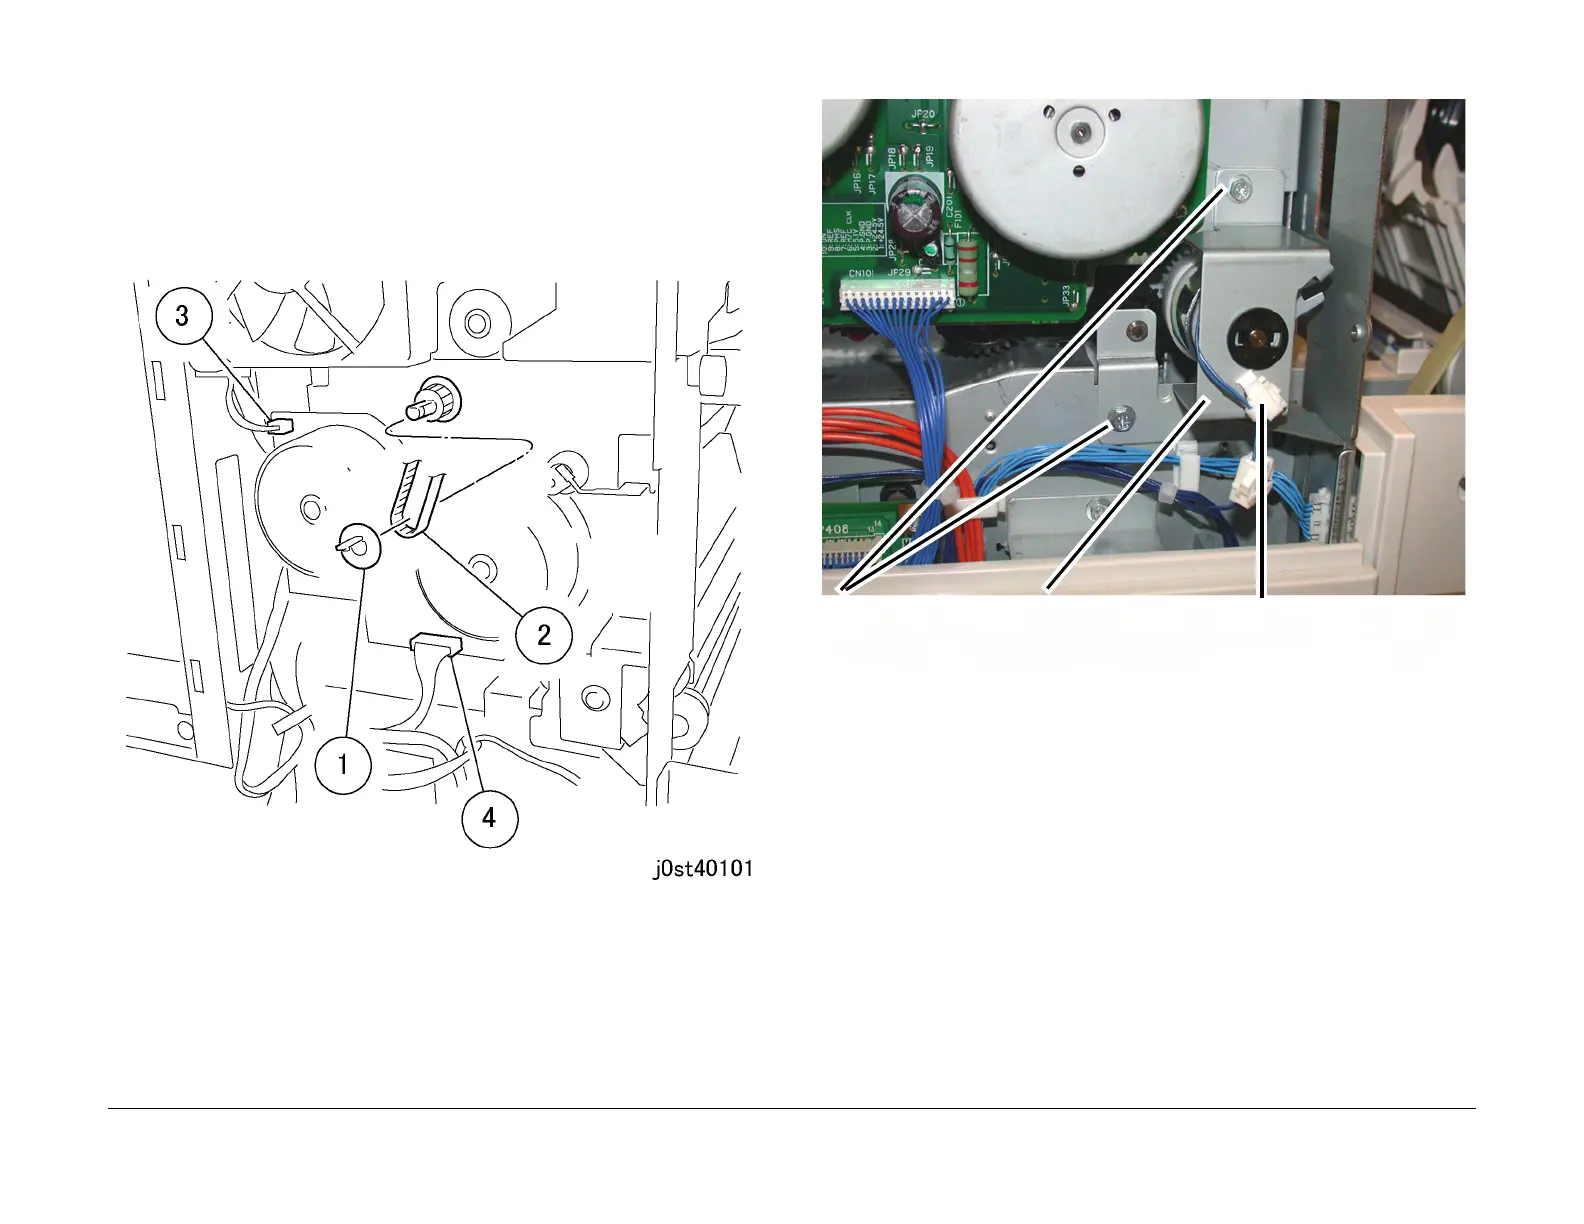
4. Disconnect the belt and connector. (Figure 3)
a. Remove the flange (item 1).
Remove the belt (item 2).
Disconnect (item 3).
Disconnect (item 4).
Figure 3 Disconnecting the belt and connector (j0st40101)
5. Remove the bracket. (Figure 4)
Figure 4 Removing the bracket
6. Remove the Main Drive Assembly. (Figure 5)
a. Open Left Cover Assembly (not shown).
b. Remove the screws (x4).
c. Remove the Main Drive Assembly.
1
Disconnect the wire clamp
from the bracket
2
Remove the screws (2)
3
Remove the Bracket

Table of Contents

Other manuals for Xerox WorkCentre 5225

Questions and Answers:

Question and Answer IconNeed help?

Do you have a question about the Xerox WorkCentre 5225 and is the answer not in the manual?

Xerox WorkCentre 5225 Specifications

General IconGeneral
Maximum print sizeA3 (297 x 420 mm)
Internal memoryNo MB
TypeDigital copier

Related product manuals