EasyManuals Logo
Home>Xerox>All in One Printer>WorkCentre 5225

Xerox WorkCentre 5225 Service Manual

Xerox WorkCentre 5225
1457 pages
To Next Page IconTo Next Page
To Previous Page IconTo Previous Page
Page #799 background imageLoading...
Page #799 background image
February, 2008
4-22
WorkCentre 5225, 5230
REP 3.1.1
Launch Version
Repairs and Adjustments
Figure 7 Removing the ROS Fan and set it aside
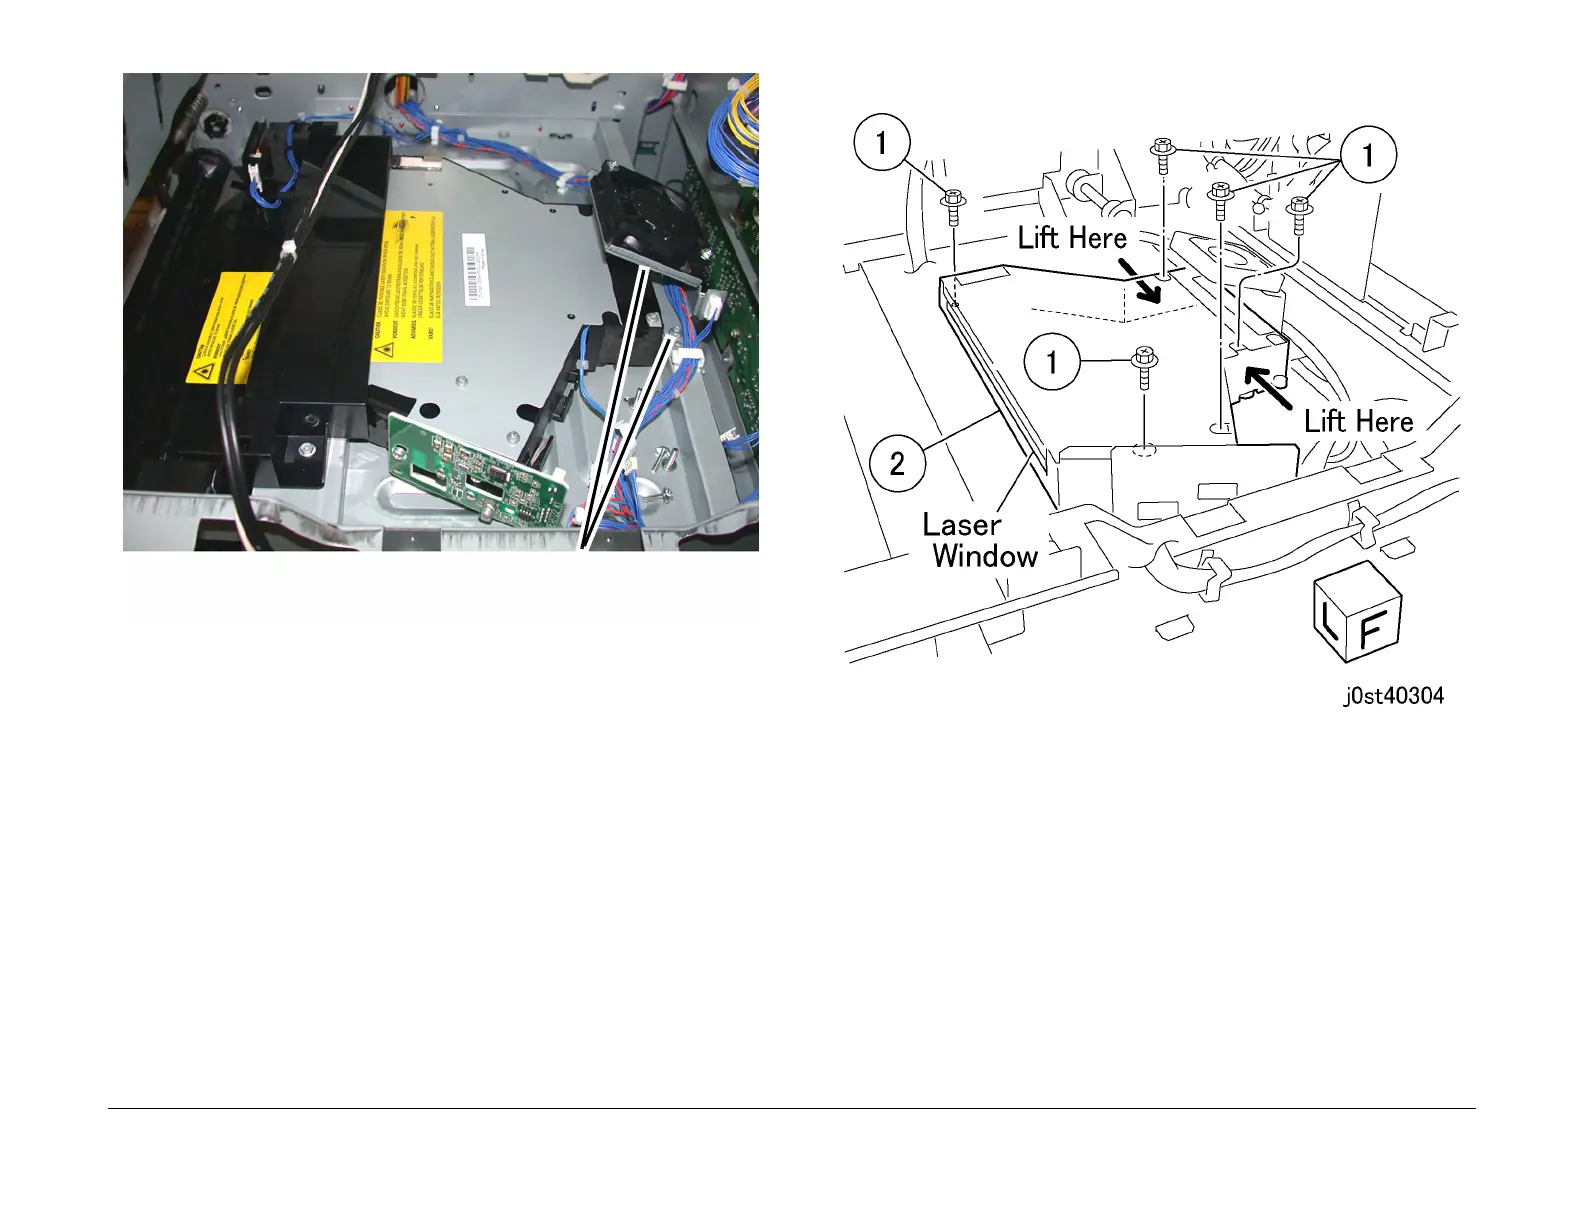
9. Remove the ROS Unit. (Figure 8)
1.Remove the screws (x5).
2.Remove the ROS Unit.
Figure 8 Removing the ROS Unit (j0st40304)
Replacement
CAUTION
When connecting the connector of the Toner Crum PWB, be careful not to press too hard such
that the PWB is shifted.
NOTE: When the ROS Unit is being installed, be careful to properly seat the ROS Unit in to the
two locating holes in the machine frame.
1. To install, carry out the removal steps in reverse order.
1
Remove the screws (2)

Table of Contents

Other manuals for Xerox WorkCentre 5225

Questions and Answers:

Question and Answer IconNeed help?

Do you have a question about the Xerox WorkCentre 5225 and is the answer not in the manual?

Xerox WorkCentre 5225 Specifications

General IconGeneral
Maximum print sizeA3 (297 x 420 mm)
Internal memoryNo MB
TypeDigital copier

Related product manuals