February, 2008
4-144
WorkCentre 5225, 5230
REP 16.2.13
Launch Version
Repairs and Adjustments
REP 16.2.13 Compiler Tray Assembly
Parts List on PL 23.12
Removal
WARNING
To avoid personal injury or shock, do not perform repair or adjustment with electrical
power applied to the machine.
1. Switch off the power and disconnect the power cord.
2. Undock the SB Finisher. (REP 16.2.1)
3. Remove the Front Cover. (REP 16.2.2)
4. Remove the Rear Upper Cover. (REP 16.2.3)
5. Remove the Foot Cover. (REP 16.2.6)
6. Remove the Stacker Lower Cover. (REP 16.2.7)
7. Remove the Stacker Tray. (REP 16.2.16)
8. Remove the Stacker Upper Cover. (REP 16.2.8)
9. Remove the Eject Cover. (REP 16.2.5)
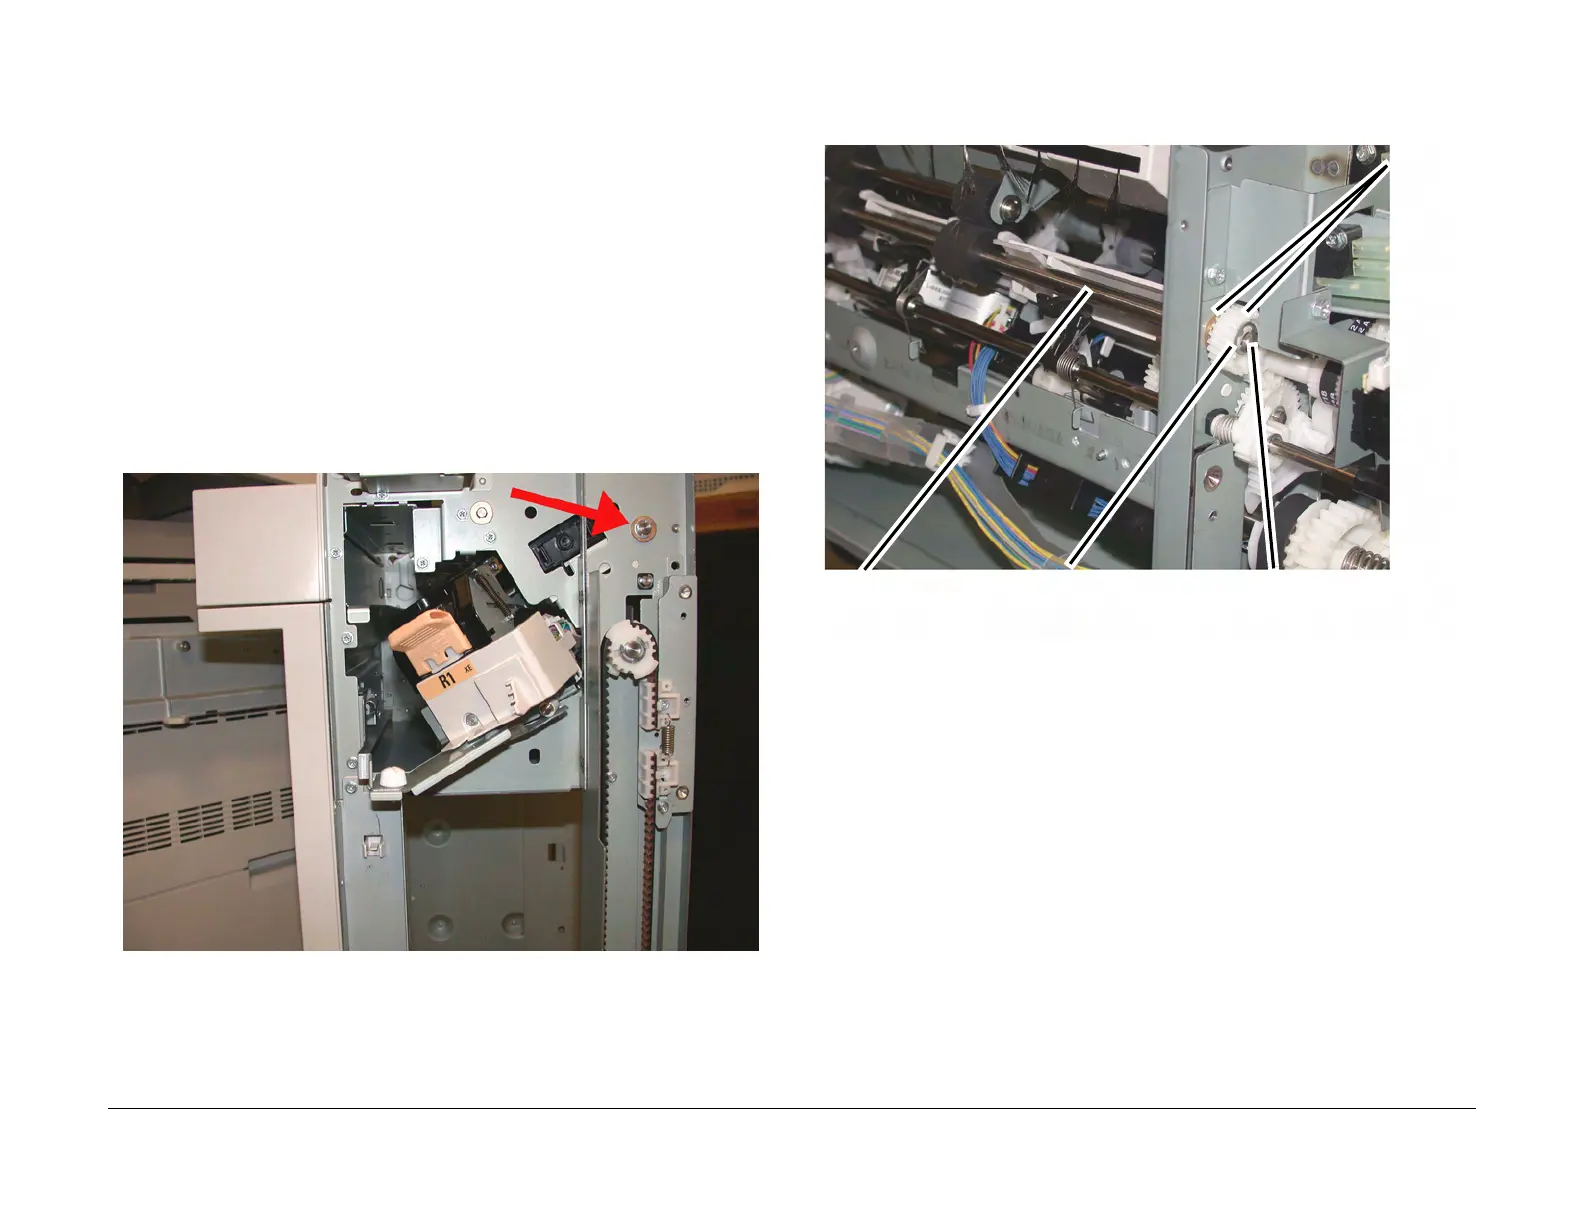
10. Preparing to remove the Eject Roller Shaft. (Figure 1)
Figure 1 Removing the E-ring and brass bearing from the front Eject Roller shaft.
(j0st41719.jpg)
11. Remove the Eject Roll Shaft. (Figure 2)
a. Remove the E-ring and brass bearing from the front of the shaft.
b. Remove the E-ring,
c. Slide the Eject Roller shaft toward the front.
d. Remove the Gear, and brass bushing.
e. Remove the Eject Roll from the Finisher.
Figure 2 Removing the Eject Roll Shaft (j0st41720.jpg)
12. Remove the Compiler Tray screw. (Figure 3)
1
Remove the E-ring
2
Slide the shaft
toward front
3
Remove
the Gea
and
brass
bearing
4
Remove the shaft

 Loading...


