February, 2008
4-150
WorkCentre 5225, 5230
REP 16.2.13
Launch Version
Repairs and Adjustments
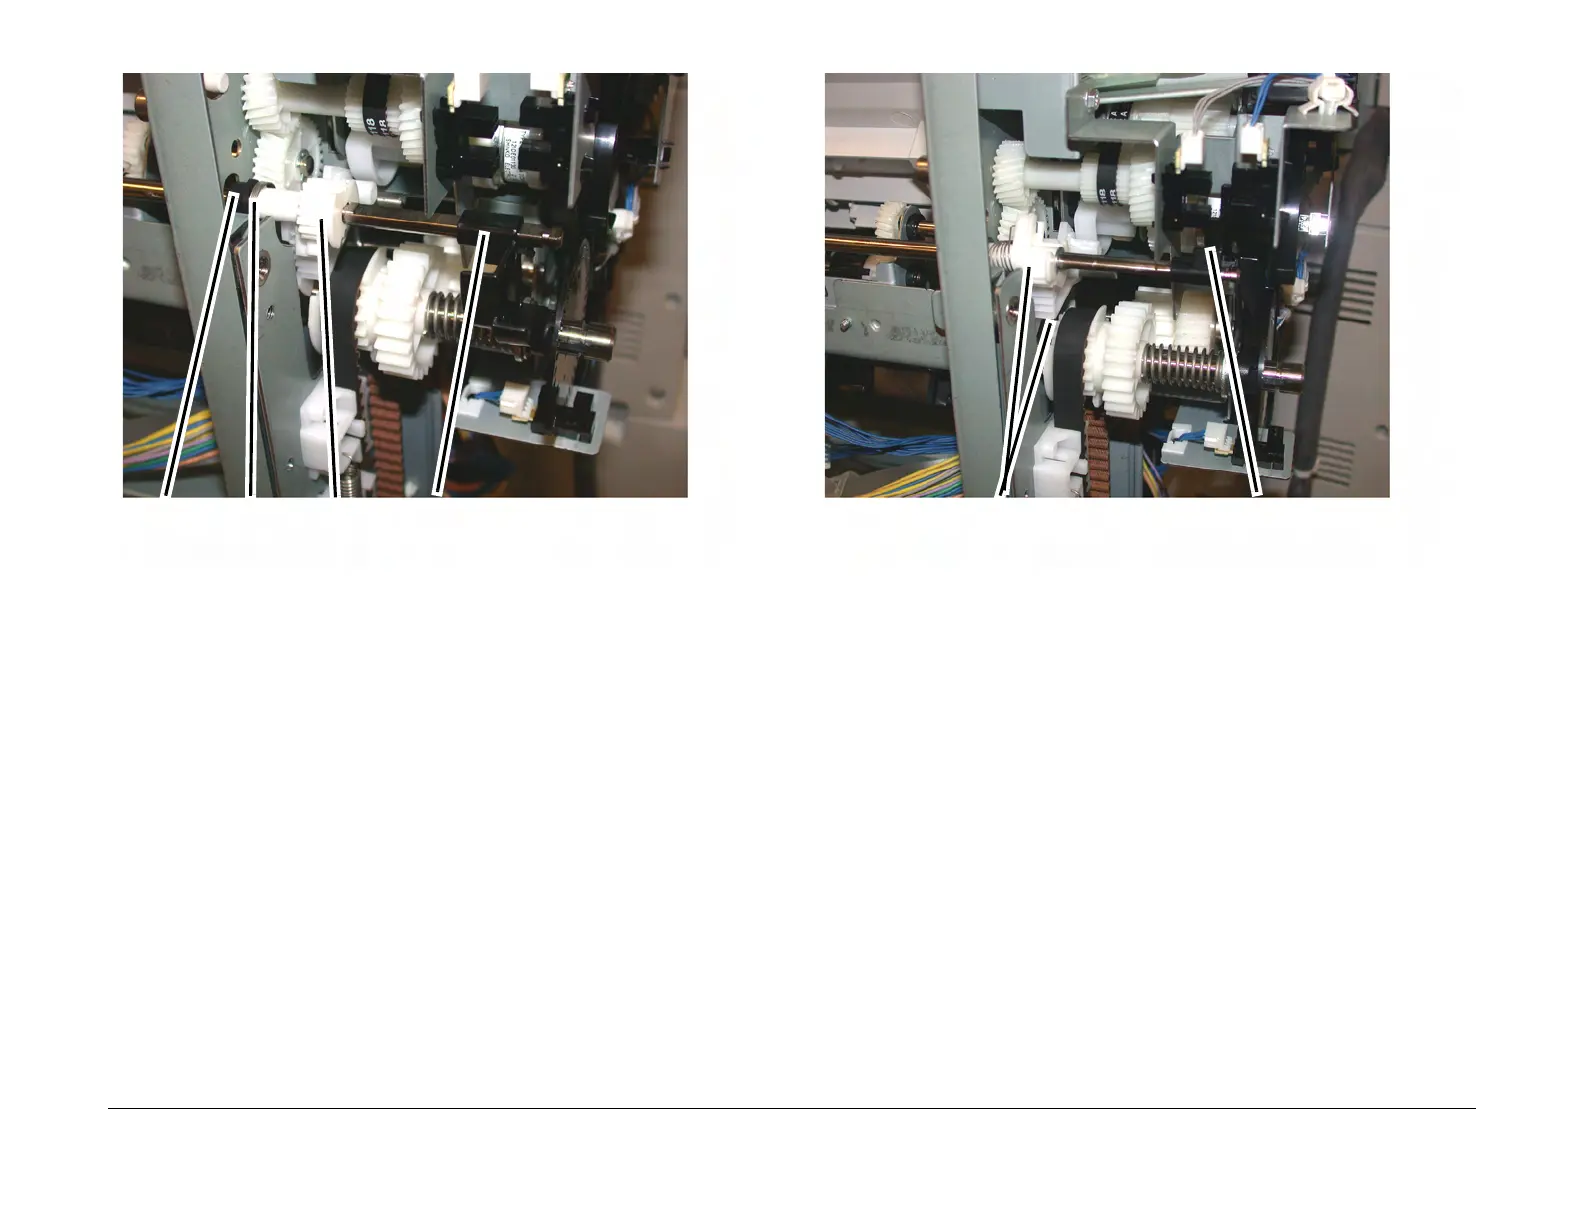
Figure 13 Installing the Bushing, Spring and Gear onto the rear of the Shaft (j0st41724)
7. Rotate the Set Clamp Shaft until the Stack Height Sensor Flag is in the position shown in
Figure 14. Then position the 2 gears into the configuration as shown in Figure 14.
Figure 14 Aligning the Gears and Stack Height Sensor Flag (j0st41723)
8. Attach the Spring to the gear and slide the Gear into position.
9. Ensure that the 2 Gears and Stack Height Sensor Flag is in the position shown Figure 15
and install the E-ring.
1
Bearing
2
Spring
3
Gear
4
Install the Stack Height Sensor Flag onto
the rear end of the Shaft as shown
1
Rotate shaft until Stack
Height Flag is in position
2
Position the 2 Gears into the
position shown here

 Loading...


