February, 2008
4-154
WorkCentre 5225, 5230
REP 16.2.14
Launch Version
Repairs and Adjustments
REP 16.2.14 Folder Knife Assembly
Parts List on PL 23.14
Removal
WARNING
To avoid personal injury or shock, do not perform repair or adjustment with electrical
power applied to the machine.
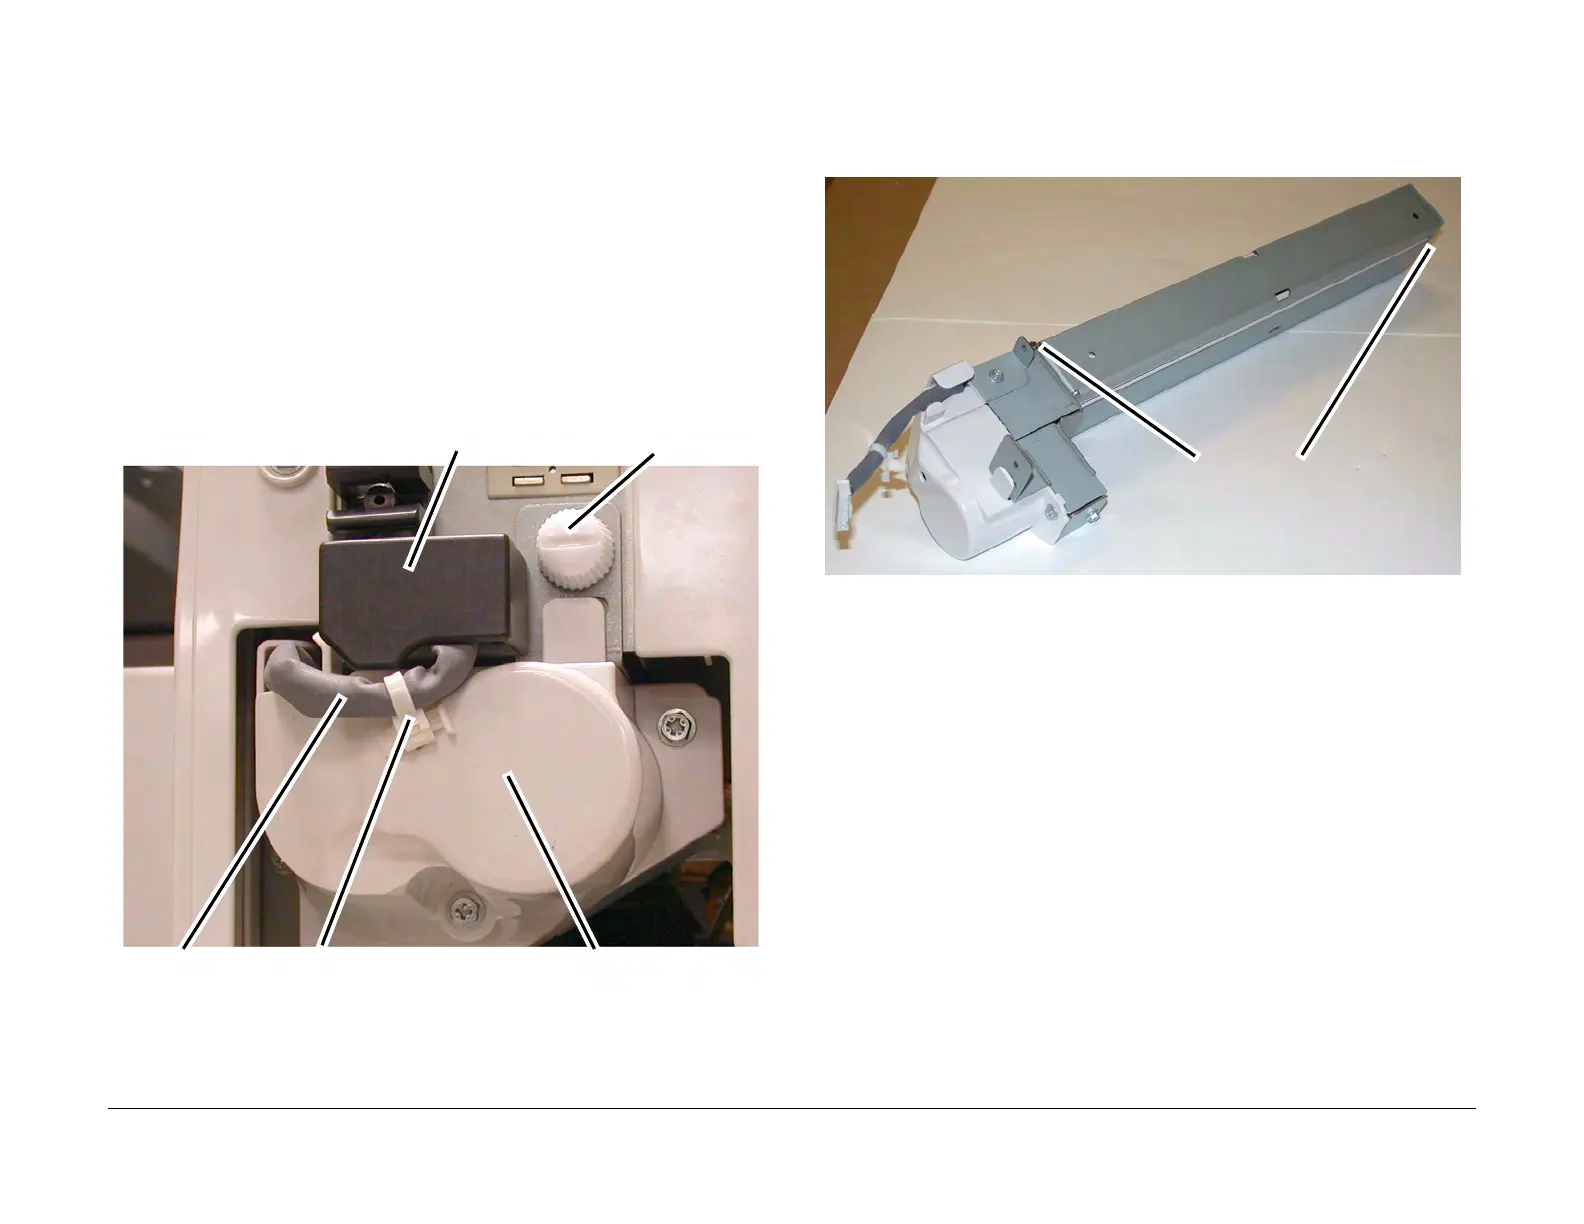
1. Remove the Folder Knife Assembly. (Figure 1)
a. Open the Finisher Front Door.
b. Remove the Guard.
NOTE: Pull out the Cable Tie to obtain additional slack in the wires.
c. Disconnect the Cable.
d. Remove the Thumbscrew.
e. Pull the Folder Knife Assembly straight out.
Figure 1 Removing the Folder Knife Assembly (j0st41686)
Replacement
NOTE: Make sure the Locating Pins (2) are properly engaged. (Figure 2)
1. Reverse the removal procedure for replacement.
Figure 2 Folder Knife Assembly (j0st41685)
Guard
Cable Tie
Cable
Thumbscrew
Folder Knife Assembly
Locating Pins

 Loading...


