Raise the vehicle with the jack (va-
riant 2)
Please note at the beginning of this chapter on
page 272.
Support points
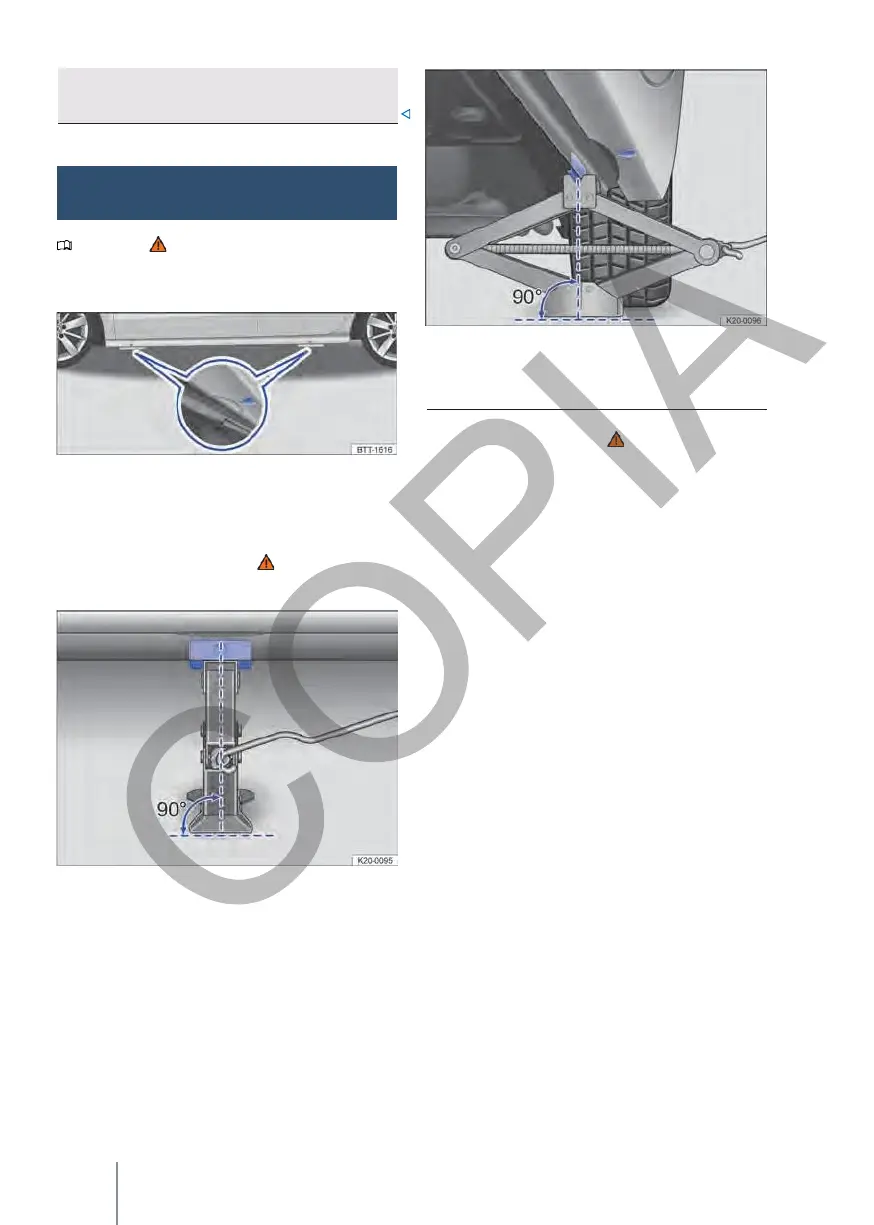
Fig. 197 Support points for the jack.
Only attach the jack to the underbody
reinforcements behind the markings on the body
→ fig. 197. The valid jacking point is the one next
to the corresponding wheel → .
Positioning the jack
Fig. 198 Jack positioned on the left side of the vehicle,
in the rear area.
Fig. 199 Jack positioned on the left side of the vehicle,
in the rear area.
Checklist
For your own safety, please observe the following
points in the order given → :
1.
Choose flat, firm ground to lift the vehicle.
2.
Switch off the engine.
3.
If the vehicle has a manual gearbox, engage
one gear.
4.
If the gearbox is a DSG® dual clutch gearbox,
move the selector lever to the P position.
5.
Engage the electronic parking brake.
6.
Block the diagonally opposite wheel with
folding chocks or other suitable objects.
7.
Loosen the wheel bolts → page 273.
8.
Look under the vehicle for the jacking point
→ fig. 197 which is closest to the wheel to
be changed.
9.
Hook the crank handle into the jack housing
(depending on equipment).
10.
Raise the jack with the crank handle until it
can still be positioned just below the fulcrum of
the vehicle.
11.
Make sure that the entire base of the jack
rests firmly on the ground and that it is
positioned vertically just below the fulcrum →
fig. 198 and → fig. 199.
12.
Centre the jack and continue to raise it with the
crank handle until the claw grips the
reinforcement under the vehicle → Fig. 199.
13.
Keep raising the jack until the wheel is slightly
off the ground.
•
Always follow the operations in the checklist
and observe the generally valid safety
measures.

 Loading...