(7) Using a trim stick C-4755 or equivalent, sepa-
rate window frame molding from door. (Fig. 20)
(8) Slightly pull door trim upward and swing away
slightly.
(9) Unlock retainer clip and disconnect control
cable. (Fig. 21)
(10) Remove trim panel.
INSTALLATION
(1) Position trim panel and connect control cable.
(2) Install trim panel.
(3) Position window frame molding and seat clips
fully.
(4) Close pocket door.
(5) Install window crank and mounting ring, if
equipped.
(6) Install handle screws.
(7) Connect electrical connectors and install switch
bezel.
(8) Install handle cover.
(9) Connect battery negative cable.
WINDOW REGULATOR -
POWER
REMOVAL
(1) Lower front window approximately 2 cm (3/4
in.).
(2) Disconnect and isolate battery negative cable.
(3) Remove door trim panel. (Refer to 23 - BODY/
DOOR - FRONT/TRIM PANEL - REMOVAL)
(4) Disconnect electrical connector. (Fig. 22)
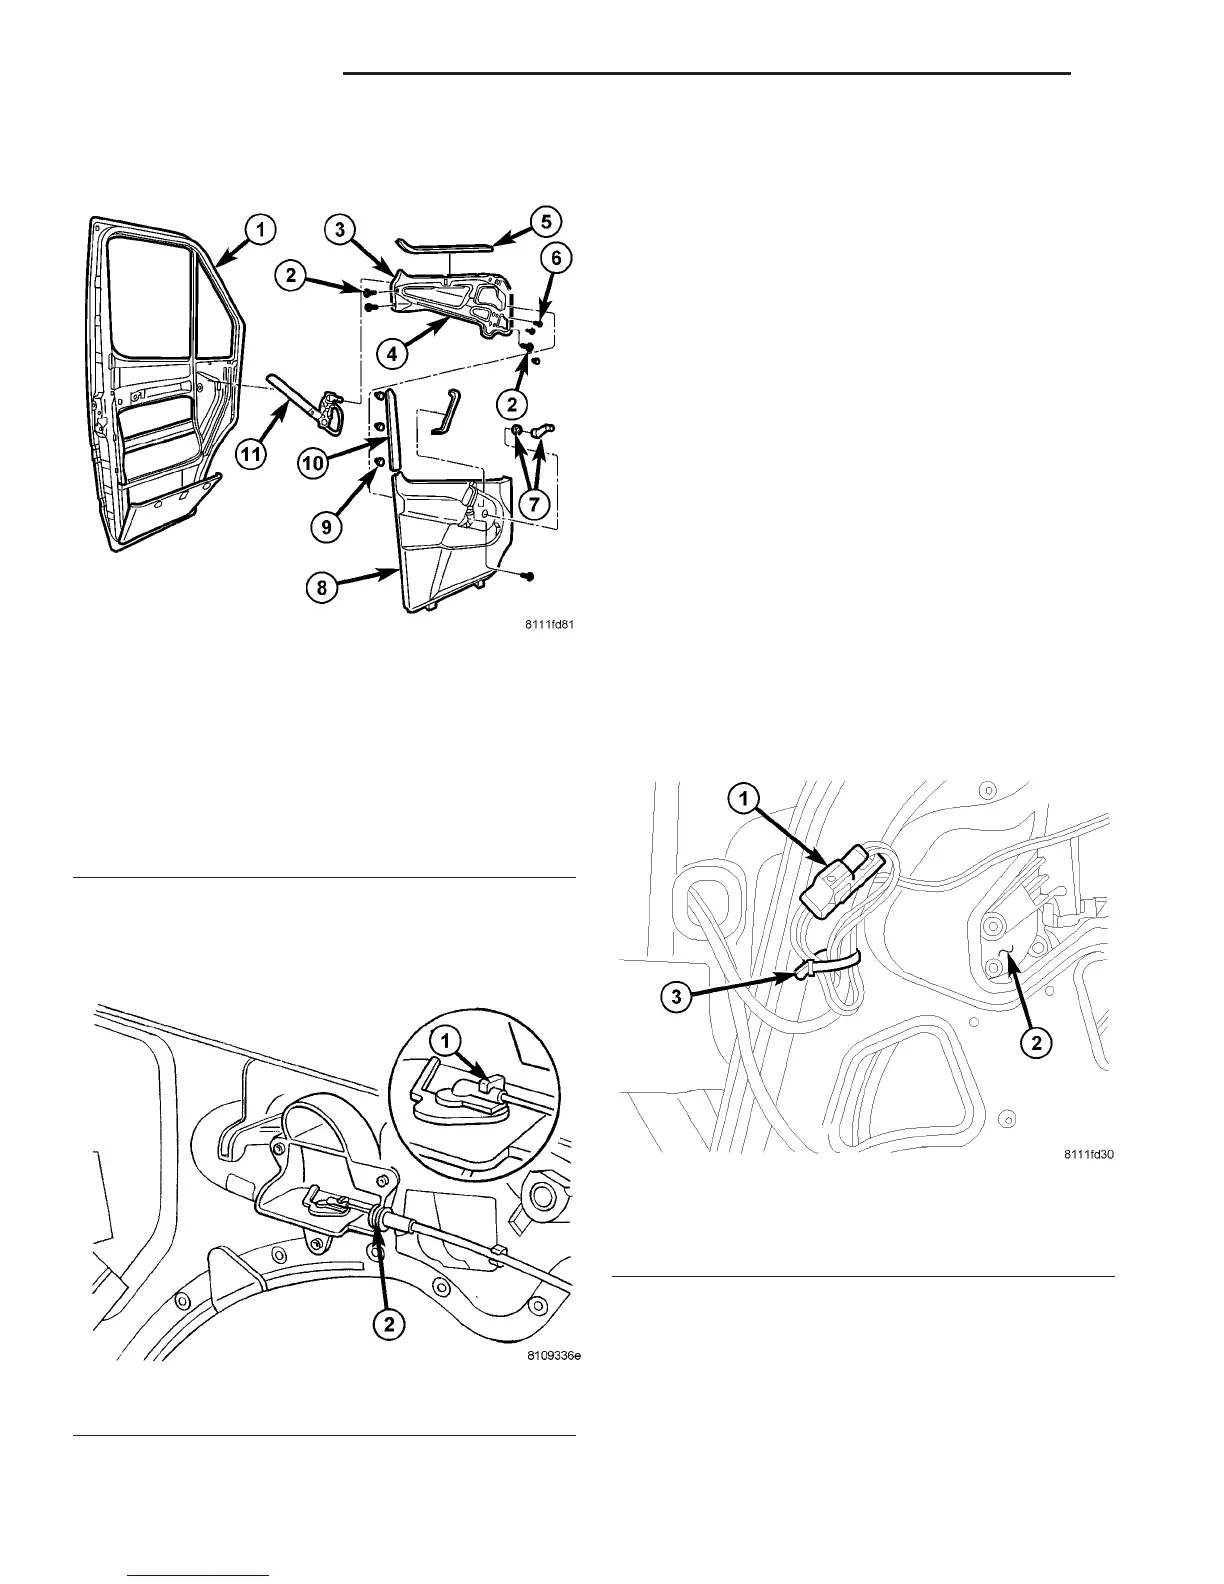
Fig. 20 MANUAL REGULATOR ASSEMBLY
1 - DOOR
2 - CARRIER PLATE BOLTS
3 - CARRIER PLATE
4 - REGULATOR ASSEMBLY
5 - SEALING STRIP
6 - REGULATOR RIVETS (4)
7 - WINDOW CRANK/TRIM RING
8 - TRIM PANEL
9 - CLIPS
10 - WINDOW FRAME MOLDING
11 - REGULATOR
Fig. 21 CONTROL CABLE
1 - RETAINER CLIP
2 - CONTROL CABLE MOUNTING
Fig. 22 ELECTRICAL CONNECTOR
1 - ELECTRICAL CONNECTOR
2 - REGULATOR MOTOR
3 - WIRE TIE
23 - 20 DOOR - FRONT VA
TRIM PANEL (Continued)

 Loading...


