(3) Pull the cargo lamp switch and bezel away
from the pillar far enough to access and disconnect
the vehicle wire harness connector for the switch
from the receptacle on the back of the switch.
(4) From the back of the switch bezel, depress the
two latches on the outside of the cargo lamp switch
body and push the switch out through the top of the
switch bezel.
INSTALLATION
INSTALLATION - INSTRUMENT PANEL
(1) From the front of the accessory switch bezel,
align the cargo lamp switch body with the opening in
the bezel and push the switch into the bezel until the
two latches on the outside of the switch body snap
into place (Fig. 4).
(2) From the back of the accessory switch bezel,
reconnect the vehicle wire harness connector for the
cargo lamp switch to the receptacle on the back of
the switch.
(3) Reinstall the accessory switch bezel onto the
instrument panel. (Refer to 23 - BODY/INSTRU-
MENT PANEL/ACCESSORY SWITCH BEZEL -
INSTALLATION).
(4) Reconnect the battery negative cable.
INSTALLATION - BULKHEAD
(1) From the front of the switch bezel, align the
cargo lamp switch body with the opening in the bezel
and push the switch into the bezel until the two
latches on the outside of the switch body snap into
place.
(2) Reconnect the vehicle wire harness connector
for the cargo lamp switch to the receptacle on the
back of the switch.
(3) Using hand pressure, firmly and evenly press
the cargo lamp switch and switch bezel into the
switch box on the back of the cargo compartment
bulkhead panel.
(4) Reconnect the battery negative cable.
INSTALLATION - REAR PILLAR
(1) From the front of the switch bezel, align the
cargo lamp switch body with the opening in the bezel
and push the switch into the bezel until the two
latches on the outside of the switch body snap into
place.
(2) Reconnect the vehicle wire harness connector
for the cargo lamp switch to the receptacle on the
back of the switch.
(3) Using hand pressure, firmly and evenly press
the cargo lamp switch and switch bezel into the
switch mounting hole on the inside of the rear door
opening pillar.
(4) Reconnect the battery negative cable.
DOME/READING LAMP BULB
REMOVAL
(1) Disconnect and isolate the battery negative
cable.
(2) Remove the dome/reading lamp unit from its
mounting location, but do not disconnect the vehicle
wire harness from the lamp connector receptacle.
(Refer to 8 - ELECTRICAL/LAMPS/LIGHTING -
INTERIOR/DOME/READING LAMP UNIT -
REMOVAL).
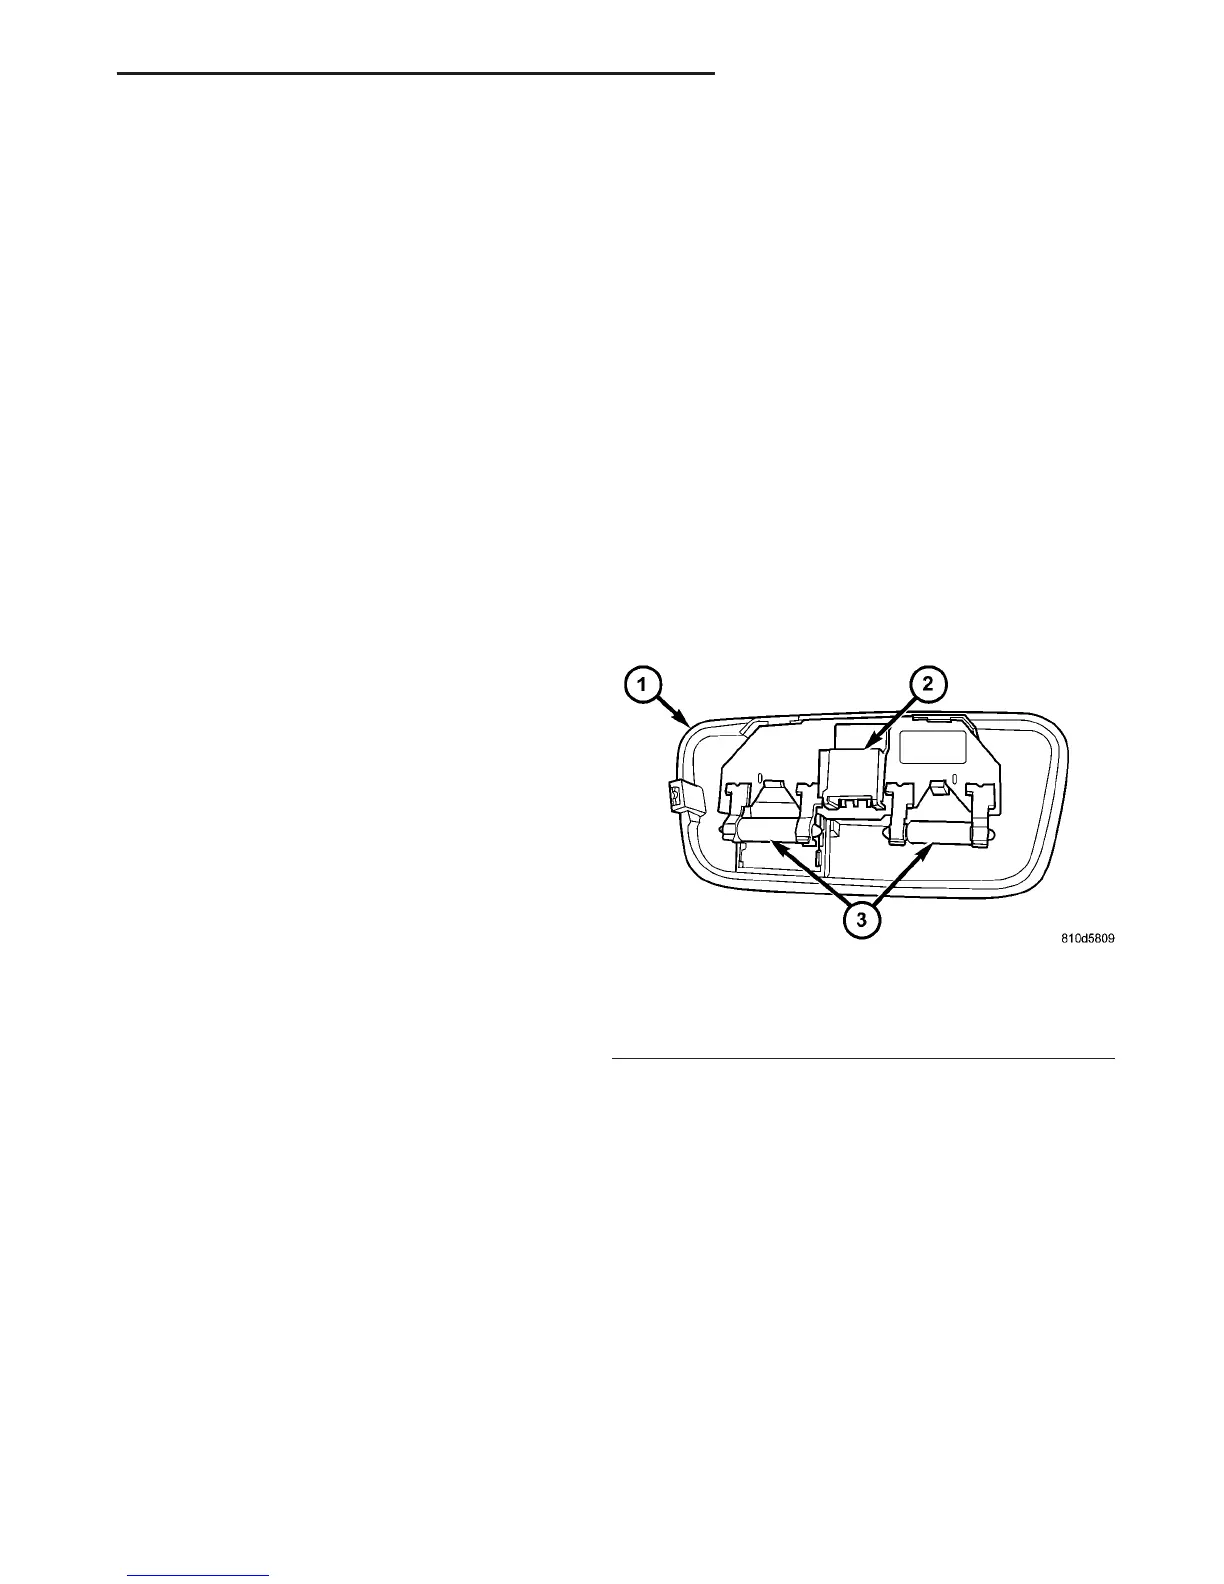
(3) Grasp the lamp housing in one hand and care-
fully pull the bulb out of the bulb holder with the
other hand (Fig. 5).
INSTALLATION
(1) Grasp the dome/reading lamp housing in one
hand and carefully insert the bulb into the bulb
holder with the other hand (Fig. 5).
(2) Reinstall the dome/reading lamp unit into its
mounting location. (Refer to 8 - ELECTRICAL/
LAMPS/LIGHTING - INTERIOR/DOME/READING
LAMP UNIT - INSTALLATION).
(3) Reconnect the battery negative cable.
Fig. 5 Dome/Reading Lamp Bulb Remove/Install
1 - LAMP HOUSING
2 - CONNECTOR RECEPTACLE
3 - BULB (2)
VA LAMPS/LIGHTING - INTERIOR 8L - 29
CARGO LAMP SWITCH (Continued)

 Loading...


