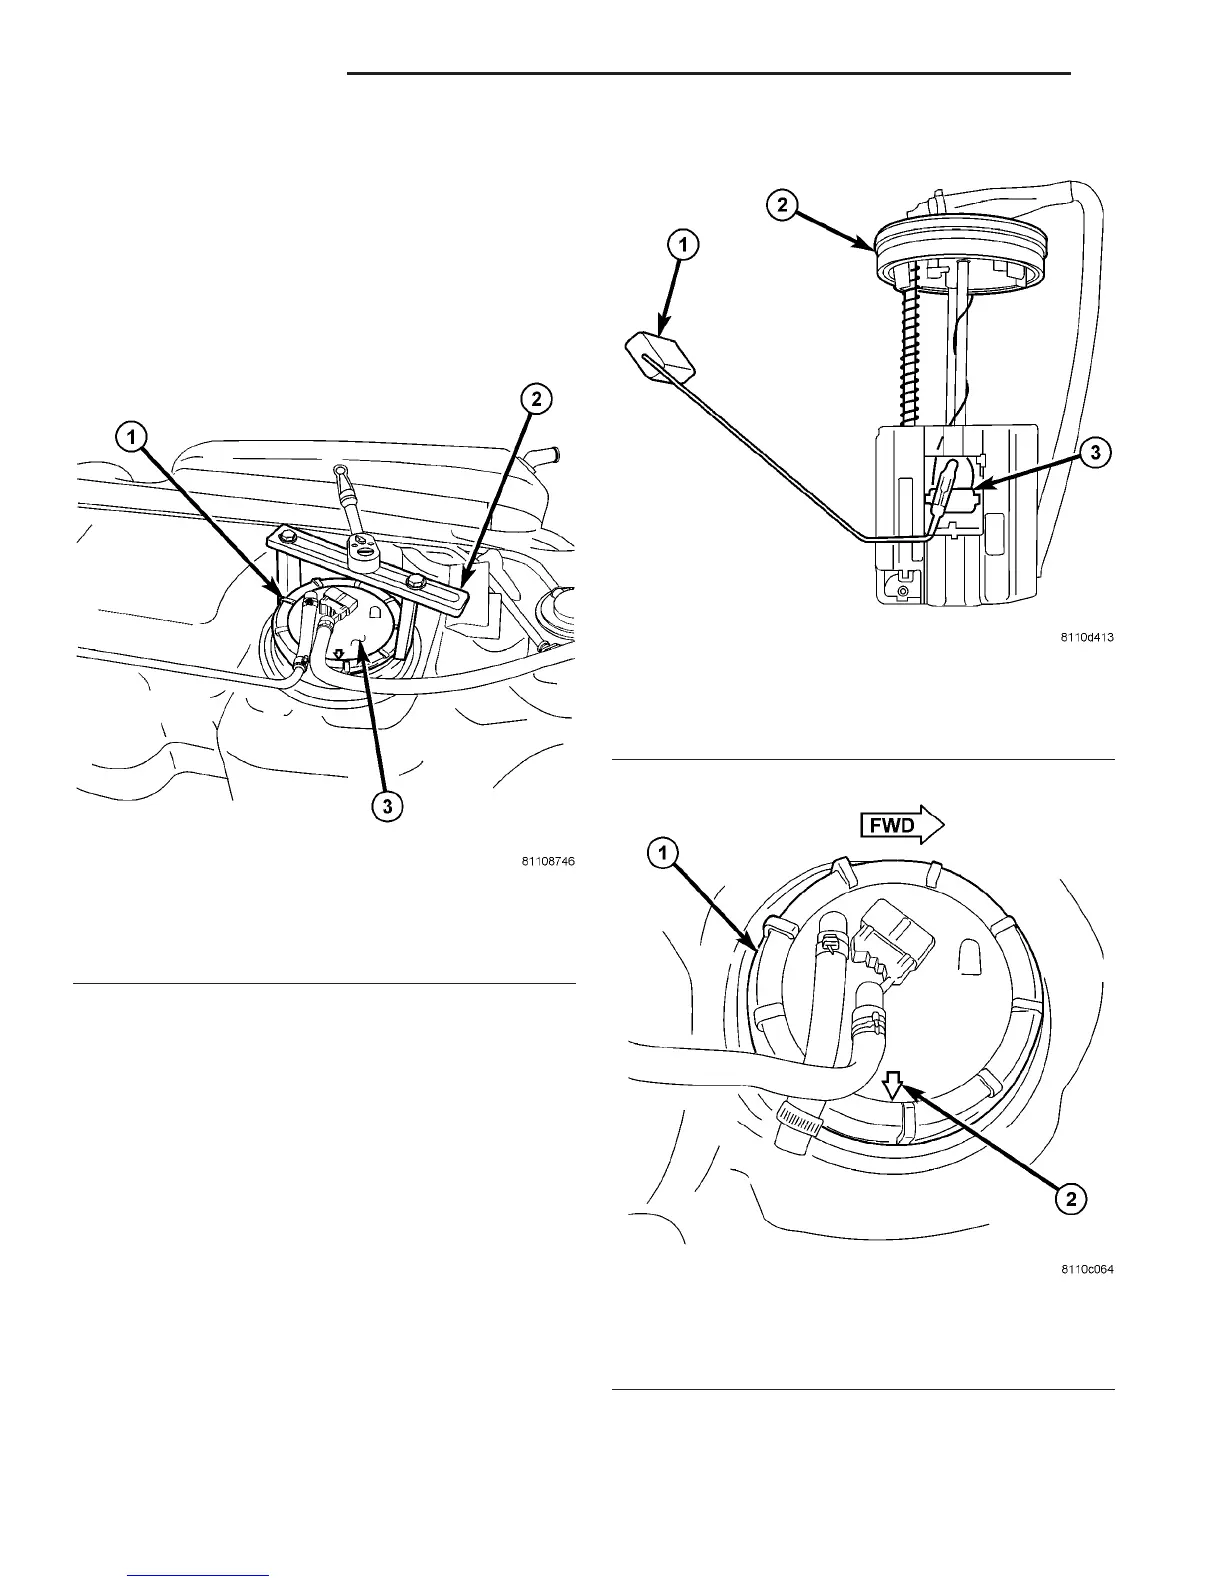
(4) The plastic fuel tank module locknut (lockring)
is threaded onto fuel tank. Install Special Tool #6856
to locknut and remove locknut (Fig. 10). The fuel
tank module will spring up slightly after locknut is
removed.
(5) Remove module from fuel tank. Be careful not
to bend float support rod while removing.
(6) Remove and discard rubber gasket (seal) (Fig.
11) from tank module.
INSTALLATION
CAUTION: Whenever the fuel tank module is ser-
viced, the rubber gasket (Fig. 11) must be replaced.
(1) Thoroughly clean locknut (lockring) and lock-
nut threads at top of tank.
(2) Using new gasket, carefully position fuel tank
module into opening in fuel tank.
(3) Position locknut over top of fuel tank module.
Install locknut finger tight.
(4) Both fuel line fittings should be pointed to the
right side of the vehicle. Rotate and position align-
ment arrow (Fig. 12) towards right side of vehicle (if
necessary) before tightening locknut. This step
must be performed to prevent the module’s
float from contacting the side of fuel tank.
(5) Tighten locknut using Special Tool #6856. Refer
to Torque Specifications.
(6) Install fuel tank. Refer to Fuel Tank Removal/
Installation.
Fig. 10 FUEL TANK MODULE R/I
1 - LOCKNUT (LOCKRING)
2 - SPECIAL TOOL #6856
3 - TOP OF TANK MODULE
Fig. 11 FUEL GAUGE SENDING UNIT
1 - FLOAT AND FLOAT ARM
2 - RUBBER GASKET (SEAL)
3 - FUEL GAUGE SENDING UNIT
Fig. 12 ALIGN TANK MODULE
1 - LOCKNUT
2 - ALIGNMENT ARROW (POSITION TOWARDS RIGHT SIDE OF
VEHICLE)
14 - 14 FUEL DELIVERY VA
FUEL TANK MODULE (Continued)

 Loading...


