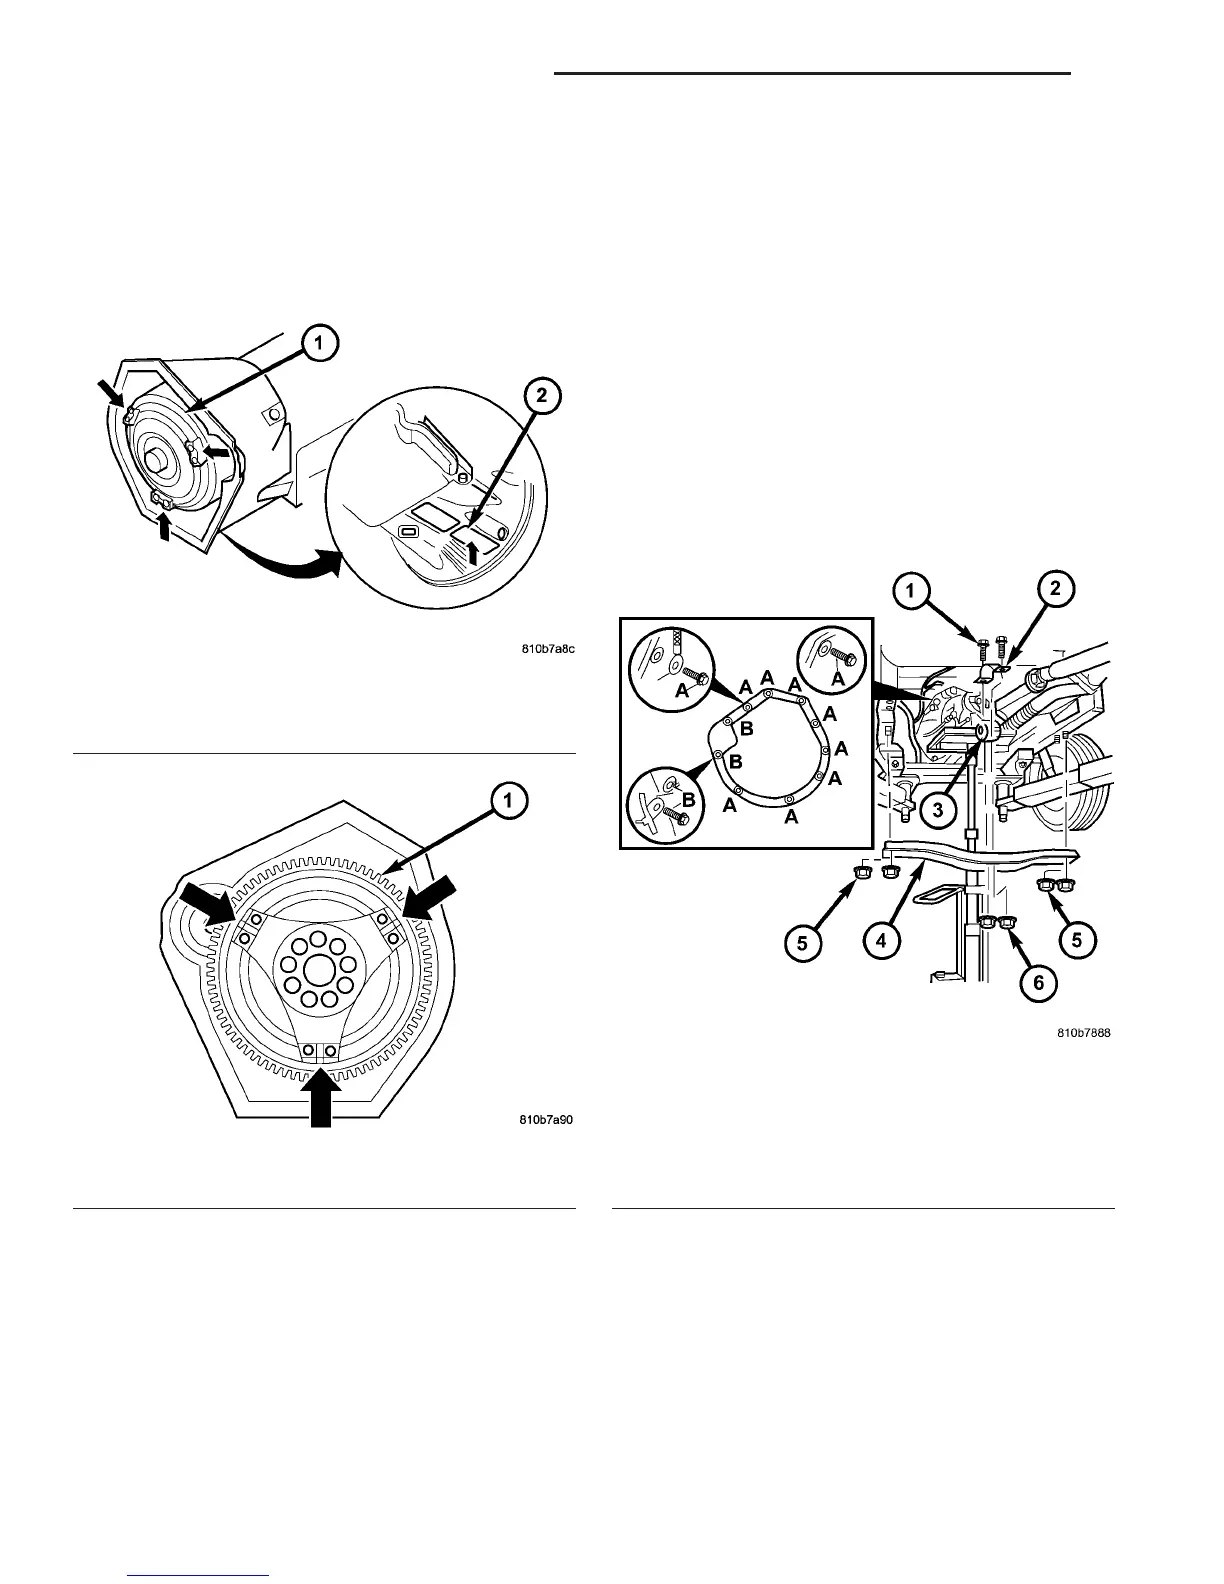
(3) Move the torque converter (1) (Fig. 59) to
shown position. Check position of torque converter
through housing opening (2) when installing trans-
mission.
(4) Move driving plate (1) (Fig. 60) to shown posi-
tion.
(5) Ensure the dowel pins are installed in their
correct position at the transmission housing flange.
(6) Place transmission onto a hydraulic transmis-
sion jack and raise the transmission into position.
Secure transmission on hydraulic jack with a strap
or ask an assistant to hold it.
(7) Move the transmission into position on the
dowel pins and install two bolts (A, B) (Fig. 61) on
the top of the transmission. Torque the bolts to 38
N·m (28 ft.lbs.).
(8) Install the bolt to hose the vent hose bracket to
the transmission. Torque the bolt to 38 N·m (28
ft.lbs.).
(9) Install the bolt to hold the ground strap to the
transmission. Torque the bolt to 38 N·m (28 ft.lbs.).
(10) Install bolts (A) (Fig. 61) on underside of
transmission. Torque the bolts to 38 N·m (28 ft.lbs.).
(11) Install rear engine cross member (4) (Fig. 61).
First install the nuts (5) at the outside ends of the
engine crossmember. Then install the bolts (1) of the
transmission mount. Torque the bolts and nuts to 45
N·m (33 ft.lbs.).
(12) Remove the wooden block supporting the
engine and remove the hydraulic jack.
(13) Install the torque converter bolts.
(a) Install the first pair bolts (2) (Fig. 62) at cir-
cumference of driving plate snug only.
Fig. 59 Position Torque Converter as Shown
1 - TORQUE CONVERTER
2 - INSPECTION OPENING
Fig. 60 Position Driveplate as Shown
1 - DRIVEPLATE
Fig. 61 Support Transmission and Install Bolts
1 - BOLT, TRANSMISSION MOUNT
2 - UPPER SHELL FOR TRANSMISSION MOUNT
3 - TRANSMISSION MOUNT
4 - CROSSMEMBER
5 - NUT, ENGINE CROSSMEMBER
6 - NUT, TRANSMISSION SUPPORT
21 - 42 AUTOMATIC TRANSMISSION - NAG1 VA
AUTOMATIC TRANSMISSION - NAG1 (Continued)

 Loading...


