REMOVAL
(1) Move selector lever to position 9P9.
(2) Raise vehicle.
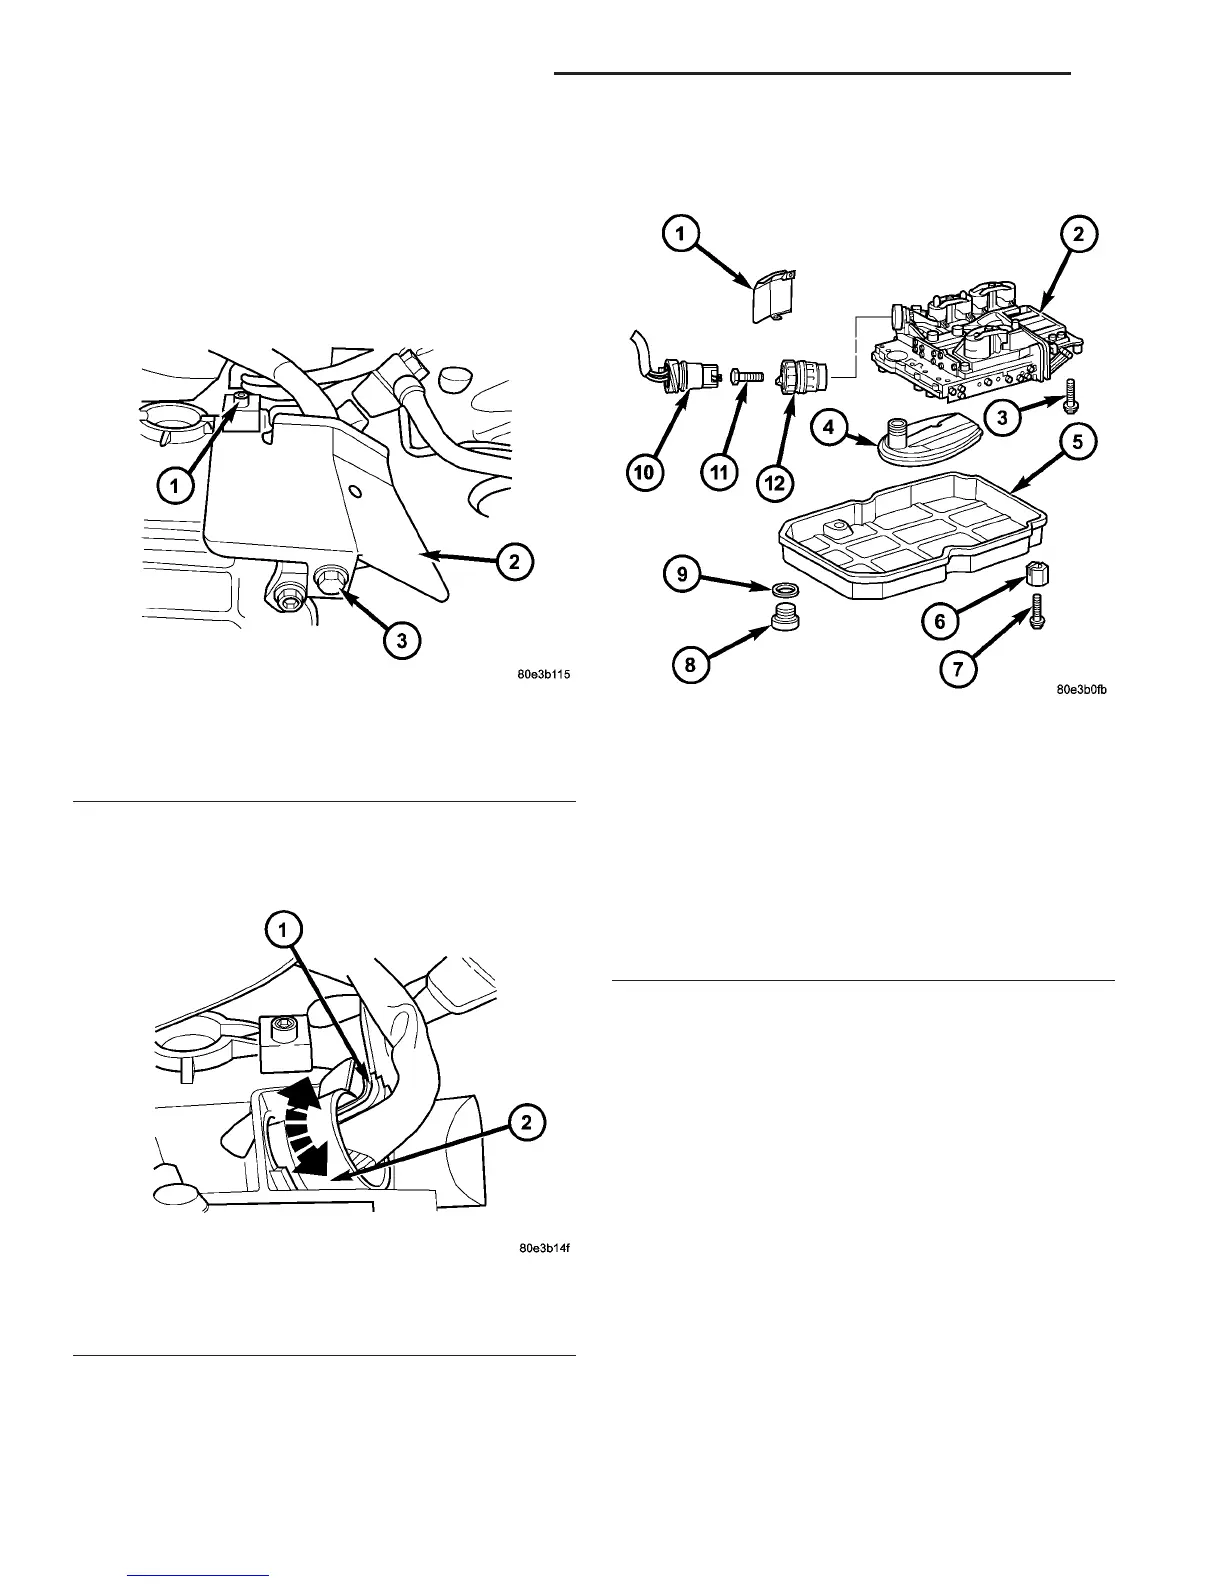
(3) Remove bolt (3) (Fig. 110) and screw (1) holding
the heat shield (2) to the transmission.
(4) Loosen guide bushing (2) (Fig. 110) and remove
from transmission housing.
(5) Disconnect 13-pin plug connector (1) (Fig. 111).
Turn bayonet lock of guide bushing (2) anti-clock-
wise.
(6) Drain transmission oil by unscrewing oil drain
plug (8) (Fig. 112).
NOTE: If the transmission fluid is burnt or contains
abraded particles, the oil cooler lines and oil cooler
must be flushed out.
(7) Detach oil pan (5).
(8) Remove oil filter (4).
(9) Unscrew Torx socket bolts (3) and remove elec-
trohydraulic control module (2).
DISASSEMBLY
(1) Remove electrohydraulic unit from the vehicle.
(2) Remove solenoid caps (1, 2) (Fig. 113).
(3) Unscrew Torx socket bolts (3, 4) (Fig. 113).
NOTE: Pay attention to the different lengths of the
Torx socket bolts.
(4) Remove leaf springs (5).
(5) Withdraw solenoid valves (6 - 11) from shift
plate (13).
Fig. 110 Remove Heat Shield
1 - SCREW
2 - HEAT SHIELD
3 - BOLT
Fig. 111 Remove Wiring Connector Plug
1 - PLUG CONNECTOR
2 - GUIDE BUSHING
Fig. 112 Remove Electrohydraulic Unit
1 - HEAT SHIELD
2 - ELECTROHYDRAULIC UNIT
3 - BOLT
4 - OIL FILTER
5 - OIL PAN
6 - CLAMPING ELEMENT
7 - BOLT
8 - DRAIN PLUG
9 - DRAIN PLUG GASKET
10 - 13-PIN PLUG CONNECTOR
11 - BOLT
12 - GUIDE BUSHING
21 - 92 AUTOMATIC TRANSMISSION - NAG1 VA
ELECTROHYDRAULIC UNIT (Continued)

 Loading...


