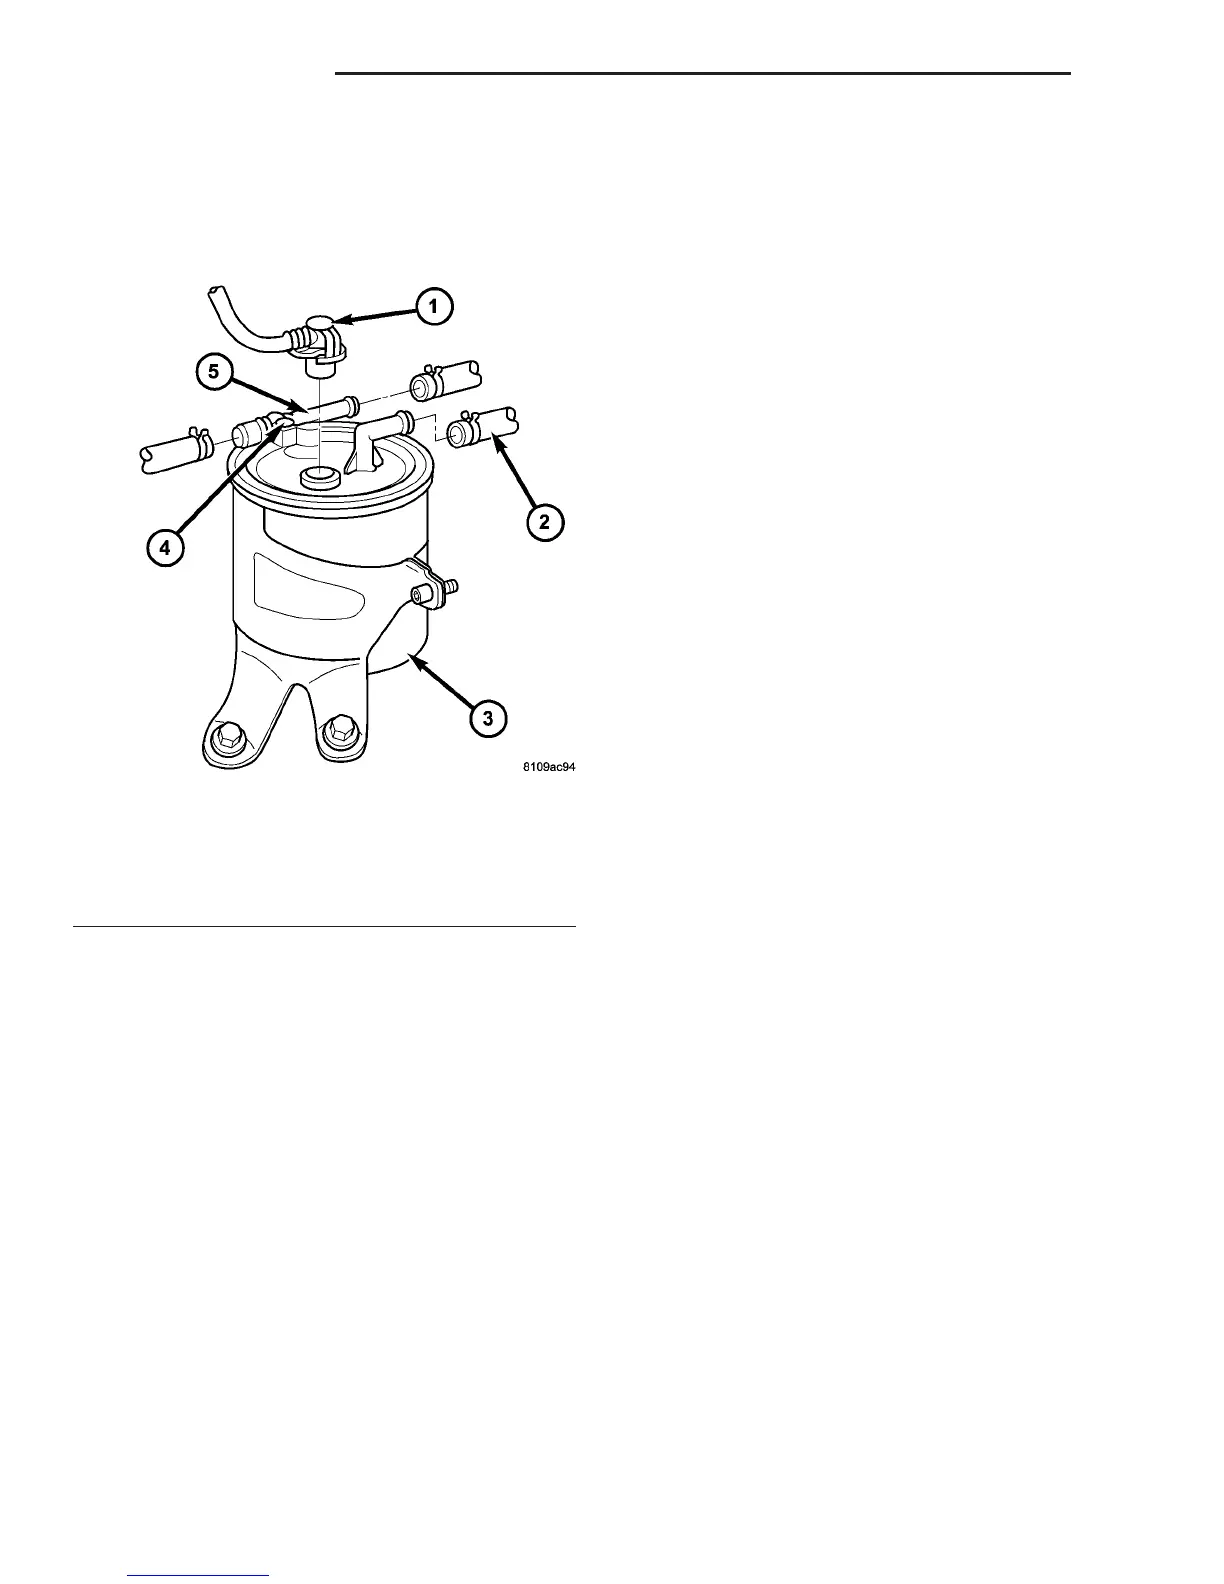
(4) Unscrew the mounting bolt on the preheating
valve, turn preheating valve out of locking arm and
pull off (Fig. 1).
(5) Remove fuel filter retaining bracket bolt and
remove fuel filter (Fig. 1).
INSTALLATION
WARNING: NO SPARKS, OPEN FLAMES OR SMOK-
ING. RISK OF POISONING FROM INHALING AND
SWALLOWING FUEL. RISK OF INJURY TO EYES
AND SKIN FROM CONTACT WITH FUEL. POUR
FUELS ONLY INTO SUITABLE AND APPROPRI-
ATELY MARKED CONTAINERS. WEAR PROTECTIVE
CLOTHING.
NOTE: Capture any fuel spillage and dispose of in
appropriately marked container.
(1) Fill new fuel filter with the new diesel fuel
(approximately 0.4 liters) (Fig. 1).
(2) Position fuel filter in bracket and tighten
retaining bolt to 53 lbs. in. (6 N·m) (Fig. 1).
(3) Seat preheating valve and tighten bolt to 13
lbs. in. (1.5 N·m) (Fig. 1).
(4) Install fuel lines and tighten clamps (Fig. 1).
(5) Properly seat fuel line plug connection and
properly set release arm (Refer to 14 - FUEL SYS-
TEM - STANDARD PROCEDURE)
(6) Connect negative battery cable.
(7) Start engine and inspect for leaks.
FUEL LINES
REMOVAL - HIGH PRESSURE LINES
WARNING: HIGH-PRESSURE FUEL LINES DELIVER
DIESEL FUEL UNDER EXTREME PRESSURE FROM
THE INJECTION PUMP TO THE FUEL INJECTORS.
THIS MAY BE AS HIGH AS 1600BAR (23,200 PSI).
USE EXTREME CAUTION WHEN INSPECTING FOR
HIGH-PRESSURE FUEL LEAKS. FUEL UNDER THIS
AMOUNT OF PRESSURE CAN PENETRATE SKIN
CAUSING PERSONAL INJURY OR DEATH. INSPECT
FOR HIGH-PRESSURE LEAKS WITH A SHEET OF
CARD BOARD. WEAR SAFETY GOGGLES AND
ADEQUATE PROTECTIVE CLOTHING WHEN SER-
VICING FUEL SYSTEM.
WARNING: NO SPARKS, OPEN FLAMES OR SMOK-
ING. RISK OF POISONING FROM INHALING AND
SWALLOWING FUEL. RISK OF INJURY TO EYES
AND SKIN FROM CONTACT WITH FUEL. POUR
FUELS ONLY INTO SUITABLE AND APPROPRI-
ATELY MARKED CONTAINERS. WEAR PROTECTIVE
CLOTHING.
(1) Disconnect negative battery cable.
CAUTION: Counterhold with wrench at threaded
connections of injectors. DO NOT EXCEED the
tightening torque in order to avoid also slackings
the threaded connection.
CAUTION: DO NOT crimp or bend lines.
NOTE: After removing injection lines, seal connec-
tions and ensure cleanliness.
(2) Unscrew union nuts of injection lines.
(3) Remove injection lines (Fig. 2).
Fig. 1 FUEL FILTER AND BRACKET
1 - FUEL LINE PLUG CONNECTION
2 - FUEL LINE INLET
3 - FUEL FILTER
4 - BOLT OF PREHEATING VALVE
5 - PREHEATING VALVE
14 - 6 FUEL DELIVERY VA
FUEL FILTER (Continued)

 Loading...


