STRUT
REMOVAL
(1) On the drivers side remove the floor covering
off to the side.
(2) On the passengers side take off the cover for
the tools.
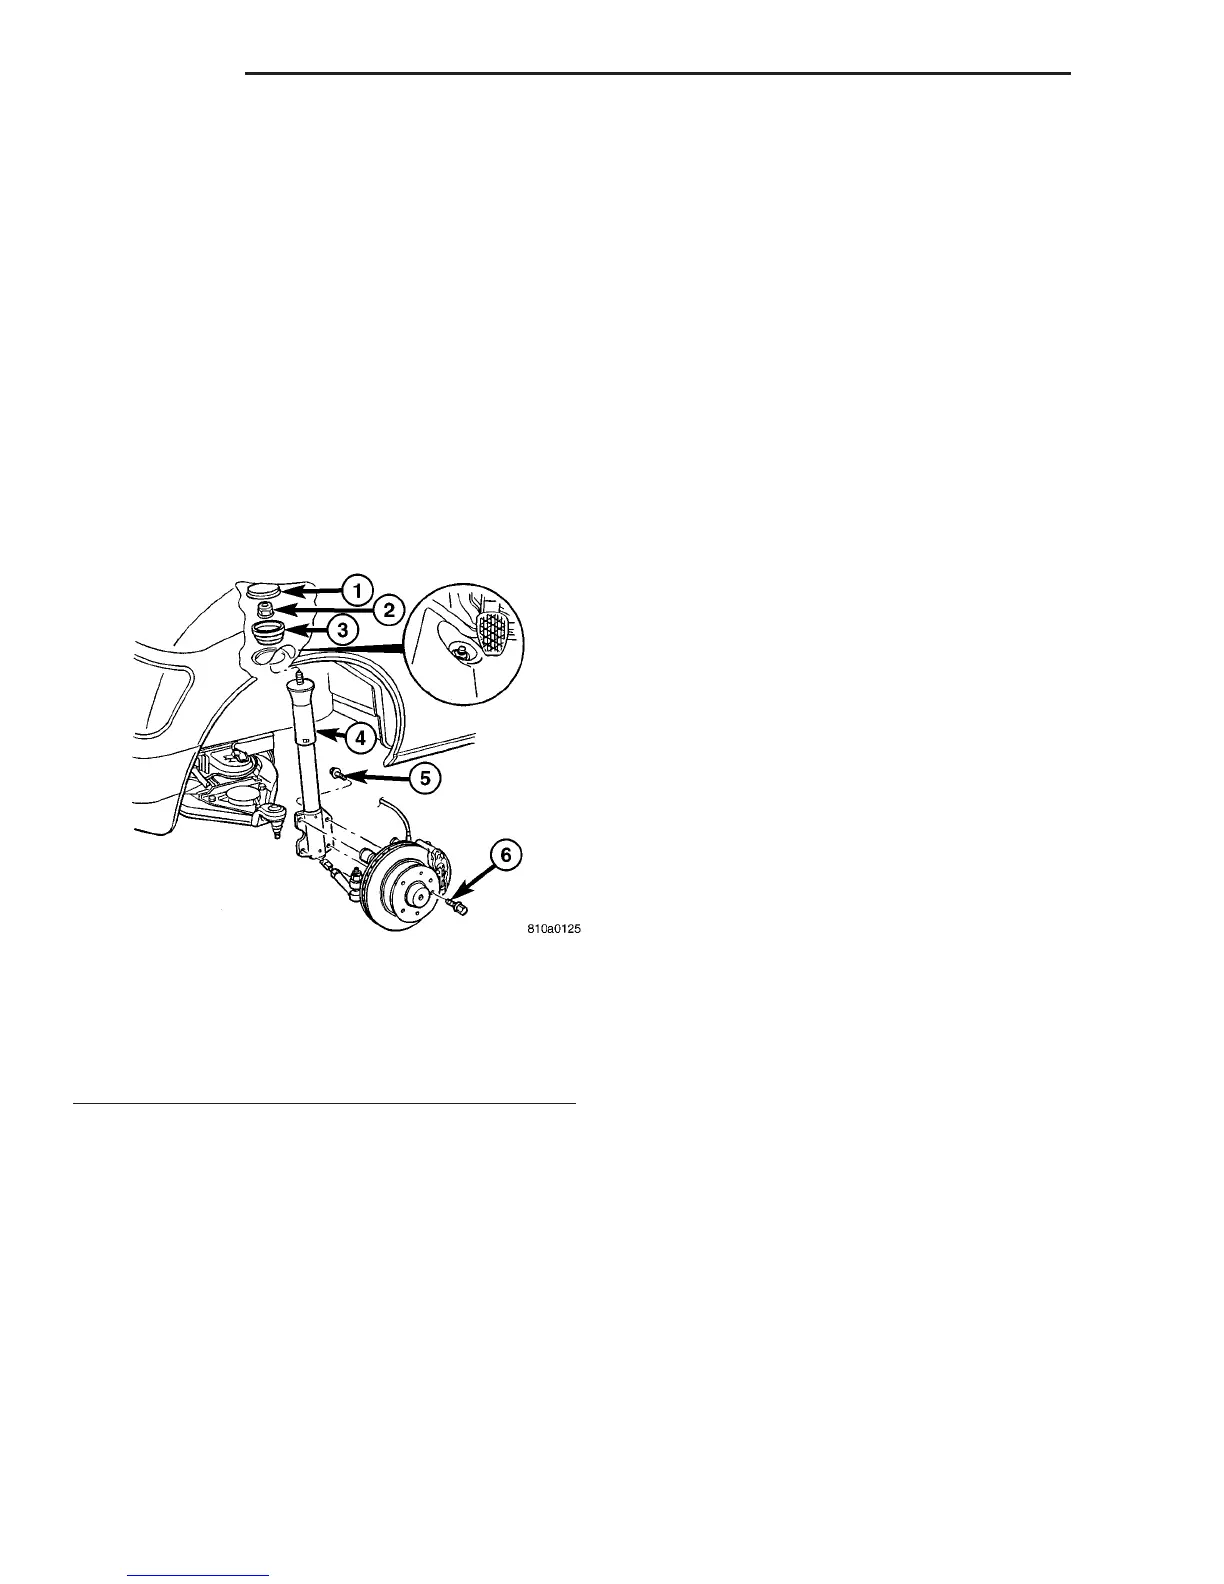
(3) Remove the cover for the upper strut mounting
(Fig. 12).
(4) Remove the nut on the upper strut mounting
(Fig. 12).
(5) Raise and support the vehicle.
(6) Remove the front wheels.
(7) Raise the lower control arm approximately 10
mm with a jack to remove the tension from the strut.
(8) Remove the strut from the steering knuckle
(Fig. 12).
INSTALLATION
NOTE: Hand tighten the strut upper mounting nut
until the vehicle is on the ground, otherwise the
bushings may become distorted.
(1) Install strut to the steering knuckle (Fig. 12).
Tighten to 185 N·m (136 ft. lbs.).
(2) Raise the lower control to install the upper
part of the strut into the footwell. Tighten to 100
N·m (74 ft. lbs.).
(3) Install wheels (Refer to 22 - TIRES/WHEELS/
WHEELS - INSTALLATION).
(4) Lower the vehicle.
(5) Install the nut covers (Fig. 12).
(6) Refit the floor covering and the tool cover.
Fig. 12 STRUT
1 - COVER
2 - NUT
3 - RUBBER MOUNT
4 - STRUT
5 - STRUT BOLT
6 - LOCKING BOLT
2 - 10 FRONT VA

 Loading...


