INSTALLATION
(1) Route the seat belt through the trim and
mount the trim panel.
(2) Seat the mounting clips fully.
(3) Position the door opening weatherstrip back
along the mounting flange.
(4) Install the seat belt and mounting bolt.
(5) Tighten the bolt to 35 N·m (26 ft. lbs.).
BULKHEAD TRIM PANEL
REMOVAL
(1) Remove the rivets and remove the lower panel.
(Fig. 7)
(2) Remove the rivets and remove the upper panel.
INSTALLATION
(1) Install the upper panel and replace rivets.
(2) Install the lower panel and replace rivets.
CARPETS AND FLOOR MATS
REMOVAL
Cargo/Passenger Van - Front
(1) Remove the stepwell scuff pads. (Refer to 23 -
BODY/INTERIOR/STEPWELL SCUFF PADS -
REMOVAL)
(2) Remove the three bolts and tray behind drivers
seat.
(3) Remove cup holder. (Refer to 23 - BODY/IN-
STRUMENT PANEL/CUP HOLDER - REMOVAL)
(4) Remove the jack storage cover.
(5) Remove carpet/mat.
Passenger Van - Rear
(1) Remove seats. (Refer to 23 - BODY/SEATS/
SEAT - REAR - REMOVAL)
(2) Remove the screws and retaining strips.
(3) Remove the seat striker assemblies.
(4) Remove carpet/mat.
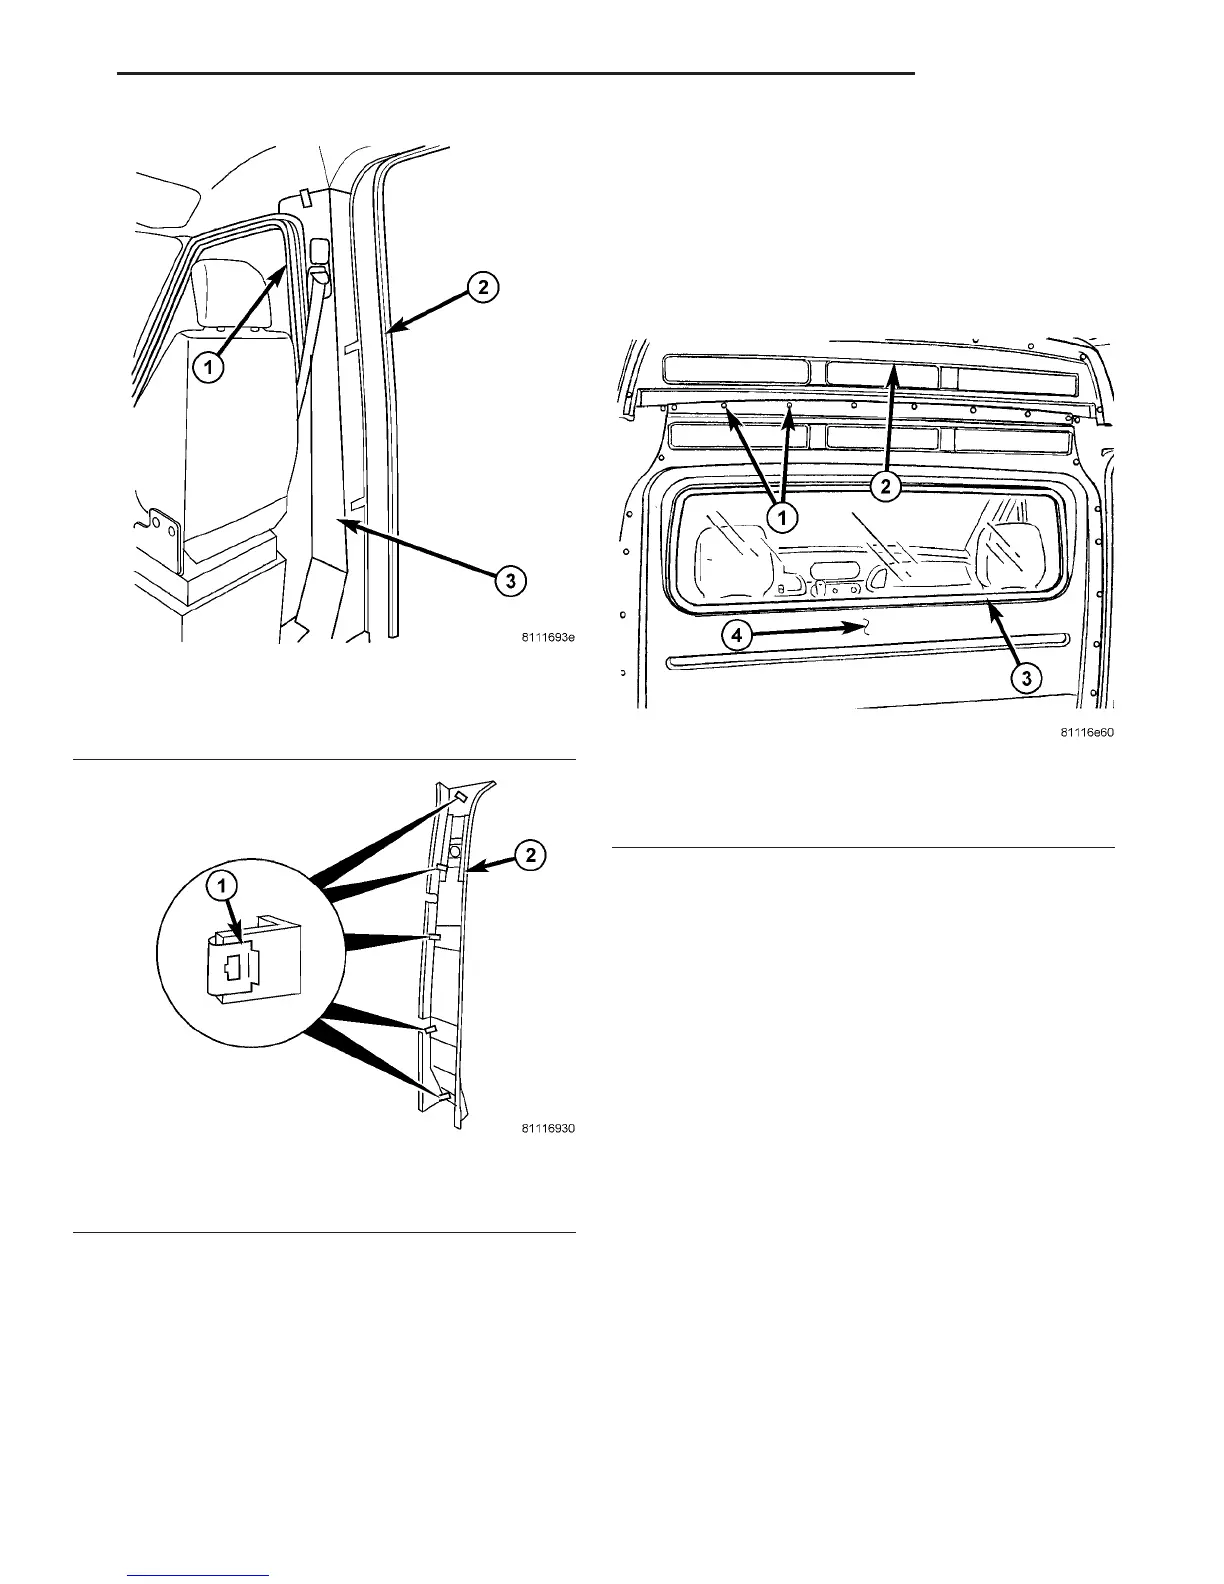
Fig. 5 B-PILLAR TRIM
1 - FRONT DOOR WEATHERSTRIP
2 - B-PILLAR
3 - B-PILLAR TRIM
Fig. 6 B-PILLAR TRIM MOUNTING CLIPS
1 - RETAINING CLIPS (5)
2 - B-PILLAR TRIM
Fig. 7 BULKHEAD TRIM PANEL
1 - RIVETS
2 - UPPER PANEL
3 - PANEL GLASS
4 - LOWER PANEL
VA INTERIOR 23 - 69
B-PILLAR TRIM (Continued)

 Loading...


