(4) Pull the socket plate away from the inner rear
pillar far enough to access the turn signal lamp bulb
(Fig. 42).
(5) Remove the turn signal lamp bulb from the tail
lamp socket plate.
INSTALLATION
(1) Install the turn signal lamp bulb into the tail
lamp socket plate (Fig. 42).
(2) Align the socket plate with the mounting hole
in the inner rear pillar.
(3) Using hand pressure, push the socket plate
gently and evenly into the inner rear pillar mounting
hole until both latch tabs are fully engaged (Fig. 41).
(4) If the vehicle is so equipped, reinstall the trim
onto the inside of the right or left rear corner pillar.
(5) Reconnect the battery negative cable.
REPEATER LAMP BULB
REMOVAL
(1) Disconnect and isolate the battery negative
cable.
(2) Remove the repeater lamp unit from its mount-
ing location, but do not disconnect it from the vehicle
wire harness. (Refer to 8 - ELECTRICAL/LAMPS/
LIGHTING - EXTERIOR/REPEATER LAMP -
REMOVAL).
(3) Pull the repeater lamp away from the vehicle
far enough to access the bulb holder on the back of
the lamp housing (Fig. 43).
(4) Grasp the lamp housing firmly in one hand,
then pull the repeater lamp bulb holder straight out
of the lamp housing.
(5) Remove the repeater lamp bulb from the bulb
holder.
INSTALLATION
(1) Install the repeater lamp bulb into the bulb
holder.
(2) Grasp the lamp housing firmly in one hand,
then push the repeater lamp bulb holder straight
into the lamp housing (Fig. 43).
(3) Reinstall the repeater lamp unit into its
mounting location. (Refer to 8 - ELECTRICAL/
LAMPS/LIGHTING - EXTERIOR/REPEATER LAMP
- INSTALLATION).
(4) Reconnect the battery negative cable.
REPEATER LAMP UNIT
REMOVAL
(1) Disconnect and isolate the battery negative
cable.
(2) Using hand pressure, press the rear edge of the
repeater lamp housing toward the front of the vehicle
against the spring pressure of the retaining clip, then
pull the rear edge of the lamp outward to disengage
it from the mounting hole (Fig. 44).
(3) Pull the repeater lamp housing slightly to the
rear to disengage the front edge of the unit from the
mounting hole.
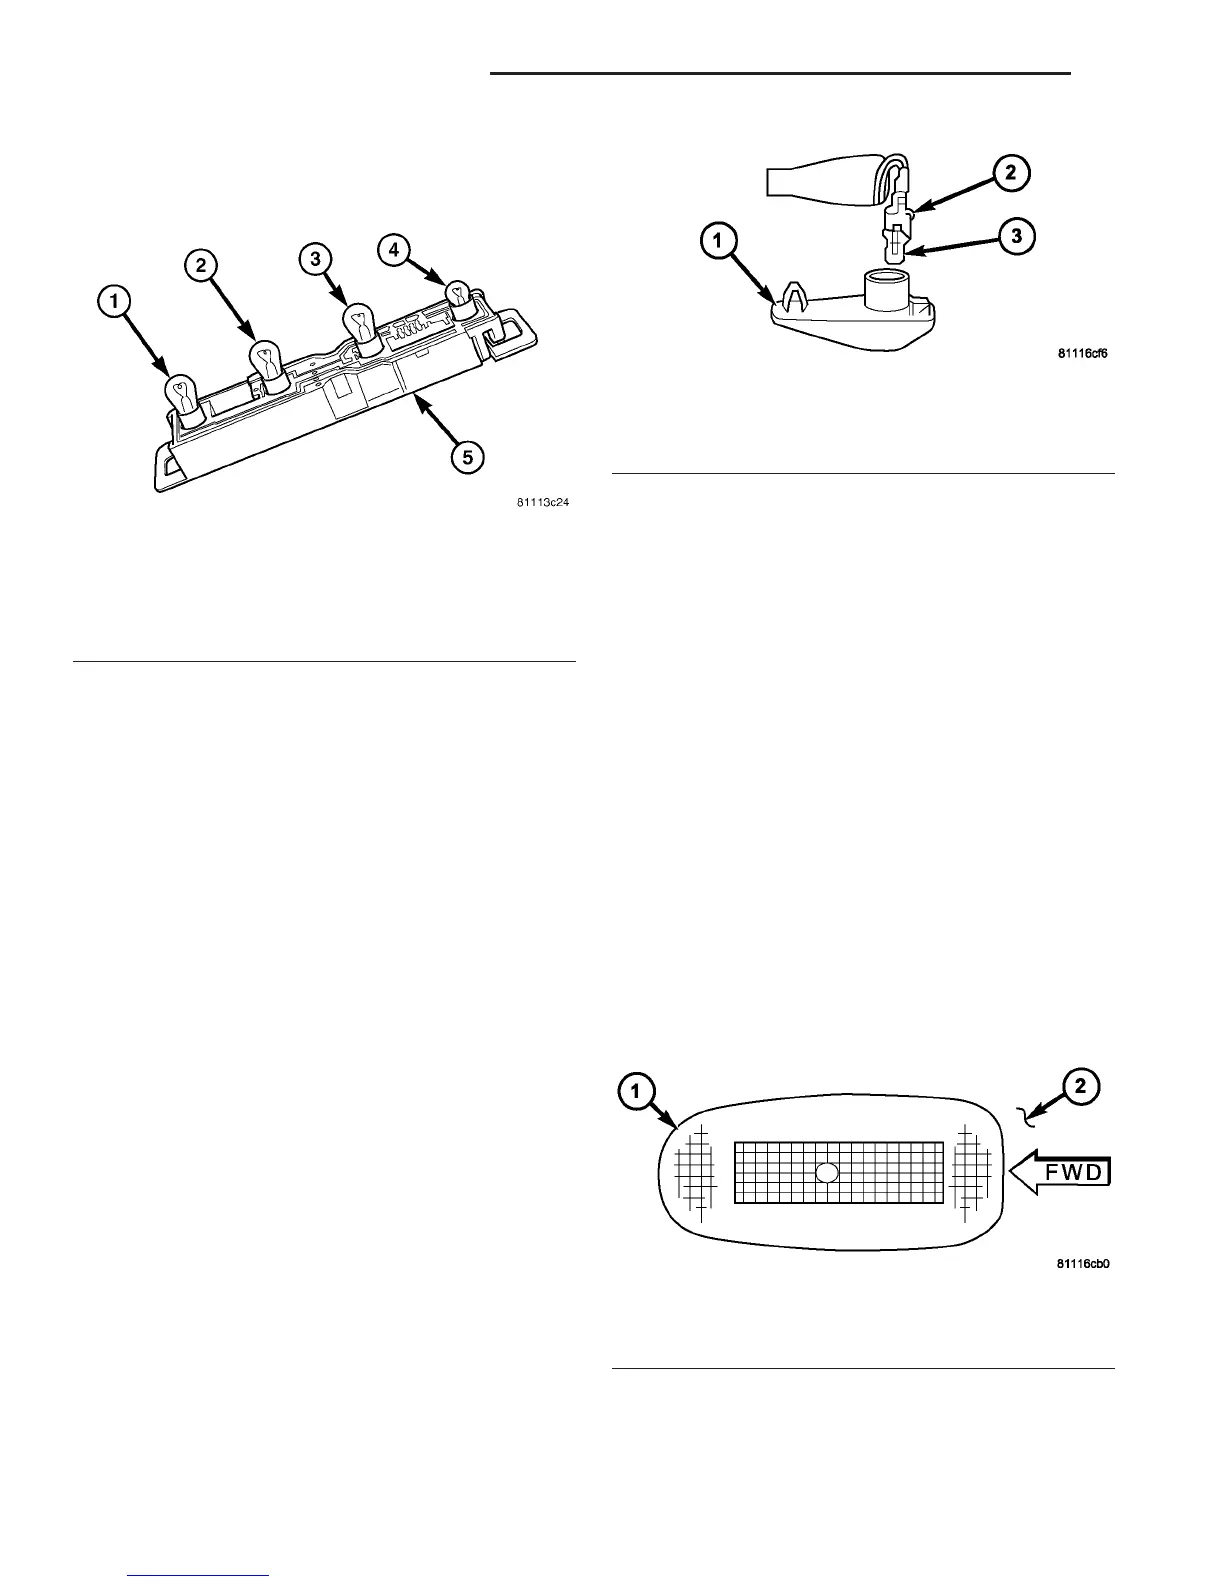
Fig. 42 Tail Lamp Bulb Remove/Install
1 - BRAKE/PARK LAMP BULB
2 - BACKUP LAMP BULB
3 - TURN SIGNAL LAMP BULB
4 - SIDE MARKER LAMP BULB
5 - TAIL LAMP SOCKET PLATE
Fig. 43 Repeater Lamp Bulb Remove/Install
1 - LAMP HOUSING
2 - BULB HOLDER
3 - BULB
Fig. 44 Repeater Lamp Unit Remove/Install
1 - LAMP HOUSING
2 - FENDER PANEL
8L - 22 LAMPS/LIGHTING - EXTERIOR VA
REAR TURN LAMP BULB (Continued)

 Loading...


