NOTE: Install flush to a max. 3 mm (0.12 in.) deep
inside the bearing cover.
(3) Check roller bearing, replace according to con-
dition.
NOTE: Thoroughly grease roller bearings prior to
installation.
(4) Install bearing cover with axle shaft seal, new
gasket and dust shield on the axle shaft.
(5) Install tapered roller bearings and race on the
axle shaft (Fig. 14).
(6) Install new locking ring on axle shaft.
NOTE: The flat side of the locking ring must point
towards the nut (Fig. 15). The locking ring is fitted
to ensure that the pressing is done over the inner
bearing race only. The flat on the locking ring must
be aligned with the flat on the axle shaft otherwise
the axle shaft will be damaged.
(7) Place axle shaft through the hole in Plate 9277
and position the assembly in a press (Fig. 16).
(8) Press tapered roller bearing onto rear axle
shaft as far as the stop.
CAUTION: In order to avoid damaging the bearing,
the outer race must be turned while pressing on.
(9) Screw on bearing nut and tighten nut with
Wrench 9279 to 500 N·m (369 ft. lbs.).
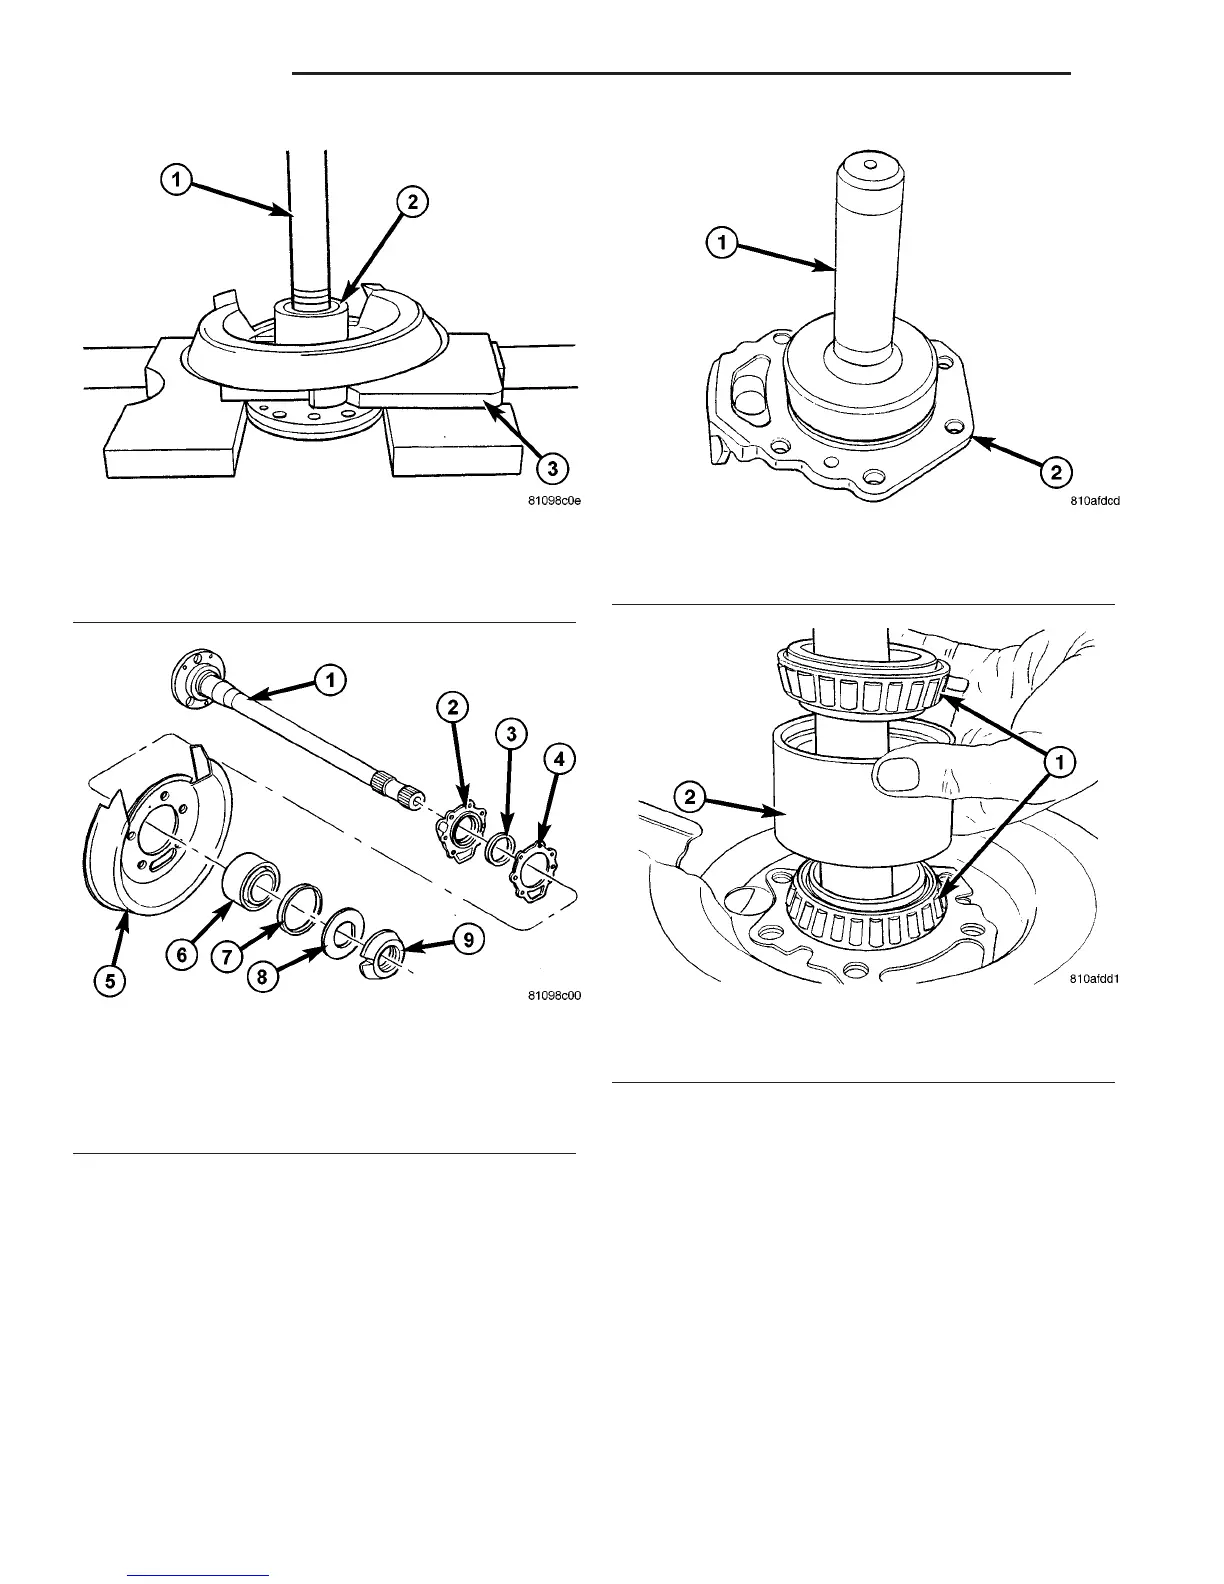
Fig. 11 PRESSING BEARING
1 - AXLE SHAFT
2 - BEARING
3 - PLATE
Fig. 12 AXLE SHAFT ASSEMBLY
1 - AXLE SHAFT 6 - BEARING
2 - BEARING COVER 7 - SEALING RING
3 - RADIAL SHAFT SEAL 8 - LOCKING RING
4 - GASKET 9 - BEARING NUT
5 - DUST SHIELD
Fig. 13 SEAL INSTALLER
1 - INSTALLER
2 - BEARING COVER
Fig. 14 BEARINGS AND RACE
1 - BEARINGS
2 - RACE
3 - 18 REAR AXLE VA
AXLE BEARINGS/SEALS (Continued)

 Loading...


